Automated Web Deployment and Python Webhook Creation: Simplifying Your Development Workflow


Introduction:
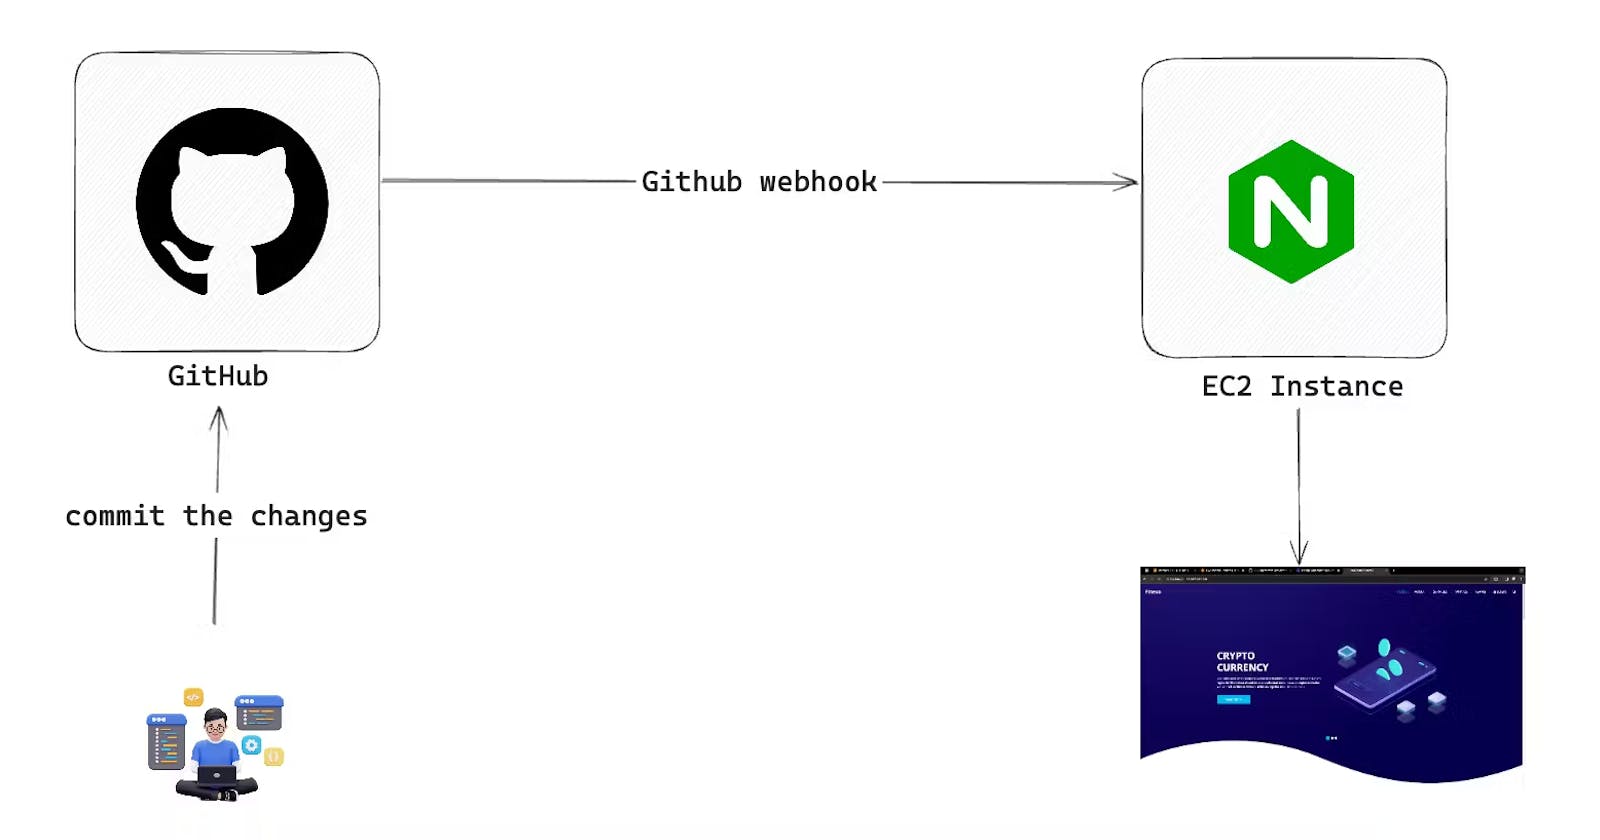
Welcome to our latest blog, where we embark on a journey to simplify and streamline the deployment of a simple static website. In this guide, we'll be utilizing powerful tools like Nginx, Docker, and Shell Scripting to automate the entire process – from checking out code from a Git repository to deploying it within a Docker container.
But we don't stop there. To add an extra layer of efficiency, we'll delve into the world of webhooks. By harnessing the capabilities of the Python Flask web framework, we'll create a webhook endpoint. This endpoint will act as a trigger, responding to events on your GitHub repository. When GitHub signals a new commit or update, our Flask webhook will execute the designated shell script, seamlessly updating and deploying your website within the Docker environment.
Prerequisites:
AWS Account
Ubuntu Instance on AWS
Let's Start:
Git Repositories: Fork the repo.
Step 1: Create an Ubuntu Instance
Go to AWS Search console -> Search of EC2 -> Go to dashboard -> Go to Launch Instance.
Select Ubuntu AMI and Instance type should be t2.micro, and also make sure that the inbound ports: SSH -> 22, HTTP -> 80 and Flask -> 5000 is opened.
Go to User data -> Copy and paste the below script inside the user data block.
#!/bin/bash
sudo apt update
yes | sudo apt install docker.io
yes | sudo apt-get install python3-pip
pip3 install flask
sudo usermod -aG docker ubuntu
newgrp docker
Step 2: Setup the Environment.
Go to running instances -> Select the instance -> Connect the Instance from your browser.
Run the following command to clone the code from the git repository.
First, Change the directory.
cd /home/ubuntugit clone https://github.com/soravkumarsharma/CICD-nginx-web-service.gitls
Run the following command to move the shell script and python code from the CICD-nginx-web-service directory.
mv CICD-nginx-web-service/deployment.sh .

mv CICD-nginx-web-service/webhook.py .

- Remove the CICD-nginx-web-service directory.
rm -rf CICD-nginx-web-service

- Run the following command to give the executable permission to the owner of the file.
sudo chmod u+x deployment.sh

- Run the following command to execute the shell script
./deployment.sh
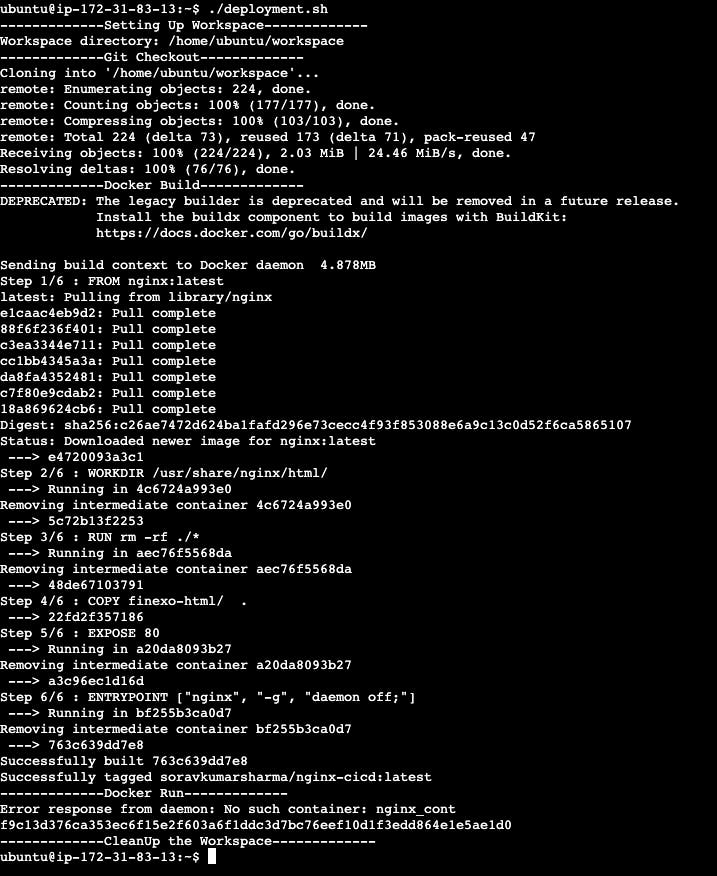
- Run the following command to check the container is up and running.
docker ps

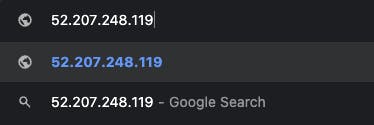
- Go to AWS -> Copy the Public IP of instance and paste the ip in the browser and access the static website. No need to specify the port.

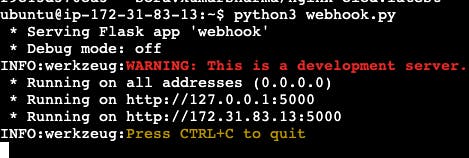
- Run the following command to run the python code, because we won't run the shell script manually if any change occur git repository code. so, to avoid this manual task run the python file.
python3 webhook.py
Next, Add the github webhook to trigger the endpoint and then this endpoint is responsible for the execution of shell script.
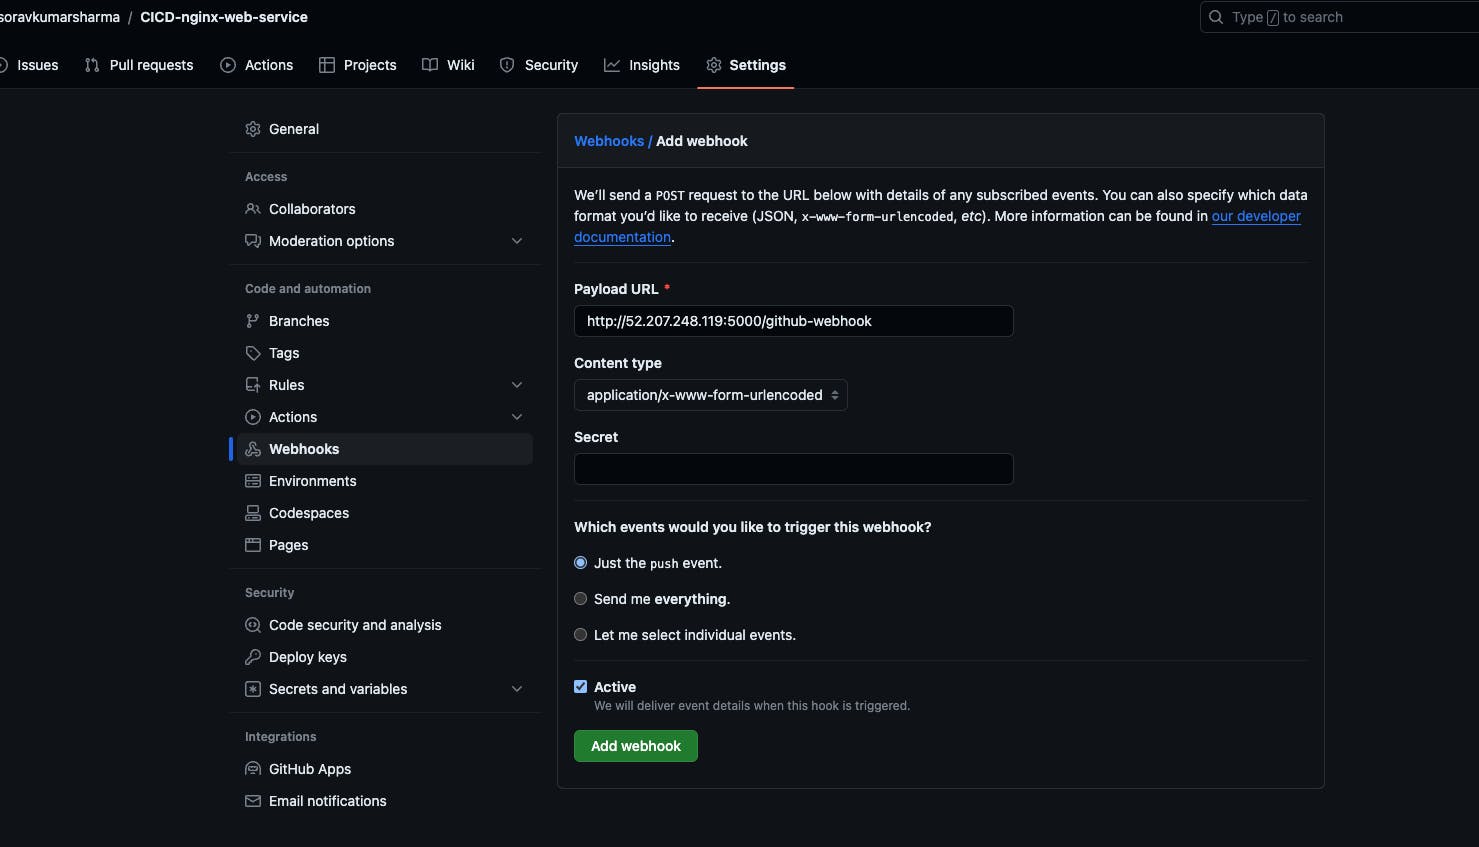
Go to GitHub Account -> Go to CICD-nginx-web-service Repository -> Go to settings -> Go to webhooks -> Add webhook
Add the PAYLOAD URL: public_ip:5000/github-webhook
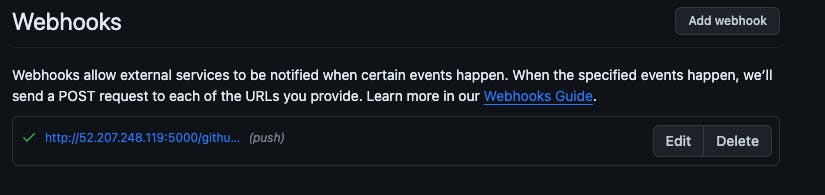
click the button Add webhook -> After clicking wait for few seconds if the green tick appear then the webhook payload url is successfully ping by github.
Step 3: Test the end to end automation.
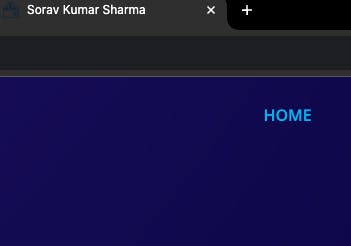
Go to git repository CICD-nginx-web-service -> Go to finexo-html directory -> Go to index.html -> Change the title.
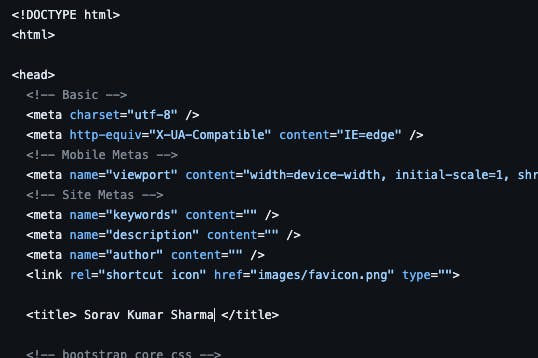
Wait for few seconds -> paste the public ip on the browser -> Check the title of the website.

Destruction time:
- Go to AWS management console -> Go to running EC2 instances -> Terminate the instance.