Building Scalable Solutions: A Deep Dive into AWS Three-Tier Web Architecture
As a passionate DevOps Engineer, I'm dedicated to mastering the tools and practices that bridge the gap between development and operations. Currently pursuing my bachelor’s in Computer Science and Engineering at Guru Nanak Dev University (Amritsar), I'm honing my skills in automation, continuous integration/continuous deployment (CI/CD), and cloud technologies. Eager to contribute to efficient software delivery and infrastructure management. Open to learning and collaborating with like-minded professionals. Let's connect and explore opportunities in the dynamic world of DevOps.

Introduction:
In this blog, We are going to create a three tier architecture on AWS using terrafrom script and then deploy a sample three tier application on that architecture. In this architecture, a public-facing Application Load Balancer forwards client traffic to our web tier EC2 instances. The web tier is running Nginx webservers that are configured to serve a React.js website and redirects our API calls to the application tier’s internal facing load balancer. The internal facing load balancer then forwards that traffic to the application tier, which is written in Node.js. The application tier manipulates data in an Aurora MySQL multi-AZ database and returns it to our web tier. Load balancing, health checks and autoscaling groups are created at each layer to maintain the availability of this architecture.
Prerequisites:
AWS Account
IAM Role
Ubuntu Instance
Let's Start:
Git Repositories:
Step 1: Create an IAM Role for Terraform.
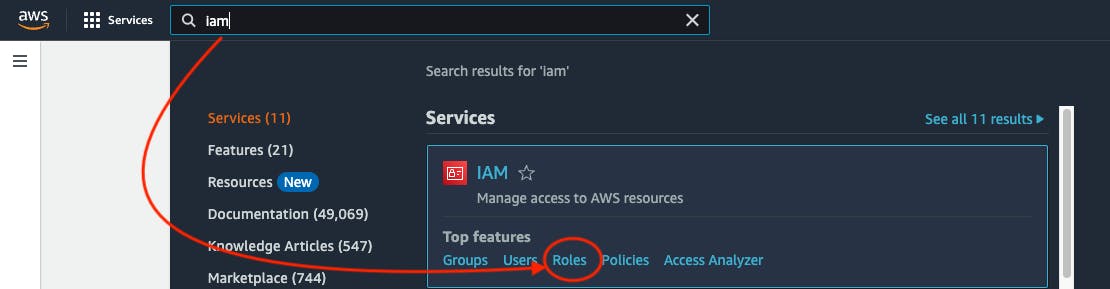
- Go to the AWS Search console, search IAM Role, and select that role.
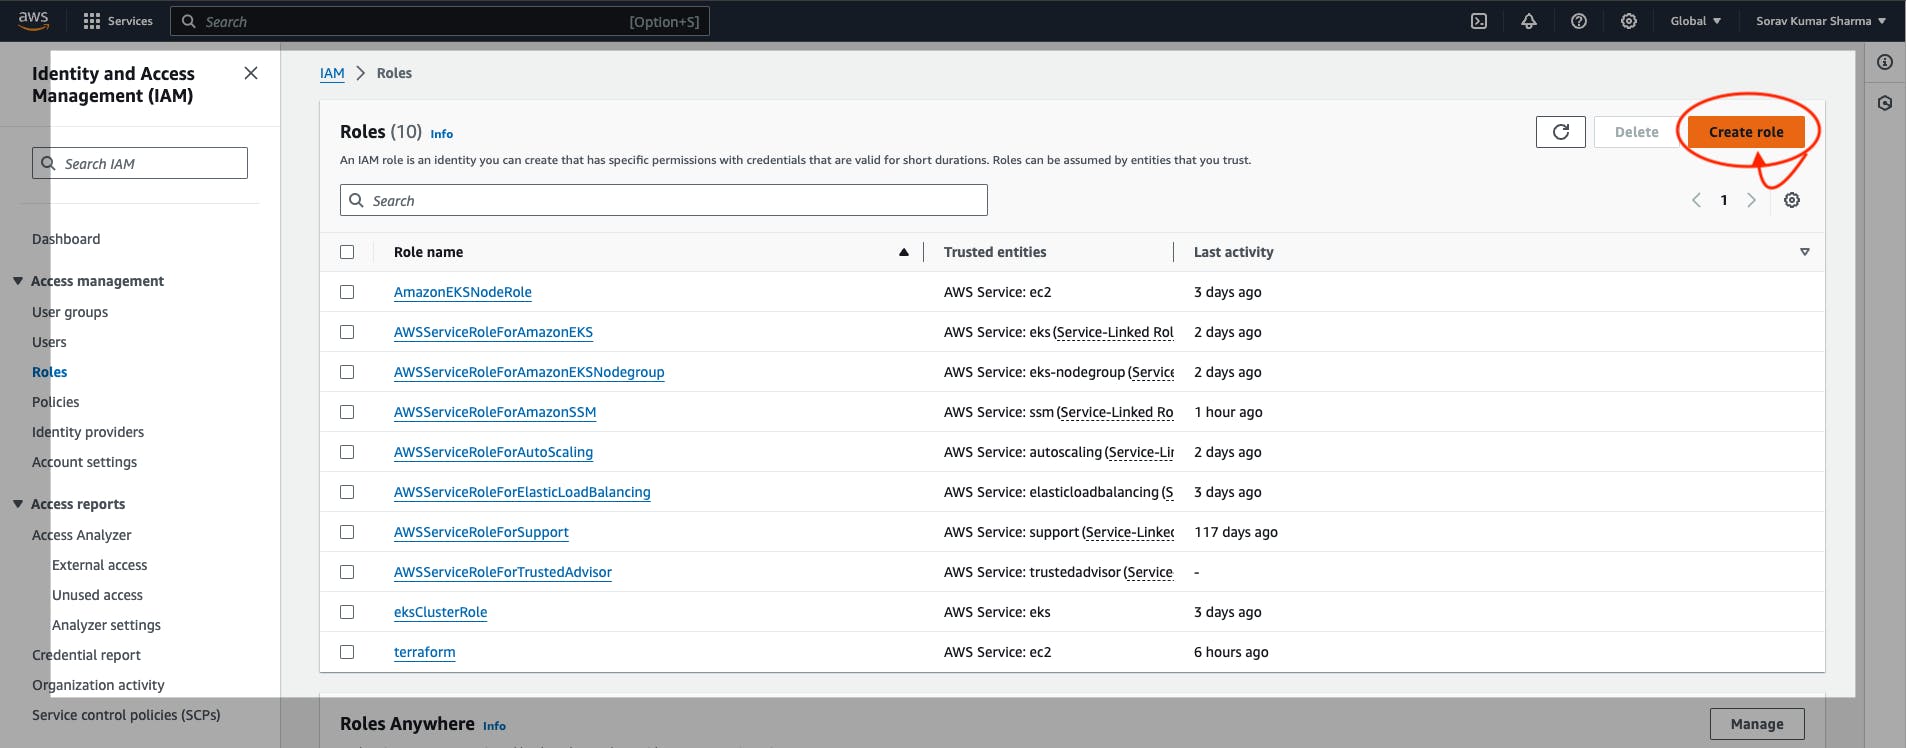
- Click on Create Role.
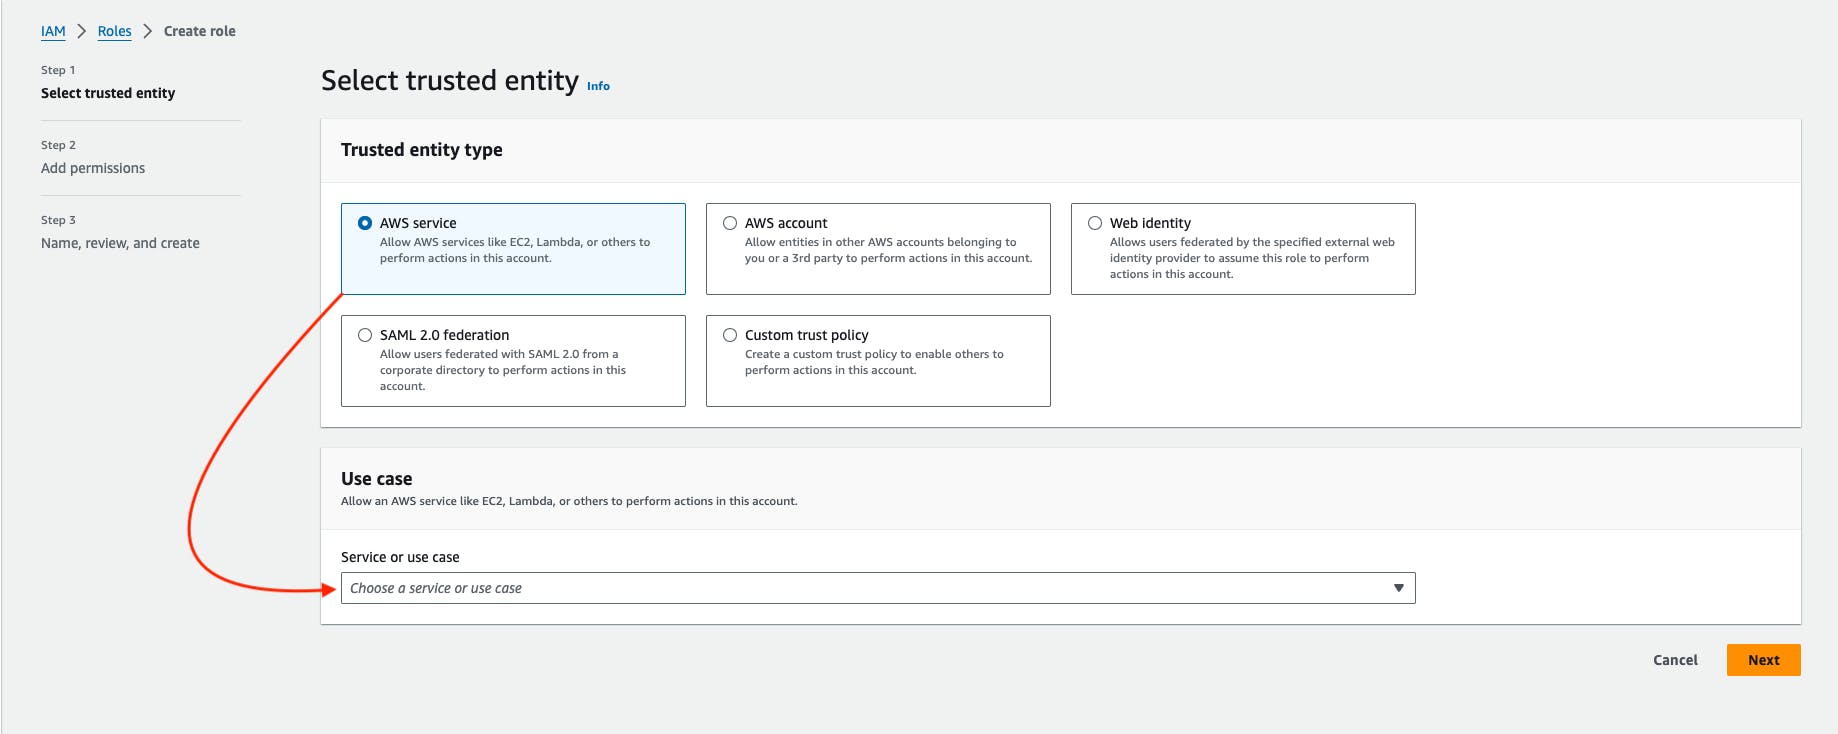
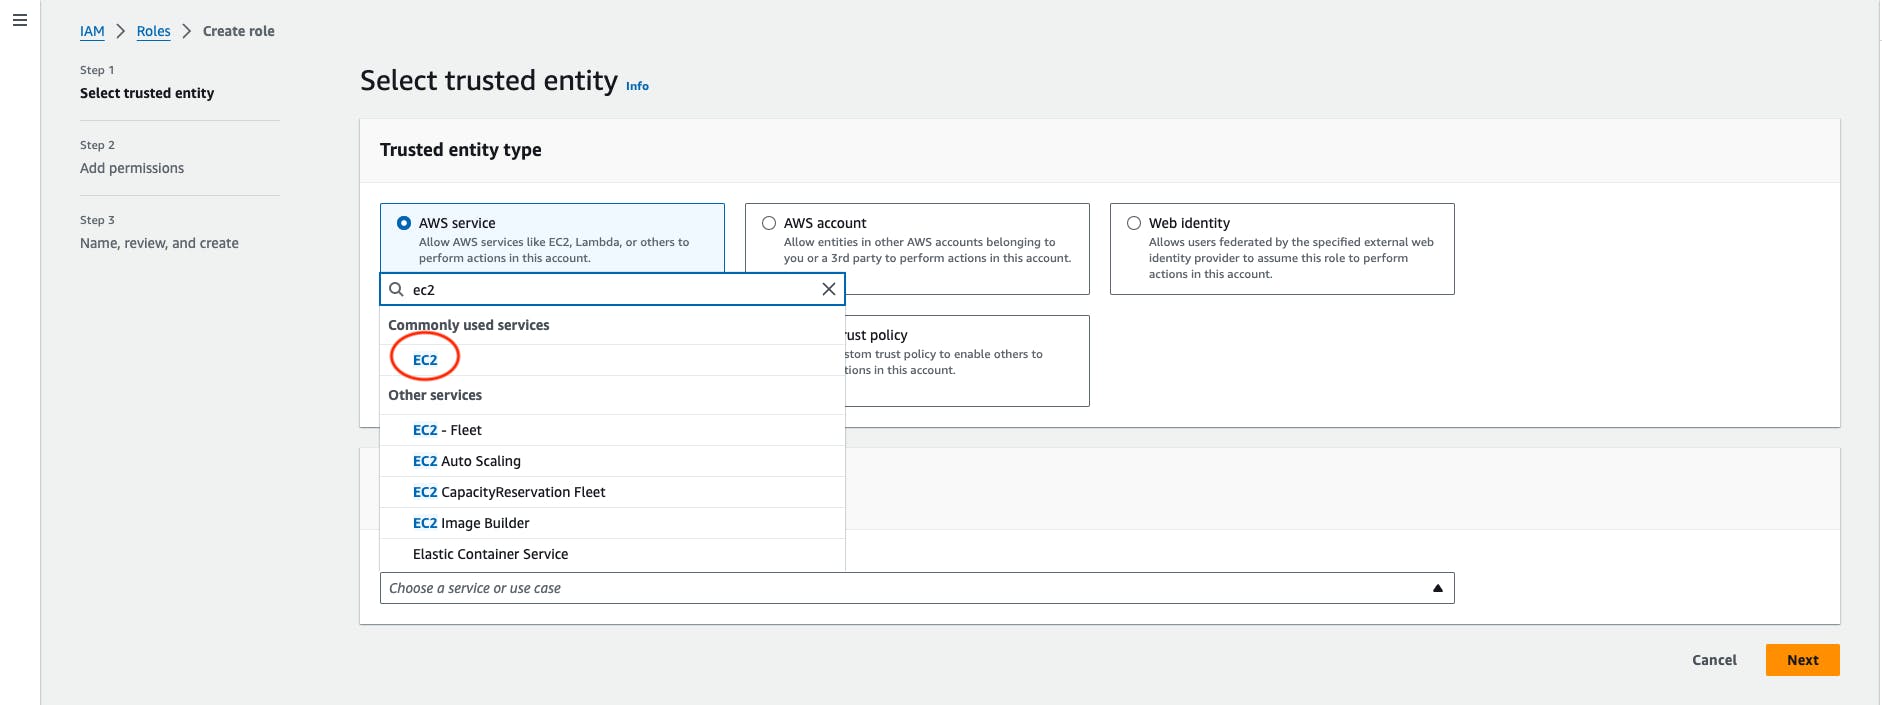
- Select the AWS Service -> choose an EC2 service in the use case block -> then Go to Next.
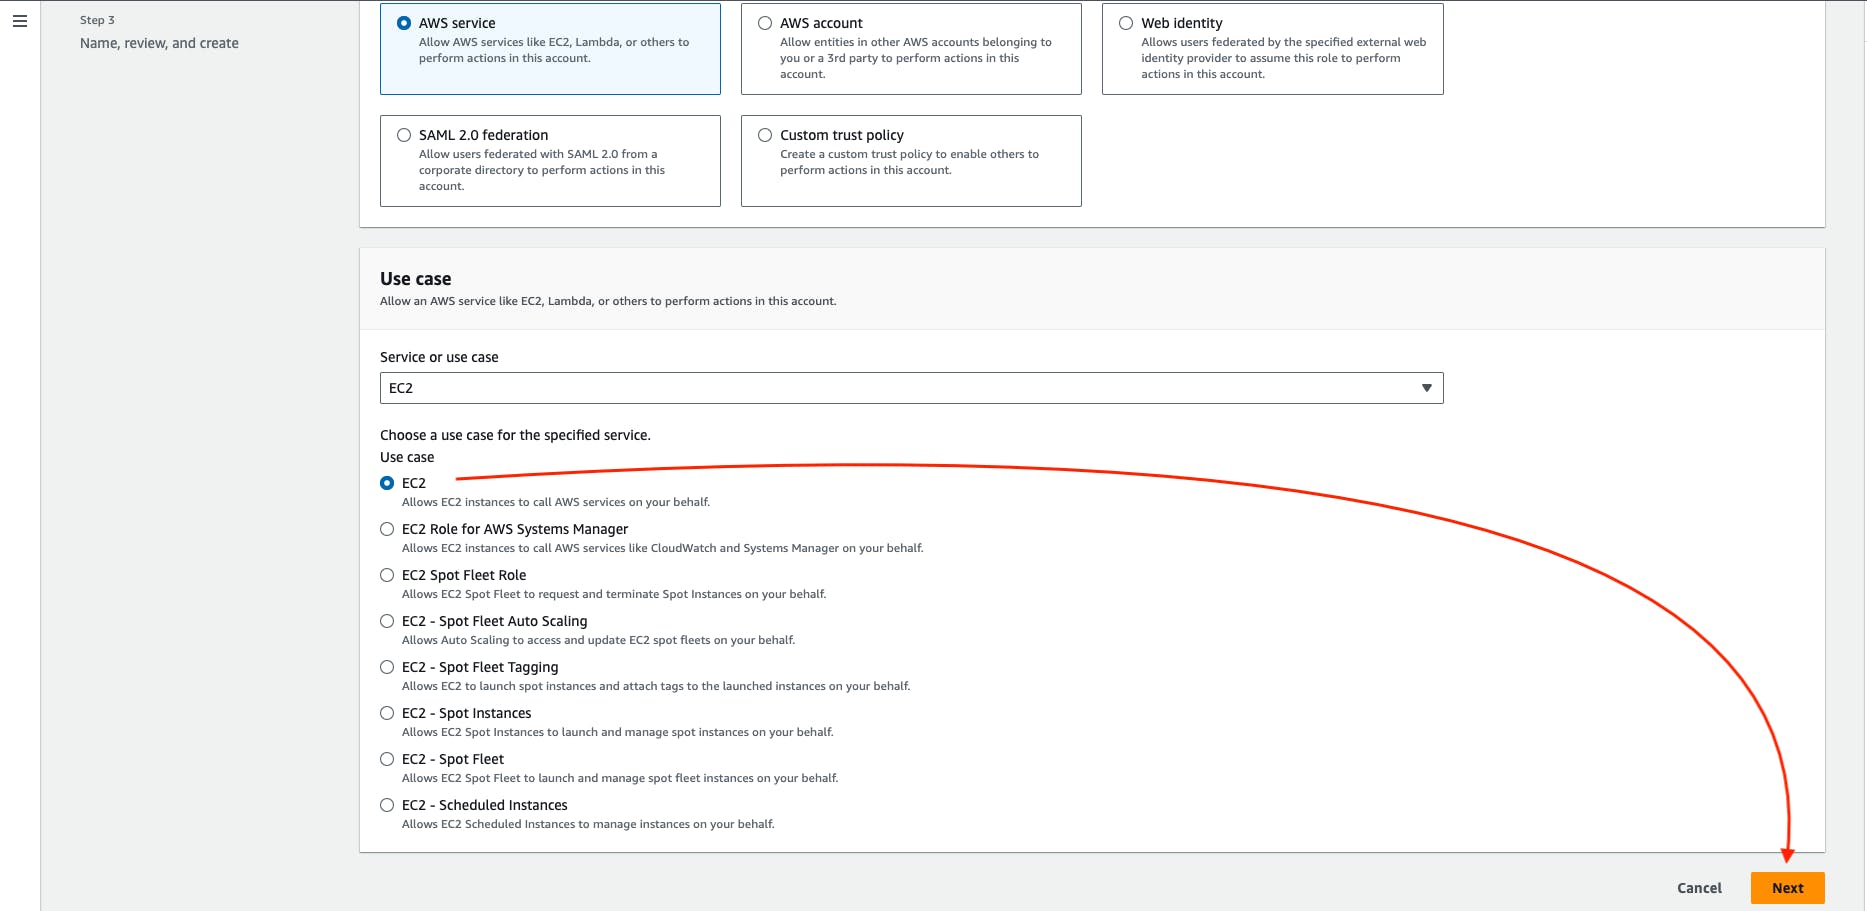
Search the AdministratorAccess and then select that policy -> Go to Next

Give any name to the role, I'm giving the role name TerraformThreeTier -> then create a role.


Step 2: Launch the 'Ubuntu' instance.
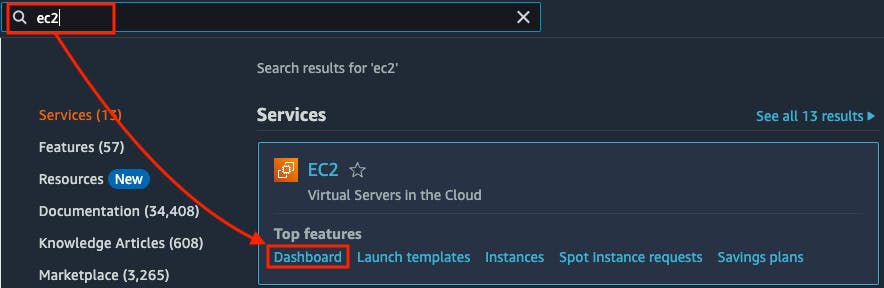
Go to the AWS Search Console -> Search for ec2 service -> Go to Dashboard
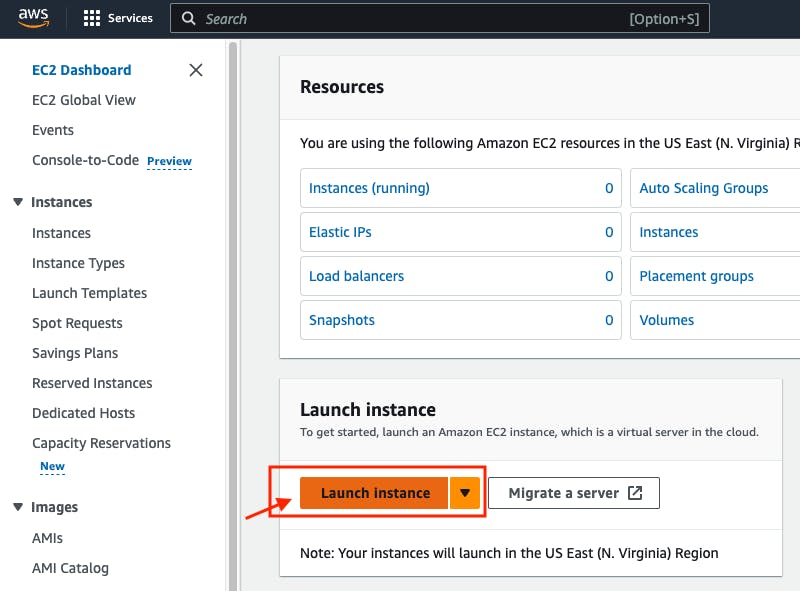
Go to Launch Instance.
- Give the instance name "three-tier-instance"

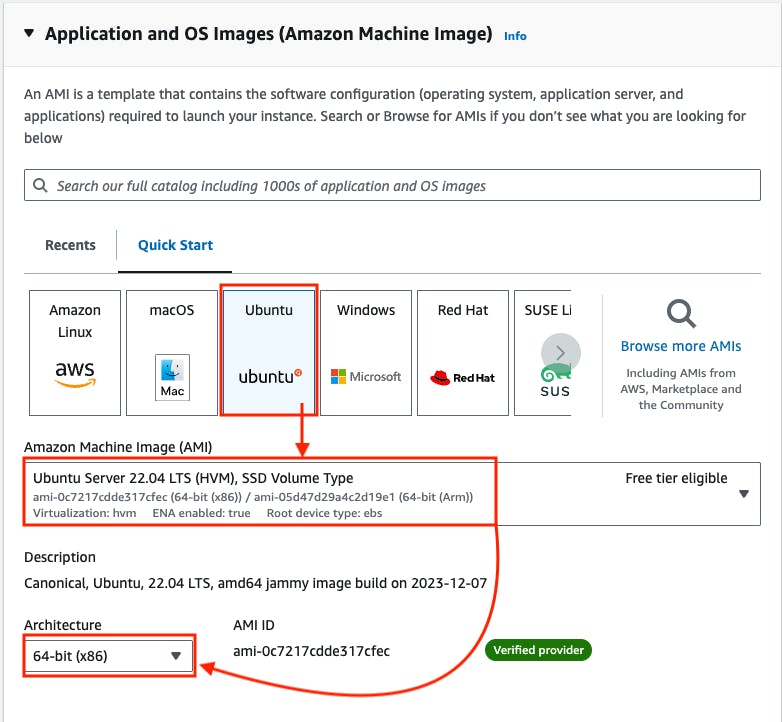
- Go to the AMI section -> Select ubuntu 22.04 LTS -> Architecture 64bit (x86)
- Go to Instance type -> Select t2.medium.

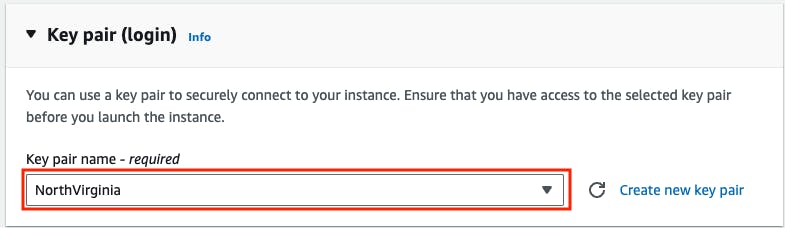
- Go to key pair -> Select existing key pair -> If you don't have one -> Create a new key pair.
- Go to Advanced details -> IAM Instance profile -> Select the role that is created for the terraform.

- Go to user data -> copy the below bash script and paste it into the user data block -> Launch instance
#!bin/bash

sudo apt update

wget -O- https://apt.releases.hashicorp.com/gpg | sudo gpg --dearmor -o /usr/share/keyrings/hashicorp-archive-keyring.gpg

echo "deb [signed-by=/usr/share/keyrings/hashicorp-archive-keyring.gpg] https://apt.releases.hashicorp.com $(lsb_release -cs) main" | sudo tee /etc/apt/sources.list.d/hashicorp.list

sudo apt update && sudo apt install terraform -y

- Select the 'three-tier-instance' instance -> Go to connect

- Copy and paste the commands into the terminal to check the terraform package is installed or not.
terraform --version

Step 3: Provision the Three-tier infrastructure.
- Clone the Terraform Script from the Git Repository.
git clone https://github.com/soravkumarsharma/AWS_Three_Tier_Architecture.git

- Change the directory into AWS_Three_Tier_Architecture
cd AWS_Three_Tier_Architecture

- Change the directory into ssh_key
cd ssh_key

Create private and public key using ssh-keygen, and name of the key should be three_tier , run the following command.
ssh-keygen -f three_tier

- Go back to AWS_Three_Tier_Architecture directory
cd ..

- Run the terraform init command to initialize a working directory containing Terraform configuration files.
terraform init

- Run the terraform plan command to preview the changes that Terraform will make to your infrastructure.
terraform plan

- Run the terraform apply command to apply the changes specified in your Terraform configuration to your infrastructure. The --auto-approve flag for automatically approving changes without the need for manual confirmation.
Note: The script may take 10-15 minutes for provisioning the infrastructure.
terraform apply --auto-approve

Step 4: Setup the Three-Tier Application
- Go to AWS Search for EC2 -> Go to EC2 Dashboard -> Go to Running Instance.
We have two more instances, one is weblayer and another one is applayer and the weblayer instance is provisioned in the public subnet so we can directly ssh into weblayer instance but we can't ssh into the applayer instance because the applayer instance is provisioned in the private subnet. we can access into the applayer instance to setup the backend using weblayer instance.

To setup the backend, first we need to ssh into the applayer, and for ssh we need private key, and we already created a key using ssh-keygen. We need to copy the private key from the three-tier-instance to weblayer instance, because the three-tier-instance and applayer instance both are created in the different - different vpc. so we can't access the applayer instance from the three-tier-instance
Copy the public ip of weblayer instance. Then Run the following command inside the three-tier-instance
cd ssh_key
- Run the following command inside the ssh_key directory to copy the private key from three-tier-instance to weblayer instance
scp -i ./three_tier "./three_tier" ec2-user@public_ip_of_weblayer:/home/ec2-user

Go to AWS console and select the weblayer instance and connect the instance in the browser

- Run the ls command to check the private key is copied or not.

Go to AWS console and copy the private ip of the applayer instance.

- Go back to the weblayer instance terminal, and run the following command to connect the applayer instance.
ssh -i ./three_tier ec2-user@private_ip_of_applayer

- Run the following command inside the app layer to update the packages
sudo yum update -y
- Install MySQL CLI to interact with MySQL RDS.
sudo yum install mysql -y

To connect with RDS mysql we need RDS database endpoint.
- Go to AWS Search console and search for RDS -> Go to Databases

- Click on database-1

- Copy the Endpoint database-1.cxuy4isaivxp.us-east-1.rds.amazonaws.com , and Go back to weblayer instance from where you are connected with applayer instance.

Run the following command to connect with the mysql database.
MySQL Credentials:
username: admin
password: password
mysql -h rds_mydql_endpoint -u admin -p- Copy the following script and apply.
    USE webappdb;
    CREATE TABLE IF NOT EXISTS transactions(id INT NOT NULL
    AUTO_INCREMENT, amount DECIMAL(10,2), description
    VARCHAR(100), PRIMARY KEY(id));

- Now, Go back from the mysql cli by run the following exit command
exit

- Now we need to install all of the necessary components to run our backend application. Start by installing NVM (node version manager).
curl -o- https://raw.githubusercontent.com/nvm-sh/nvm/v0.38.0/install.sh | bash
source ~/.bashrc

- Next, install a compatible version of Node.js and make sure it's being used.
nvm install 16
nvm use 16
- Next, Install PM2, PM2 is a daemon process manager that will keep our node.js app running when we exit the instance or if it is rebooted. Install that as well.
npm install -g pm2
- Now we need to download our code from our s3 buckets onto our instance.
cd ~/
aws s3 cp s3://devops-soravks/app-tier/ app-tier --recursive

cd ~/app-tier
npm install

- Next, edit the DBConfig.js file inside the app-tier folder. Press i to edit the file
vim DBConfig.js
- We need to add the database endpoint inside the DB_HOST value.

- Press esc key from your keyboard and then press colon : and then type wq -> Enter

- start the app with pm2
pm2 start index.js
- Now let's run a couple tests to see if our app is configured correctly
curl http://localhost:4000/health

Next we need to setup the weblayer instance, To exit from the applayer instance just type exit and then you will exit from the applayer instance. Now you are inside the weblayer instance. Let's setup the weblayer instance also.

- To Setup the Weblayer instance first update all packages
sudo yum update -y
- We now need to install all of the necessary components needed to run our front-end application. Again, start by installing NVM and node. run the following command one by one.
curl -o- https://raw.githubusercontent.com/nvm-sh/nvm/v0.38.0/install.sh | bash
source ~/.bashrc
nvm install 16
nvm use 16
- Now we need to download our web tier code from our s3 bucket
aws s3 cp s3://devops-soravks/web-tier/ web-tier --recursive

- Navigate to the web-layer folder and create the build folder for the react app so we can serve our code. Run the following command one by one.
cd ~/web-tier
npm install
npm run build
- Next Install nginx, The NGINX can be used for different use cases like load balancing, content caching etc, but we will be using it as a web server that we will configure to serve our application on port 80, as well as help direct our API calls to the internal load balancer.
sudo amazon-linux-extras install nginx1 -y
We will now have to configure NGINX. Navigate to the Nginx configuration file with the following commands and remove the nginx.conf file:
cd /etc/nginx sudo rm -rf nginx.conf- Create a nginx.conf file inside the /etc/nginx directory -> Copy the following content and replace the internal lb DNS name with yours internal lb DNS name
sudo vim nginx.conf
Replace the [REPLACE-WITH-INTERNAL-LB-DNS] with your load balancer dns,
to copy the load balancer dns.
Go to AWS search console, search for load balancers -> Go to loadbalancer -> copy the app-tier-internal-lb dns name


# For more information on configuration, see:
#   * Official English Documentation: http://nginx.org/en/docs/
#   * Official Russian Documentation: http://nginx.org/ru/docs/

user nginx;
worker_processes auto;
error_log /var/log/nginx/error.log;
pid /run/nginx.pid;

# Load dynamic modules. See /usr/share/doc/nginx/README.dynamic.
include /usr/share/nginx/modules/*.conf;

events {
    worker_connections 1024;
}

http {
    log_format  main  '$remote_addr - $remote_user [$time_local] "$request" '
                      '$status $body_bytes_sent "$http_referer" '
                      '"$http_user_agent" "$http_x_forwarded_for"';

    access_log  /var/log/nginx/access.log  main;

    sendfile            on;
    tcp_nopush          on;
    tcp_nodelay         on;
    keepalive_timeout   65;
    types_hash_max_size 4096;

    include             /etc/nginx/mime.types;
    default_type        application/octet-stream;

    # Load modular configuration files from the /etc/nginx/conf.d directory.
    # See http://nginx.org/en/docs/ngx_core_module.html#include
    # for more information.
    include /etc/nginx/conf.d/*.conf;

    server {
        listen       80;
        listen       [::]:80;
        server_name  _;

        #health check
        location /health {
        default_type text/html;
        return 200 "<!DOCTYPE html><p>Web Tier Health Check</p>\n";
        }

        #react app and front end files
        location / {
        root    /home/ec2-user/web-tier/build;
        index index.html index.htm
        try_files $uri /index.html;
        }

        #proxy for internal lb
        location /api/{
                proxy_pass http://[REPLACE-WITH-INTERNAL-LB-DNS]:80/;
        }


    }

# Settings for a TLS enabled server.
#
#    server {
#        listen       443 ssl http2;
#        listen       [::]:443 ssl http2;
#        server_name  _;
#        root         /usr/share/nginx/html;
#
#        ssl_certificate "/etc/pki/nginx/server.crt";
#        ssl_certificate_key "/etc/pki/nginx/private/server.key";
#        ssl_session_cache shared:SSL:1m;
#        ssl_session_timeout  10m;
#        ssl_ciphers PROFILE=SYSTEM;
#        ssl_prefer_server_ciphers on;
#
#        # Load configuration files for the default server block.
#        include /etc/nginx/default.d/*.conf;
#
#        error_page 404 /404.html;
#            location = /40x.html {
#        }
#
#        error_page 500 502 503 504 /50x.html;
#            location = /50x.html {
#        }
#    }

}

save and exit from the vim editor.
Then, restart Nginx with the following command:
sudo service nginx restart
- To make sure Nginx has permission to access our files execute this command:
chmod -R 755 /home/ec2-user
- And then to make sure the service starts on boot, run this command:
sudo chkconfig nginx on
Step 5: Access the Three-tier application from the browser.
- Go to AWS Search Console -> Search for load balancers -> Copy the internet-facing load balancer DNS name which is web-tier-internal-lb -> paste it on the another tab.


- Go to hamburger icon -> Go to DB DEMO -> Add entries to test the application


Destruction Time:
- Go to AWS search console -> Search for EC2 -> Go to Dashboard -> Go to running instances -> Select the three-tier-instances and connect the instance throught the browser.

- Next, change the directory into AWS_Three_Tier_Architecture
cd AWS_Three_Tier_Architecture
- Run the terraform destory command to destory the three-tier infrastructure.
Note: The script may take 15-20 minutes to destroying the infrastructure
terraform destroy --auto-approve

- Next, Delete the three-tier-instance also from the AWS console.

Thank you for joining us on this exploration of AWS three-tier architecture with Terraform. May your deployments be seamless, your applications performant, and your infrastructure always in harmony with your business goals.
Happy coding and cloud crafting!


