Kubegaming Mastery: A Step-by-Step Guide to TicTacToe Deployment with ArgoCD, Jenkins CI, and Terraform


Introduction:
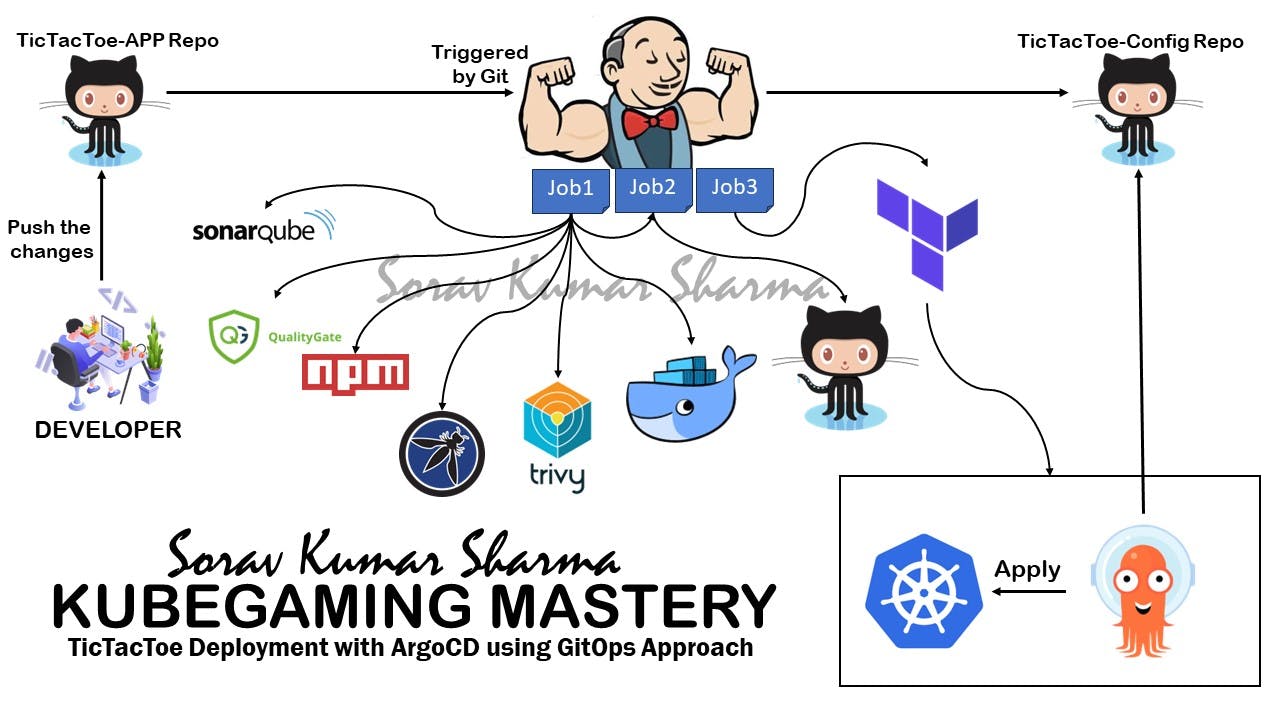
In this blog, we explore the deployment of a "tic-tac-toe" game on a Kubernetes cluster using a GitOps approach. The entire CI/CD pipeline is automated, starting from source code management to production deployment. Key tools and technologies include Jenkins for continuous integration (CI), ArgoCD for continuous deployment (CD), Docker for containerization, SonarQube, and Trivy for security analysis, The blog also highlights the use of Terraform for provisioning the Kubernetes cluster infrastructure. This approach ensures a streamlined and secure development lifecycle, making the blog a valuable resource for readers seeking to implement a similar end-to-end deployment pipeline.
Key Highlights:
Learn how Jenkins orchestrates CI processes seamlessly.
Experience the power of GitOps with ArgoCD for automated CD.
Secure your deployment using Docker, SonarQube, and Trivy.
Explore the use of Terraform for efficient Kubernetes cluster provisioning.
Why Read This Blog?
- Our blog provides insights into a comprehensive deployment pipeline, offering readers valuable knowledge for implementing similar solutions. As you explore the GitOps approach and the integration of various tools, discover the benefits of a secure, automated, and efficient development lifecycle.
Prerequisites:
AWS Account
IAM Role
Ubuntu instances 'name -> Working-Space'
- Working-Space -> Instance stance type should be
t2.largeand the root volume should be30 GiB
- Working-Space -> Instance stance type should be
Let's start:
Note: Create an AWS account if you haven't created one yet, If you have already created then login into the AWS account.
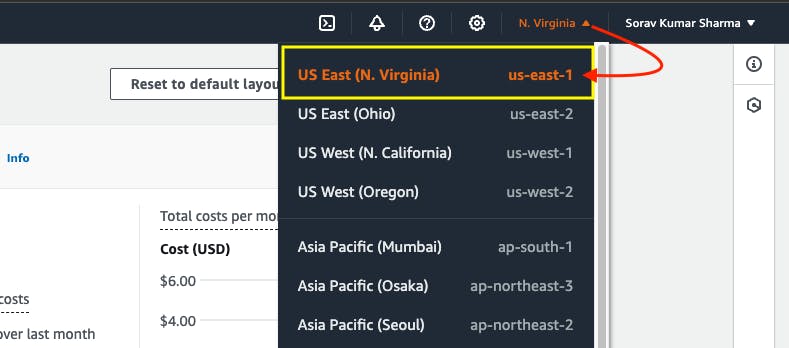
We create all the instances in the us-east-1 region, and also we need one IAM role for the 'Work-Space' instance and also make sure that the AmazonEC2FullAccess policy is attached to it, and this IAM role is needed to provision the Kubernetes cluster from terraform code. If you don't want to create an IAM role then you can also create an IAM user with AmazonEC2FullAccess permission and then install the AWS CLI in the 'Work-Space' instance and then configure the AWS CLI with Access Key and Secret key.
In the GitOps approach, maintaining separate repositories for code and configuration is a common practice. This separation allows for a clear distinction between the application code and the declarative configuration used to manage the infrastructure and application deployment.
Git Repositories:
Step 1: Select the us-east-1 region from AWS Regions.
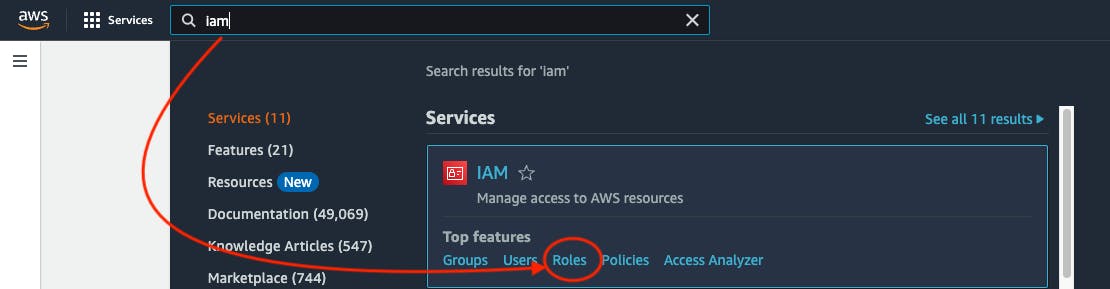
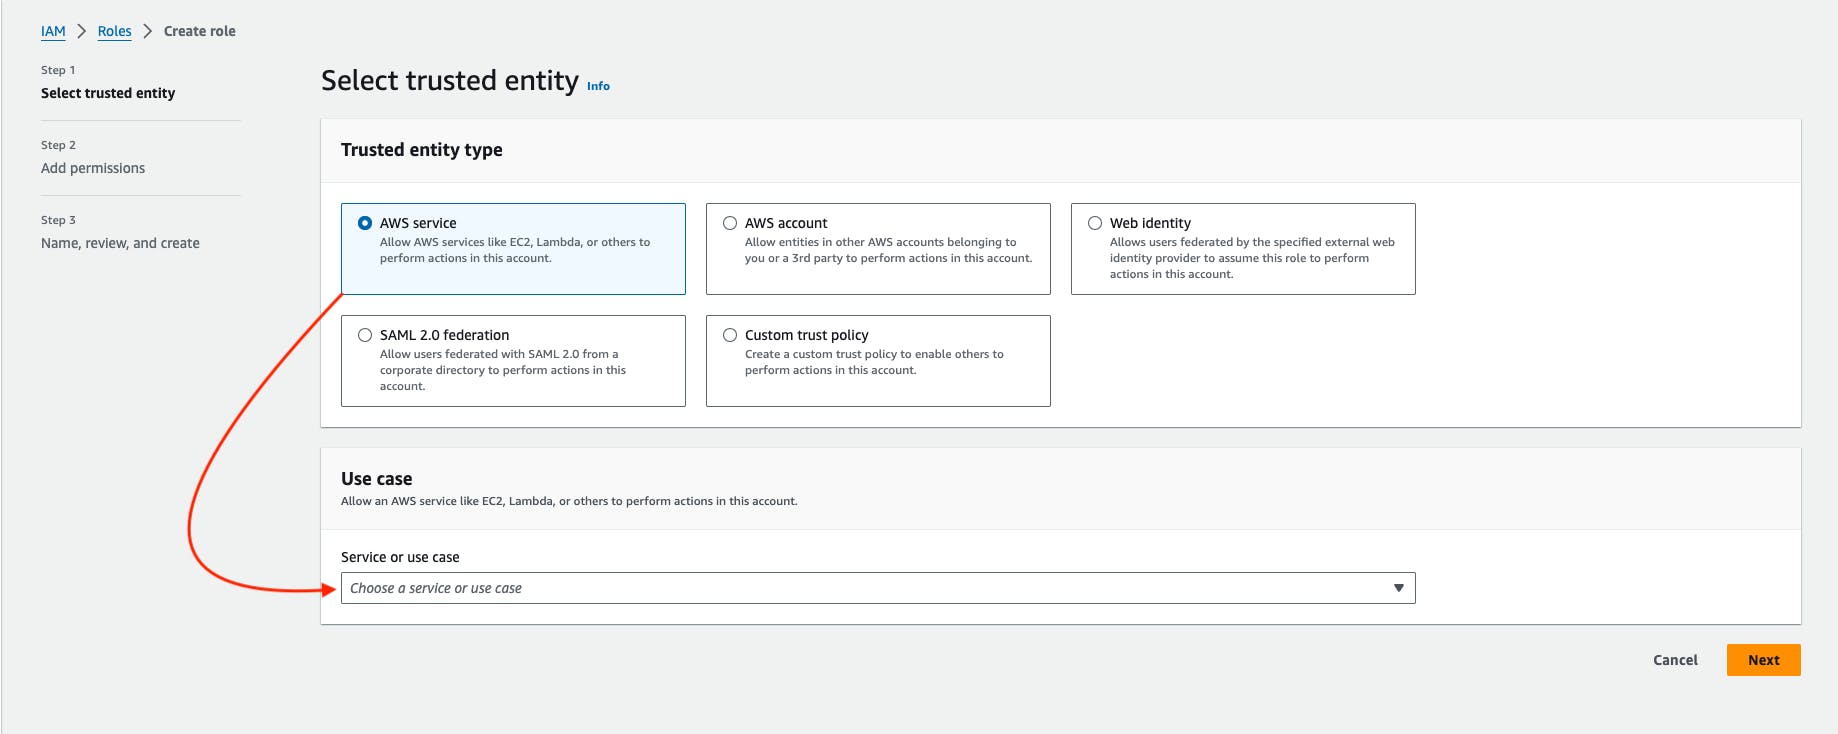
Step 2: Create an IAM Role for Terraform.
Go to the AWS Search console, search IAM Role, and select that role.
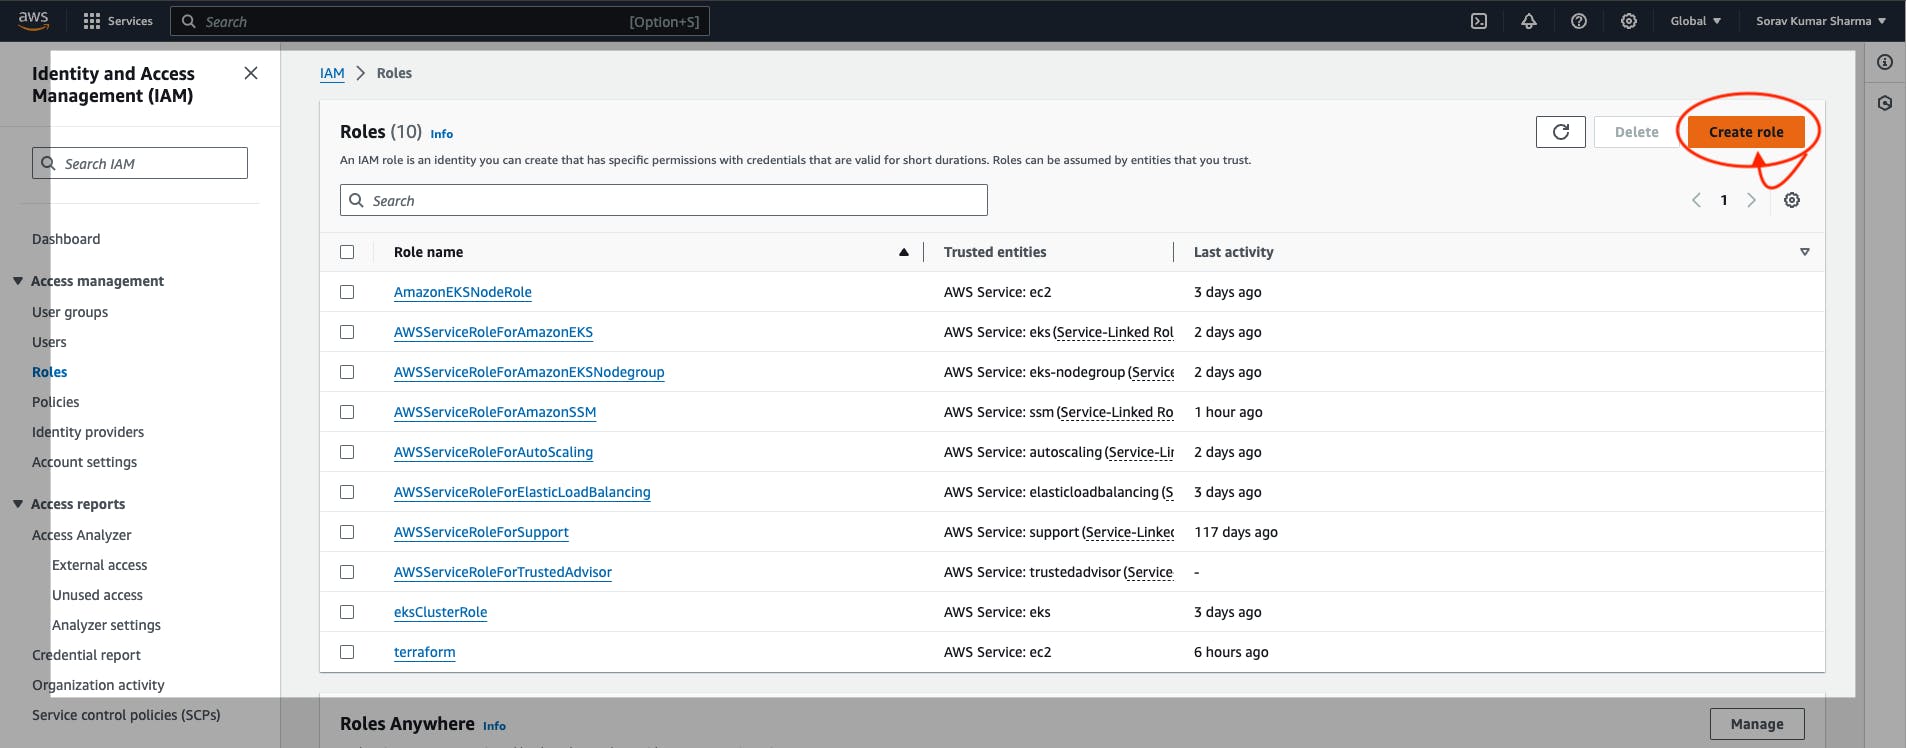
Click on Create Role.
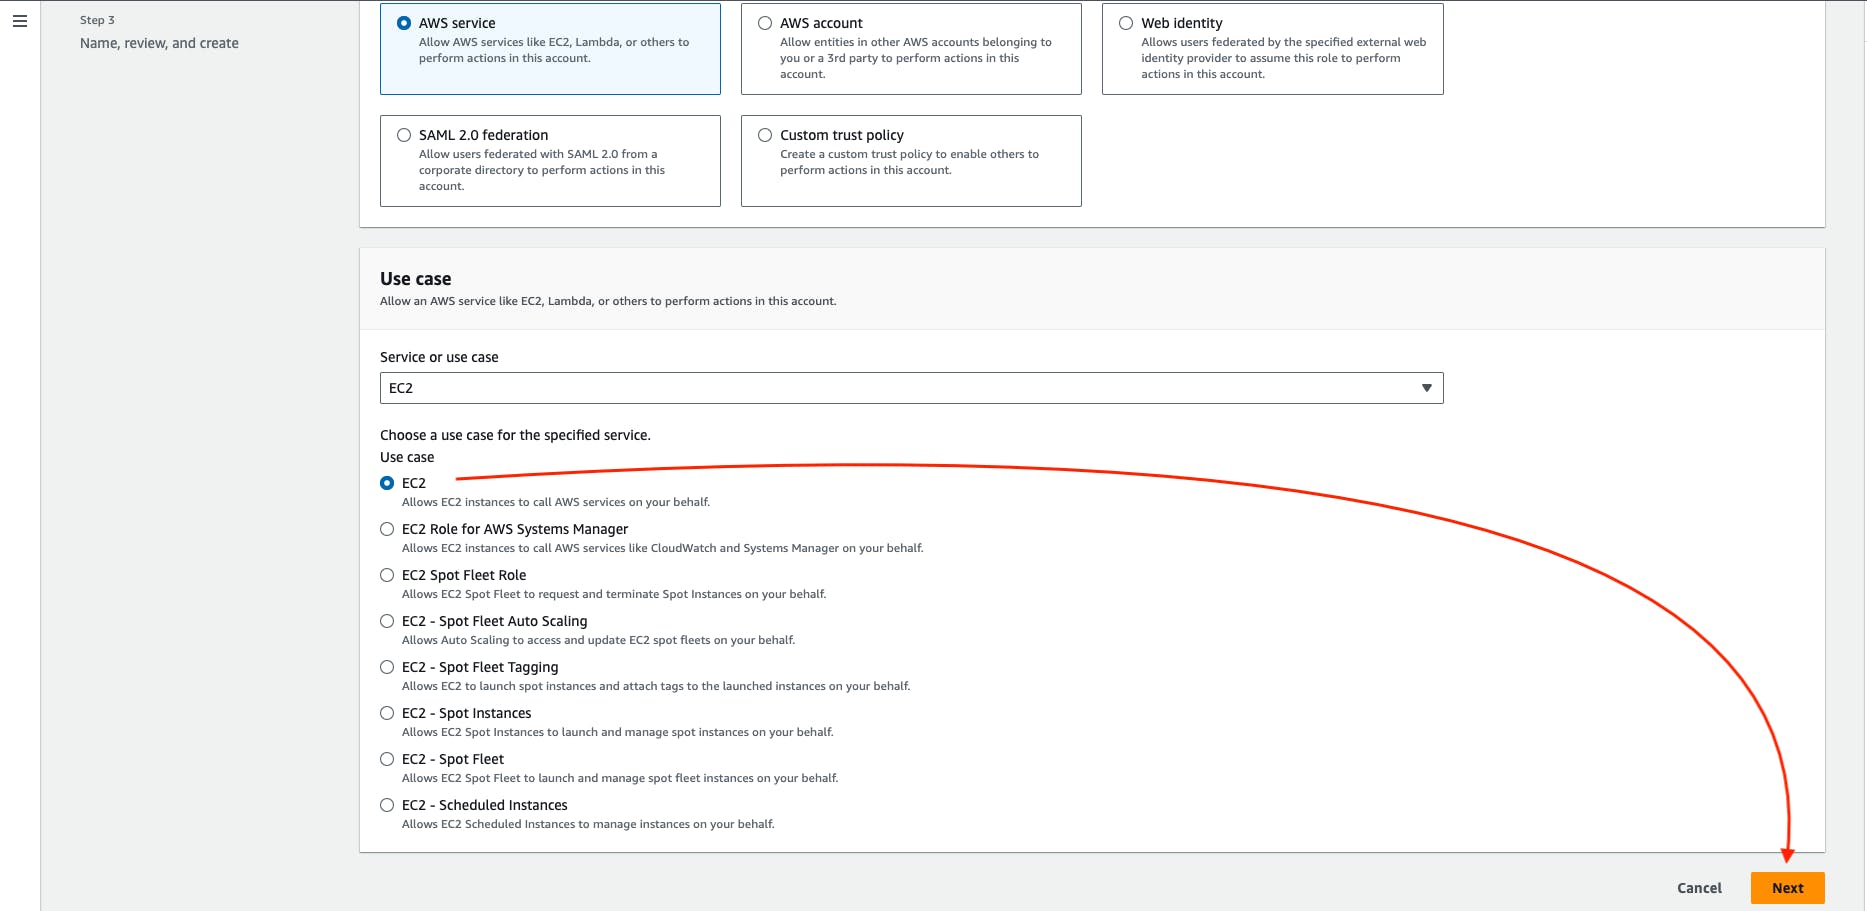
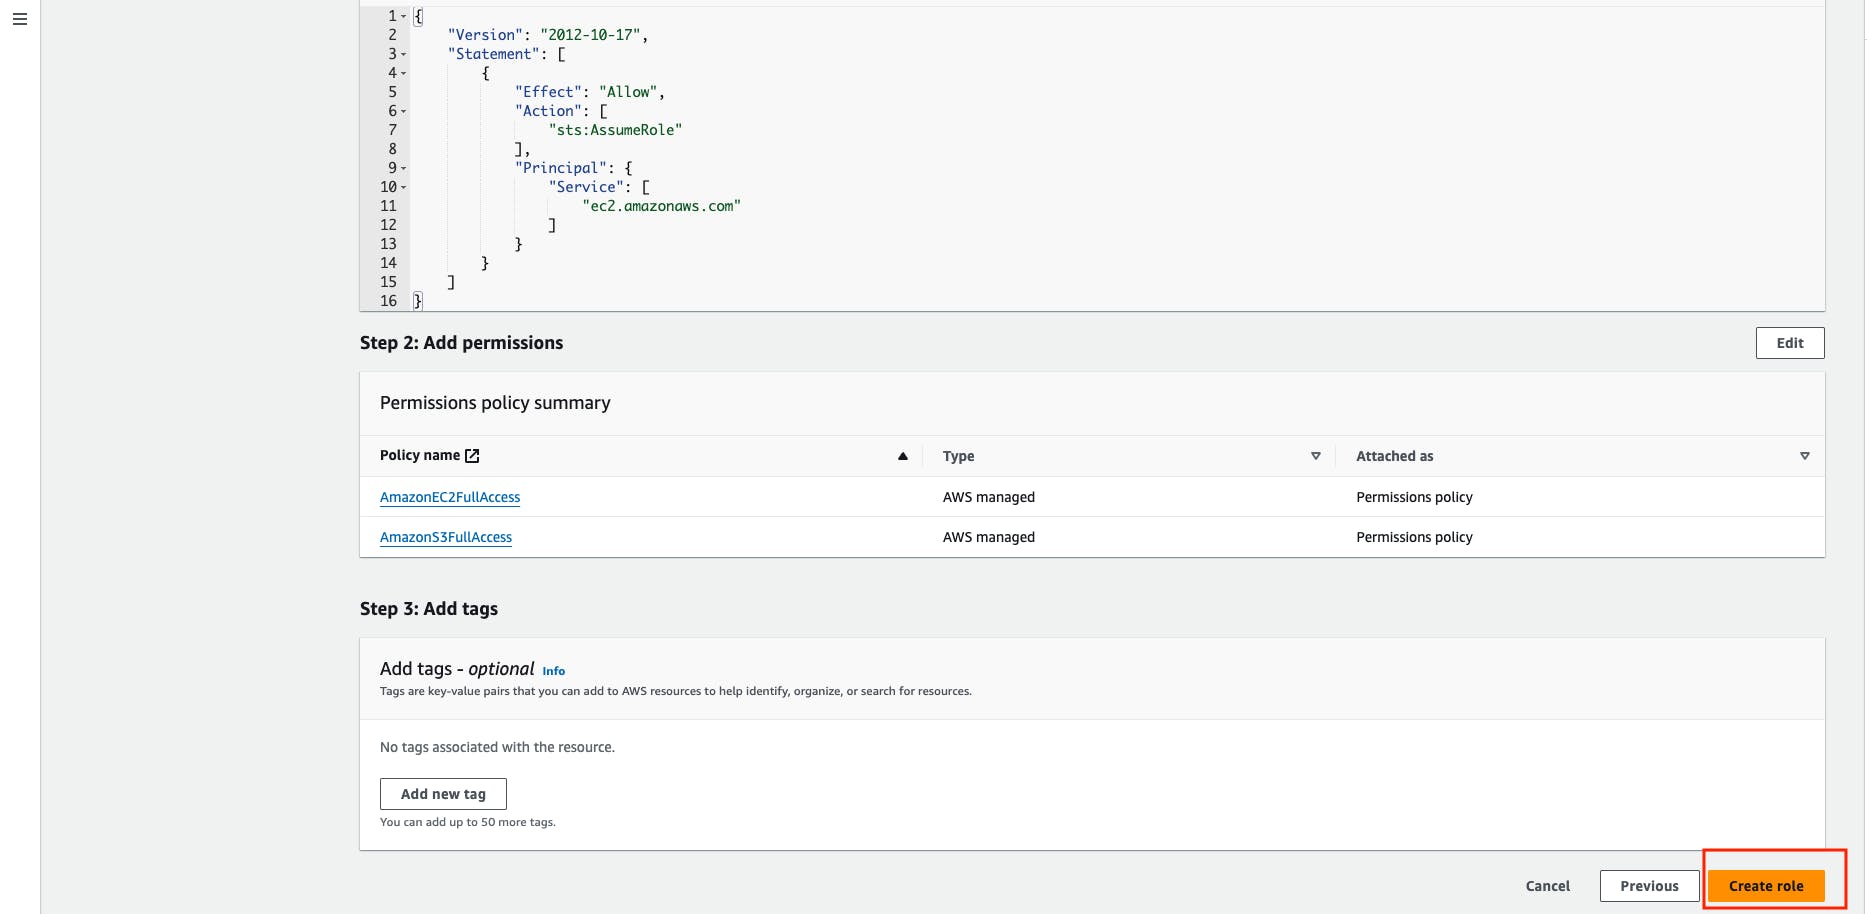
Select the AWS Service -> choose an EC2 service in the use case block -> then Go to Next.
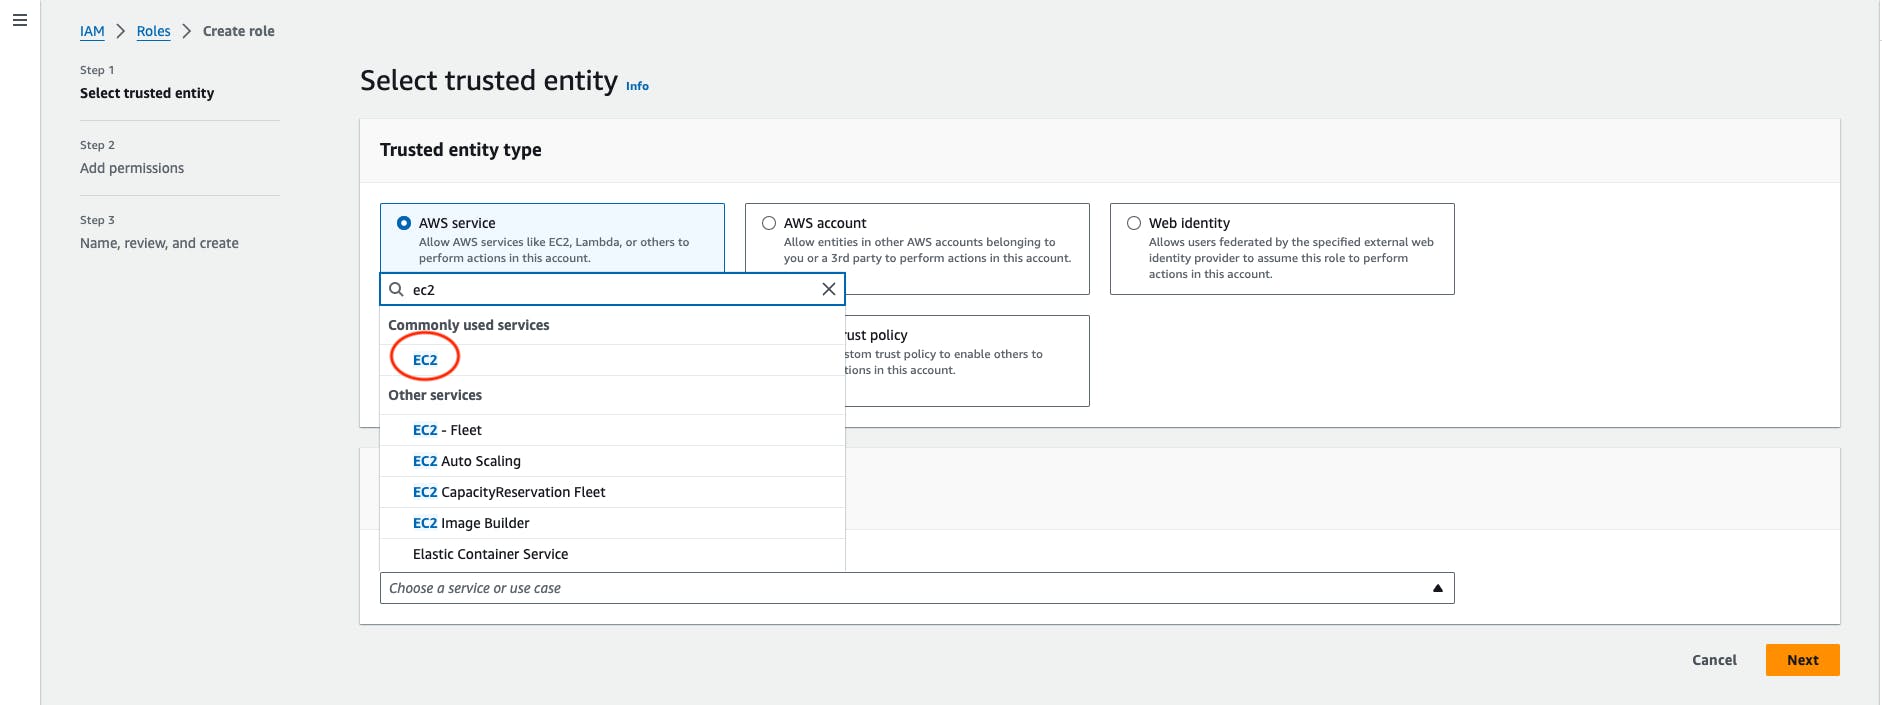
Search the AmazonEC2FullAccess and then select that policy.
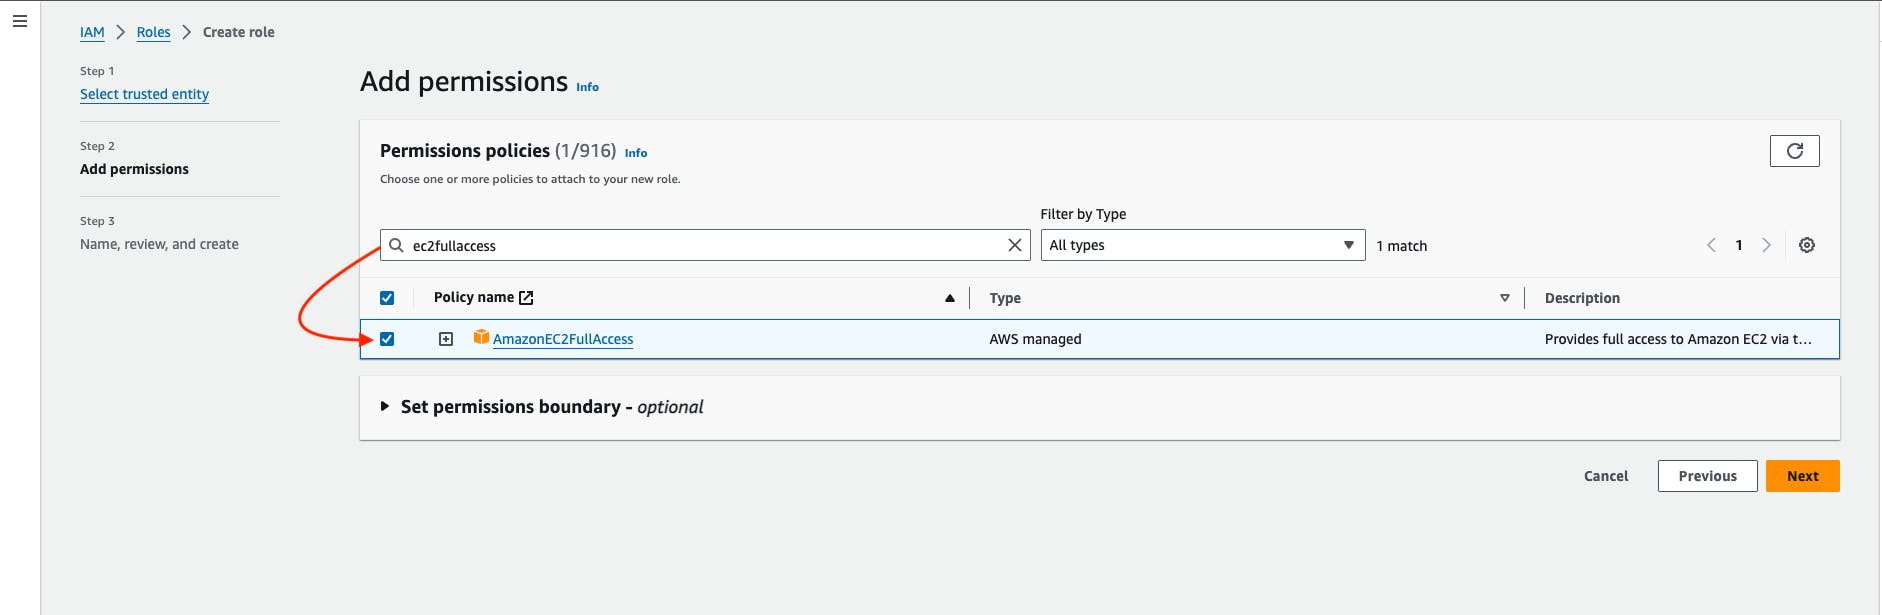
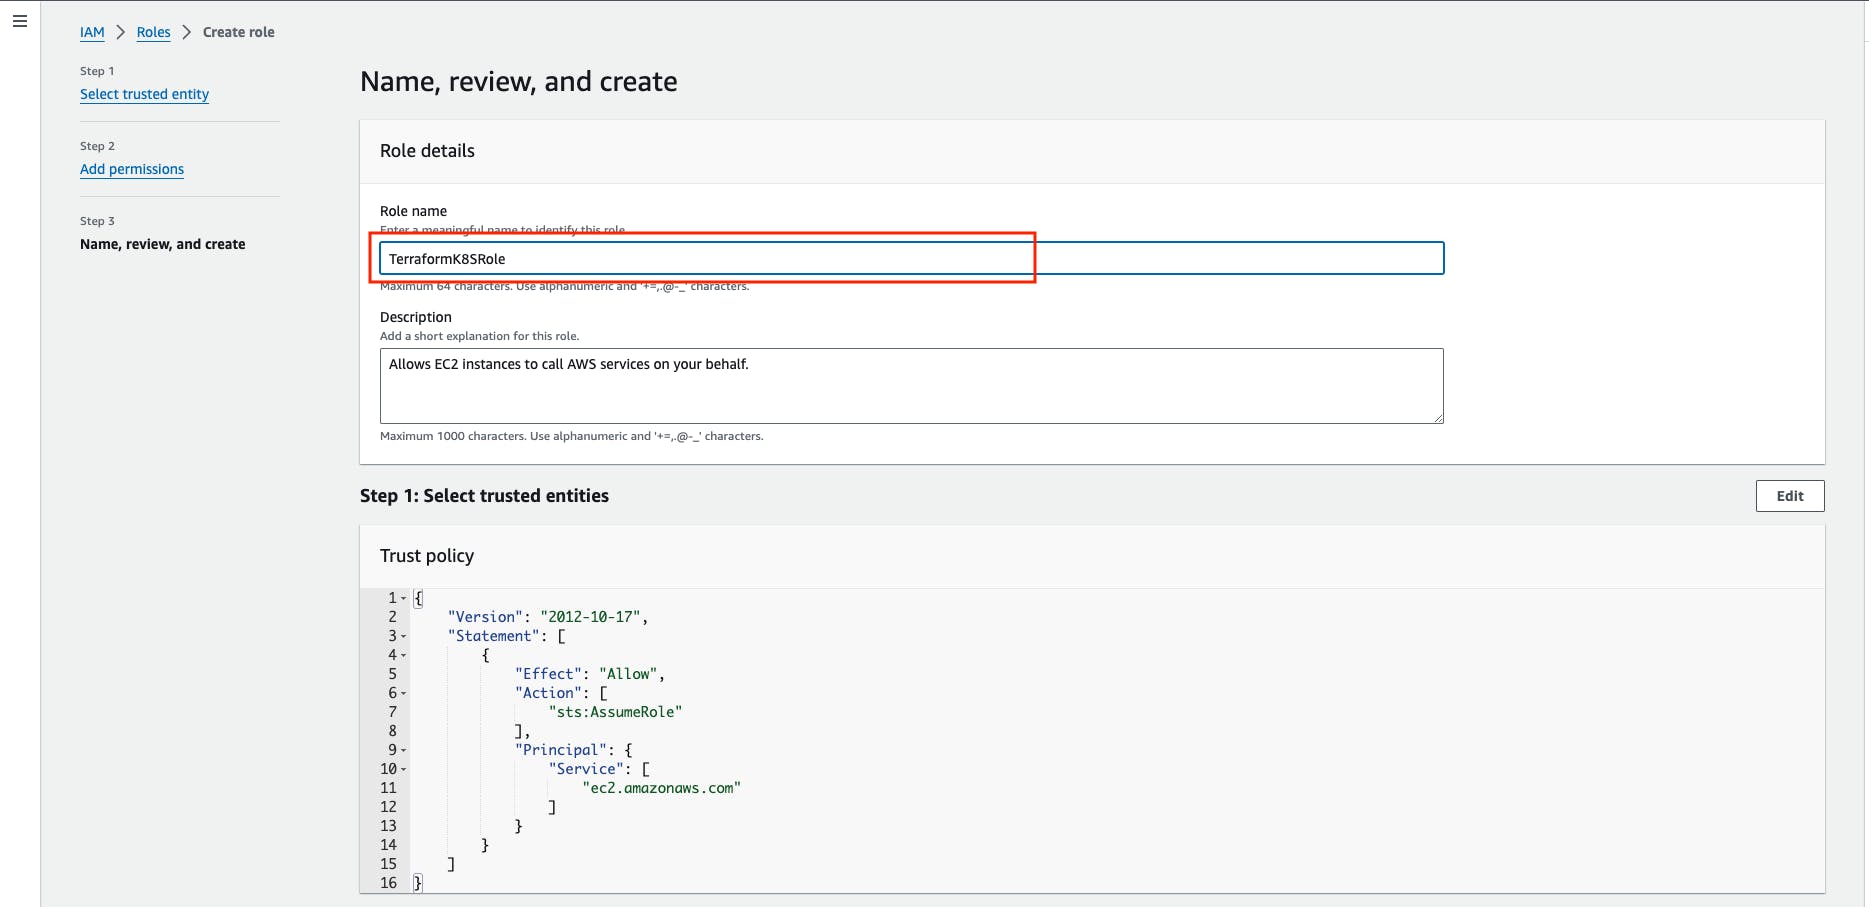
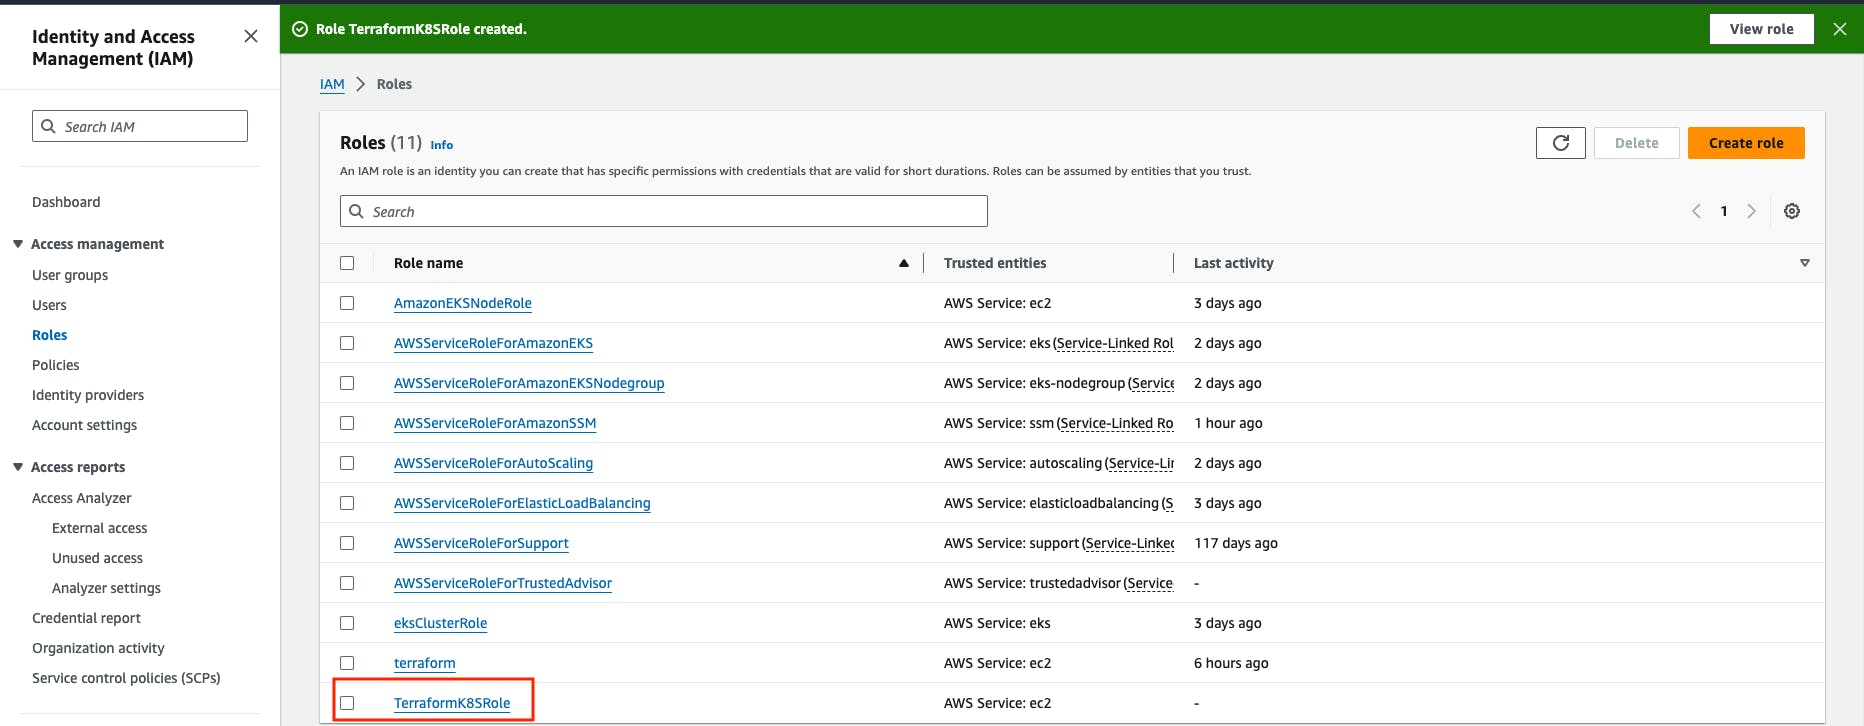
Give any name to the role, I'm giving the role name TerraformK8sRole -> then create a role.
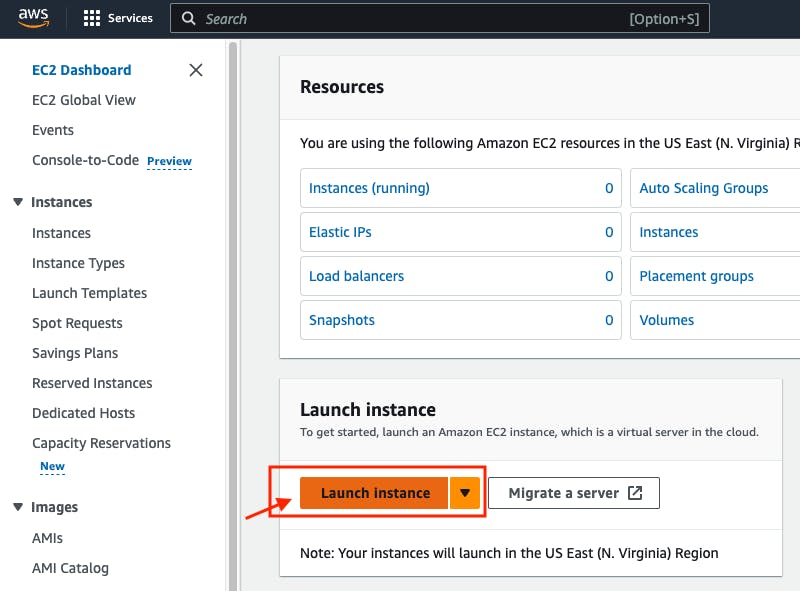
Step 3: Launch the 'Working-Space' instance.
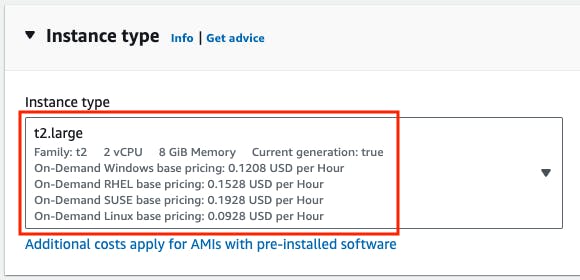
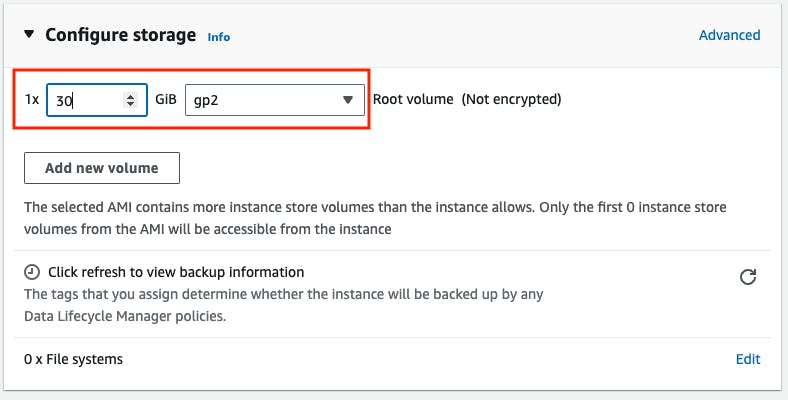
The working-space instance must have AMI type ubuntu 22.04, the instance type must be t2.large, and the root volume must be 30 GiB because we are going to install terraform, Jenkins, node-exporter, and docker for that we need better performance. and also attached the IAM role to this instance and in the security groups the inbound ports: 8080 -> Jenkins, 9000 -> SonarQube, 22 -> SSH
Let's Create the instance:
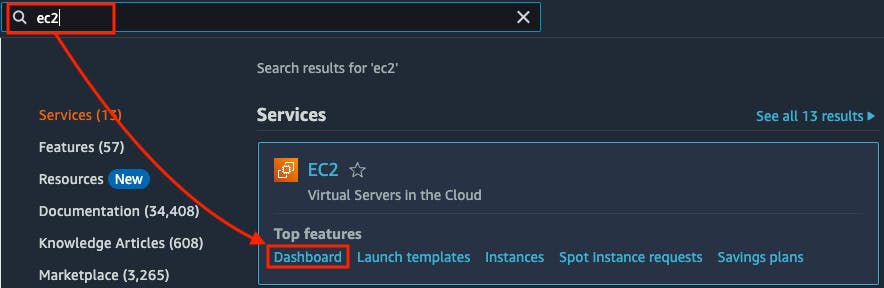
Go to the AWS Search Console -> Search for ec2 service -> Go to Dashboard
Go to Launch Instance.
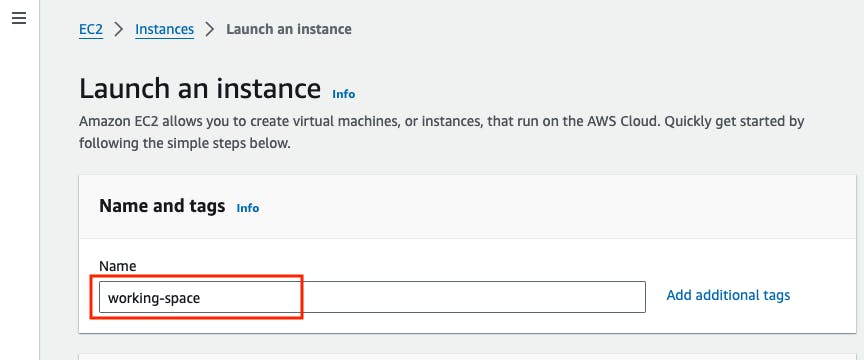
Give the instance name "working-space"
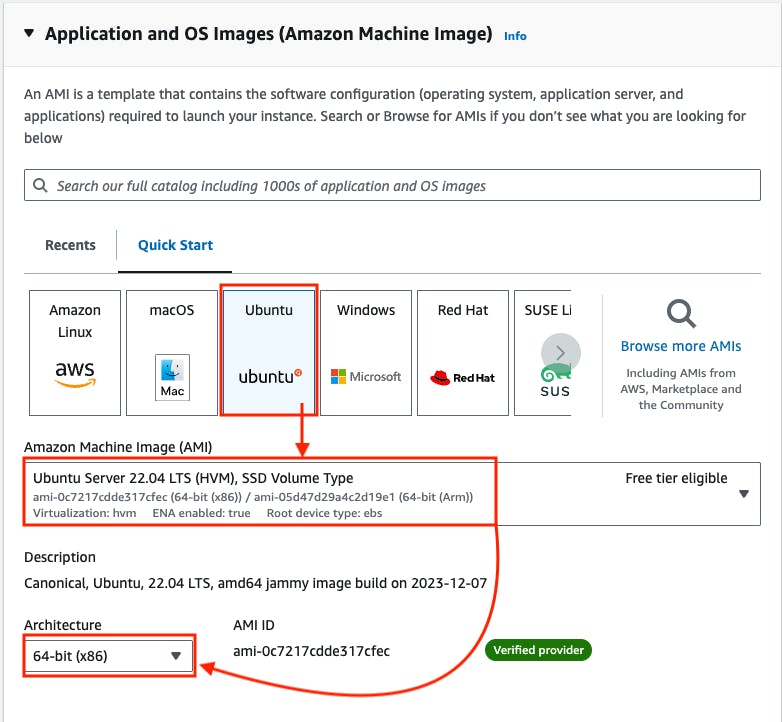
Go to the AMI section -> Select ubuntu 22.04 LTS -> Architecture 64bit (x86)
Go to Instance type -> Select t2.large
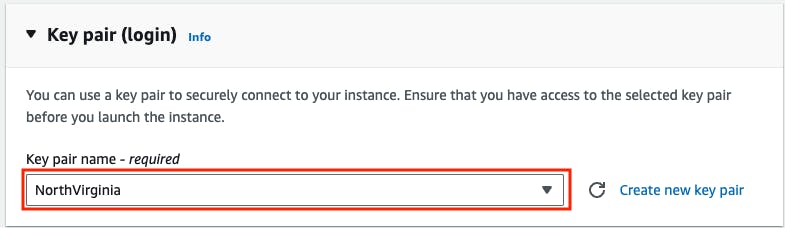
Go to key pair -> Select existing key pair -> If you don't have one -> Create a new key pair.
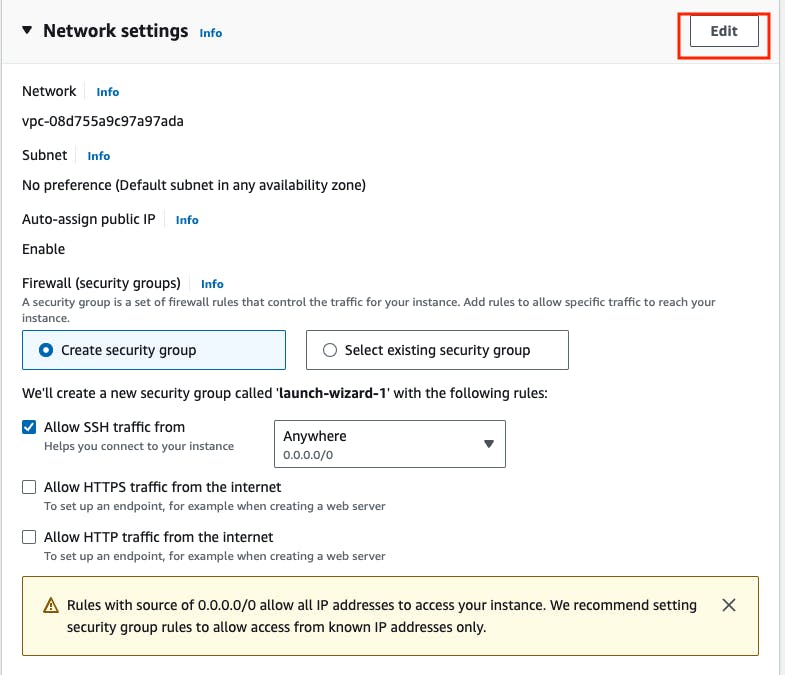
Go to Networking Settings -> Go to edit -> Go to Add Security Group rule.
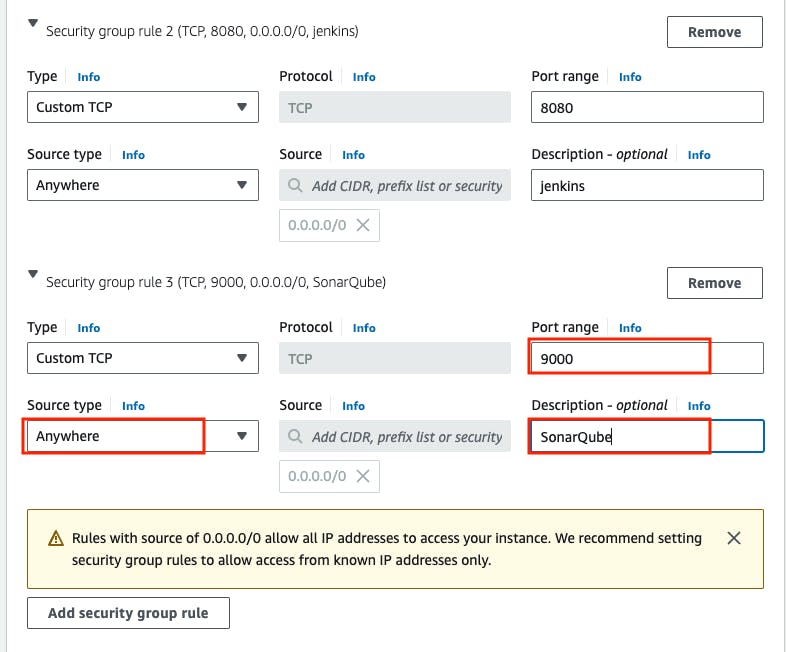
In this networking setting block, we need to open some inbound ports in the security group, like the 8080 port should be opened for Jenkins service, If this port is not opened the firewall won't allow the incoming request for the port 8080, To access the Jenkins UI from the internet we need to first add the inbound port 8080 in the security group. we need also other ports should be opened like 9000 for SonarQube, and 22 for SSH.
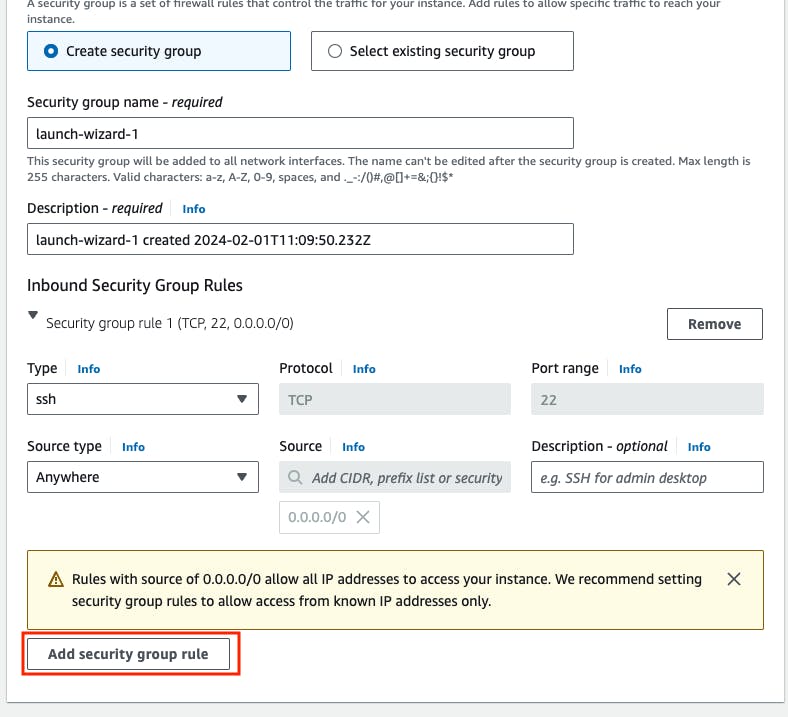
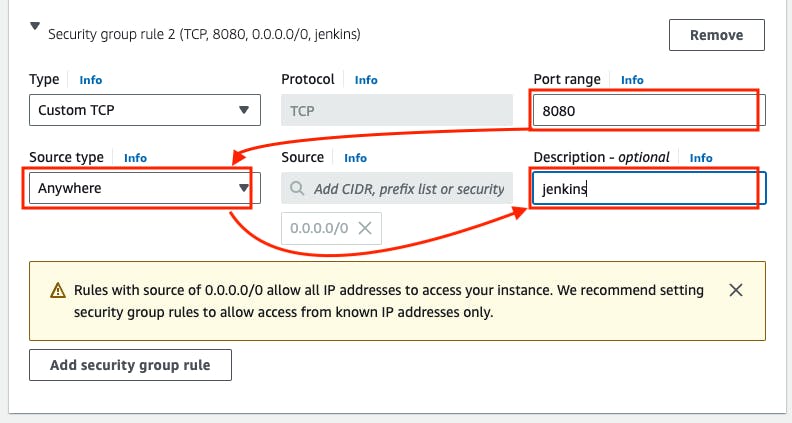
- Go to Port range block -> 8080 -> source type -> Anywhere -> Description -> Jenkins -> Go to Add security group rule.
- Go to Port range block -> 9000 -> Source type -> Anywhere -> Description -> SonarQube -> Go to Add Security Group rule.
Go to Configure Storage -> 30Gib -> gp2
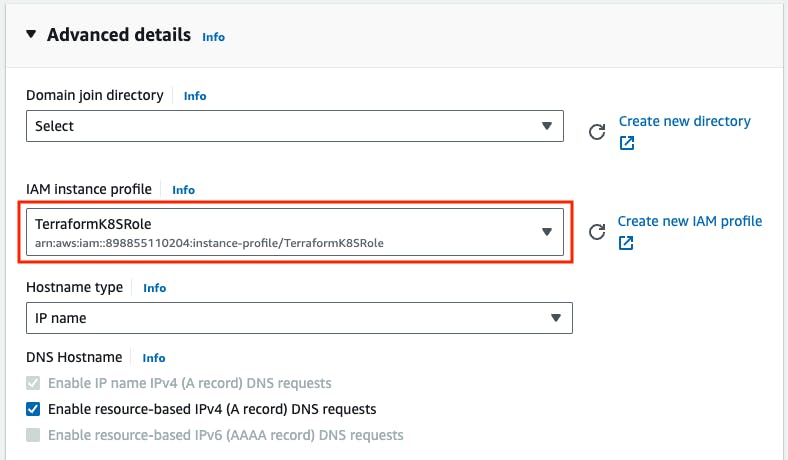
Go to Advanced details -> IAM Instance profile -> Select the role that is created for the terraform.
Go to user data -> copy the below bash script and paste it into the user data block -> Launch instance
Note: the script may take 4-5 minutes to install all the required packages after 4-5 minutes you can SSH into the instance.
#!bin/bash
#update the packages.
sudo apt update
#set the hostname "working-space"
sudo hostnamectl set-hostname working-space
#restart the hostname service
sudo systemctl restart systemd-hostnamed.service

#Install docker
sudo apt install -y docker.io
#append the $USER -> ubuntu in the docker group so the ubuntu user can use the docker commands.
sudo usermod -aG docker ubuntu
#refresh the docker group to reflect the changes.
newgrp docker

#update the packages.
sudo apt update
#install openjdk17 for jenkins server because for running the jenkins we need to install the java first.
sudo apt install fontconfig openjdk-17-jre -y

#Download the Jenkins repository key and store it in the keyring file.
sudo wget -O /usr/share/keyrings/jenkins-keyring.asc \
  https://pkg.jenkins.io/debian-stable/jenkins.io-2023.key

#Add the Jenkins repository to the list of package sources
echo deb [signed-by=/usr/share/keyrings/jenkins-keyring.asc] \
  https://pkg.jenkins.io/debian-stable binary/ | sudo tee \
  /etc/apt/sources.list.d/jenkins.list > /dev/null
#updating the packages.
sudo apt-get update -y
#install the jenkins.
sudo apt-get install jenkins -y

#jenkins also need to be part of docker group because we are also going to use the docker commands from jenkins pipeline.
sudo usermod -aG docker jenkins
#refresh the docker group.
newgrp docker
#restart the server to reflect the changes.
sudo systemctl restart jenkins

#download the terraform repository key and store it in the keyring file
wget -O- https://apt.releases.hashicorp.com/gpg | sudo gpg --dearmor -o /usr/share/keyrings/hashicorp-archive-keyring.gpg
#Add the terraform repository to the list of packages soures.
echo "deb [signed-by=/usr/share/keyrings/hashicorp-archive-keyring.gpg] https://apt.releases.hashicorp.com $(lsb_release -cs) main" | sudo tee /etc/apt/sources.list.d/hashicorp.list
#update the package list and install the terraform
sudo apt update && sudo apt install terraform -y

#install the pip, because we are going to install the ansible using pip
sudo apt install python3-pip -y
#install the ansible because ansible is required to run the playbook.
sudo pip install ansible

#install the required packages for trivy.
sudo apt-get install wget apt-transport-https gnupg lsb-release -y
#add the trivy respository the the keyring file.
wget -qO - https://aquasecurity.github.io/trivy-repo/deb/public.key | sudo apt-key add -
#add the trivy repository to the list of packages sources.
echo deb https://aquasecurity.github.io/trivy-repo/deb $(lsb_release -sc) main | sudo tee -a /etc/apt/sources.list.d/trivy.list
#update the package list
sudo apt-get update
#install the trivy
sudo apt-get install trivy -y
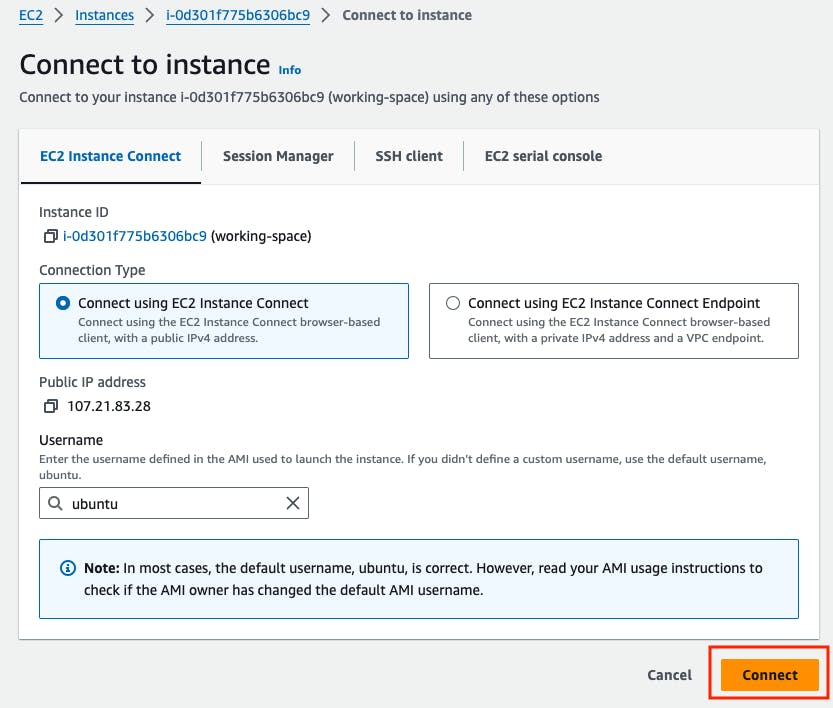
Select the 'working-space' instance -> Go to connect
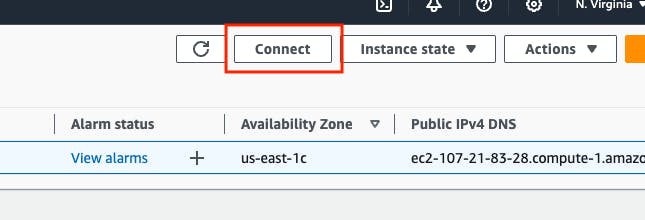
Select EC2 Instance Connect -> Go to Connect
Copy and paste the commands into the terminal to check whether all the packages are installed or not.
docker version
java --version
jenkins --version
trivy --version
terraform --version
ansible --version

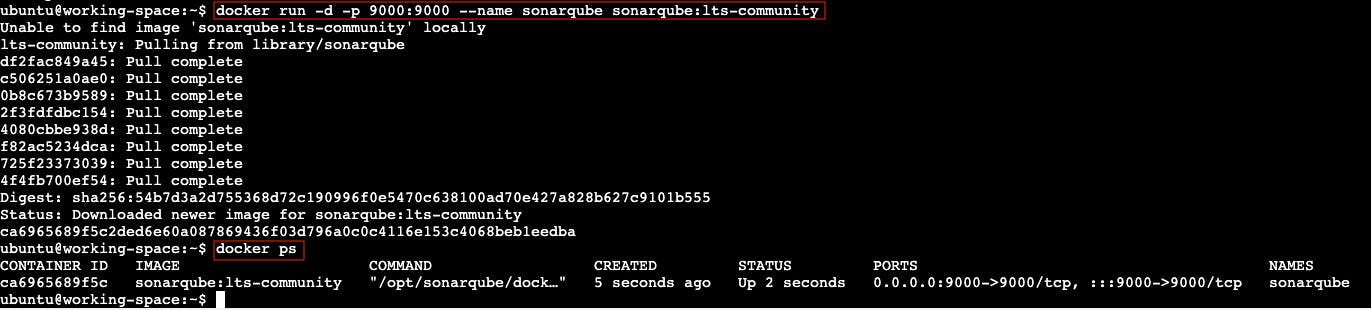
Run the SonarQube Server in the docker container.
SonarQube is an open-source platform designed for continuous inspection of code quality to perform automatic reviews with static analysis of code to detect bugs, code smells, and security vulnerabilities.
docker run -d -p 9000:9000 --name sonarqube sonarqube:lts-community
Go back to running instances -> Select the working-space instance -> Click on the instance ID from the bottom.

Go to Networking -> Copy the Public IPv4.
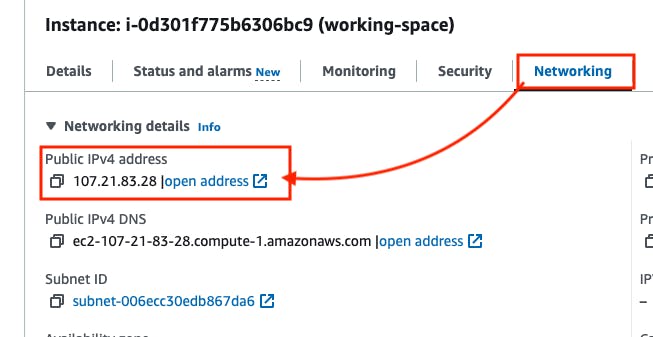
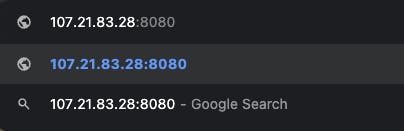
Open another tab -> paste the IP with the port
To access the Jenkins server:
To access the SonarQube server: public_ip_of_working_space_instance:9000
Step 4: Set up the Jenkins Server
Jenkins is an open-source automation server widely used for continuous integration and continuous delivery (CI/CD) of software projects. It facilitates the automation of building, testing, and deploying code changes, allowing development teams to deliver software more rapidly and reliably.
- Go to the URL -> public_ip_of_working_space_instance:8080
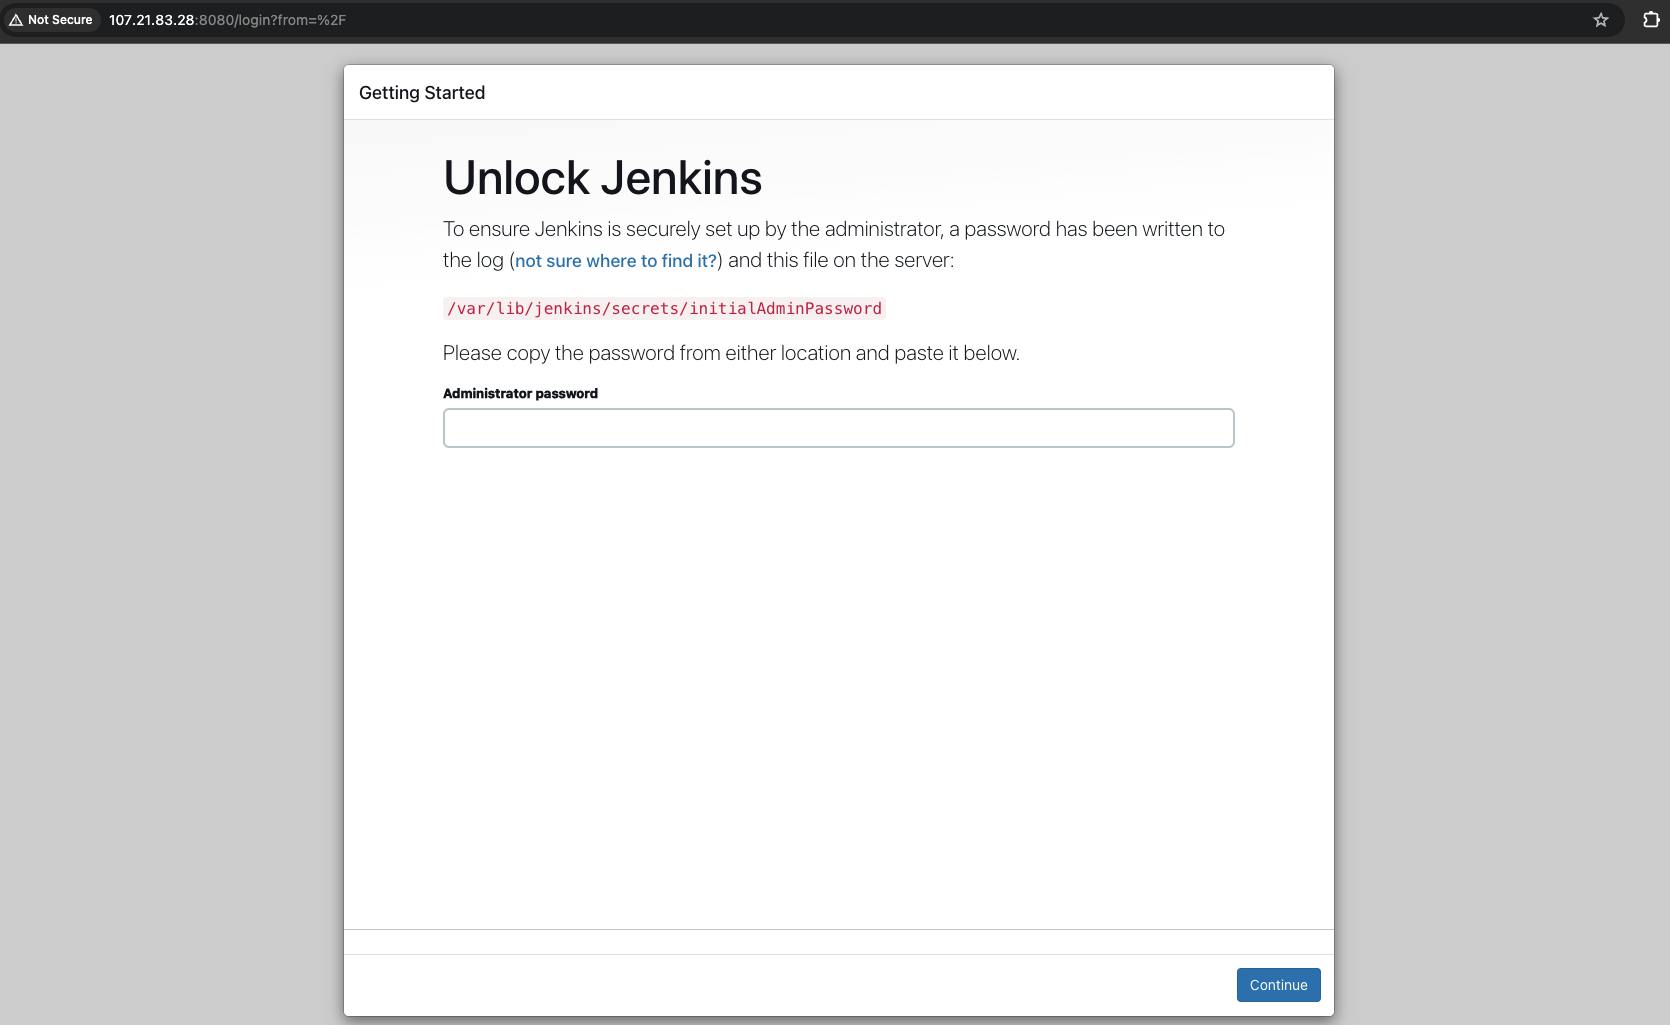
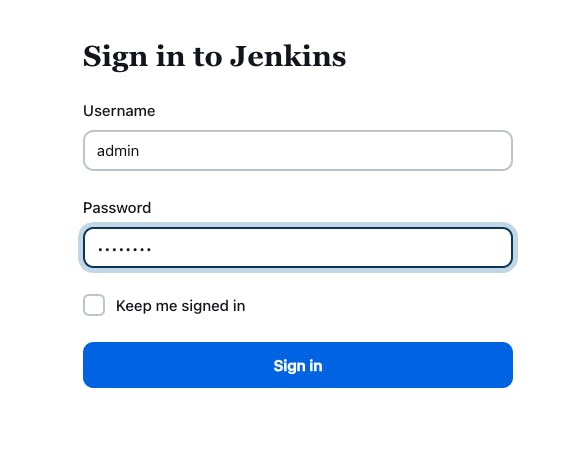
To unlock the Jenkins server, We need a password that is stored in the file initialAdminPassword. To retrieve the initial password go to the path /var/lib/jenkins/secrets/ and cat the file initialAdminPassword.
sudo cat /var/lib/jenkins/secrets/initialAdminPassword

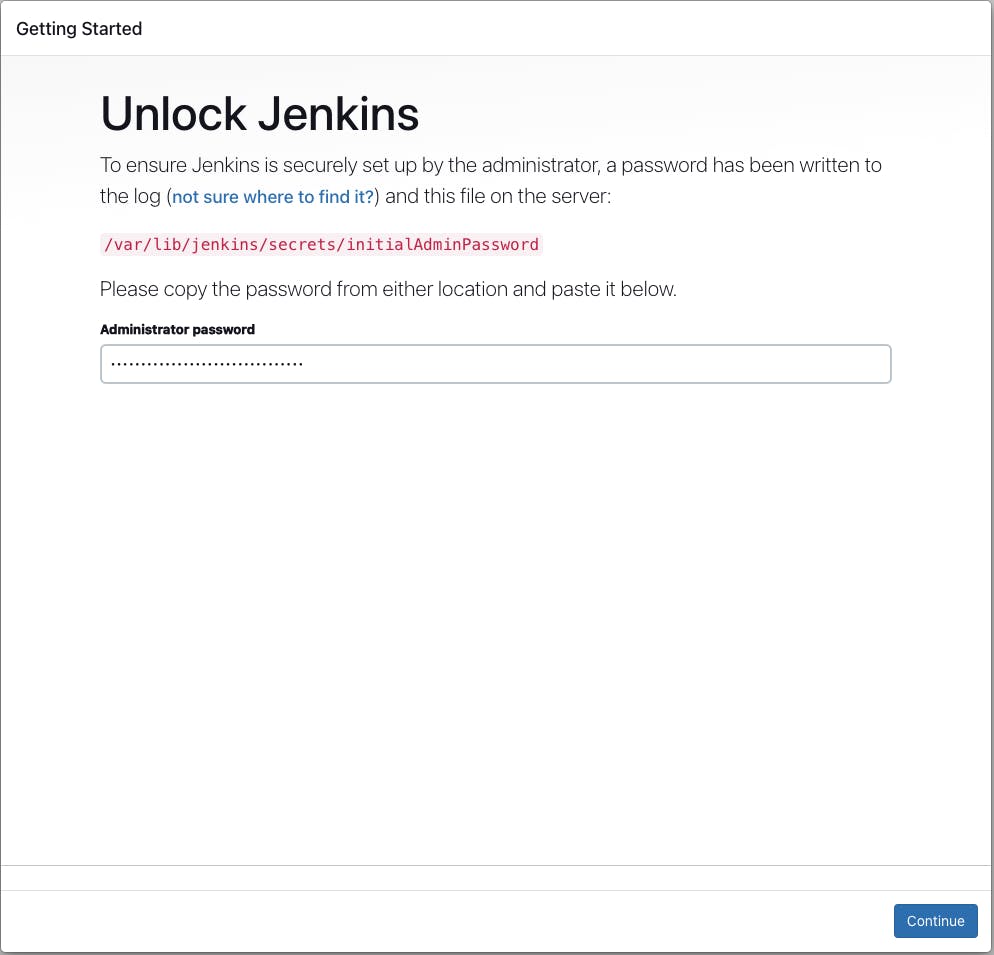
Copy the password and paste it into the Jenkins Administrator password field.
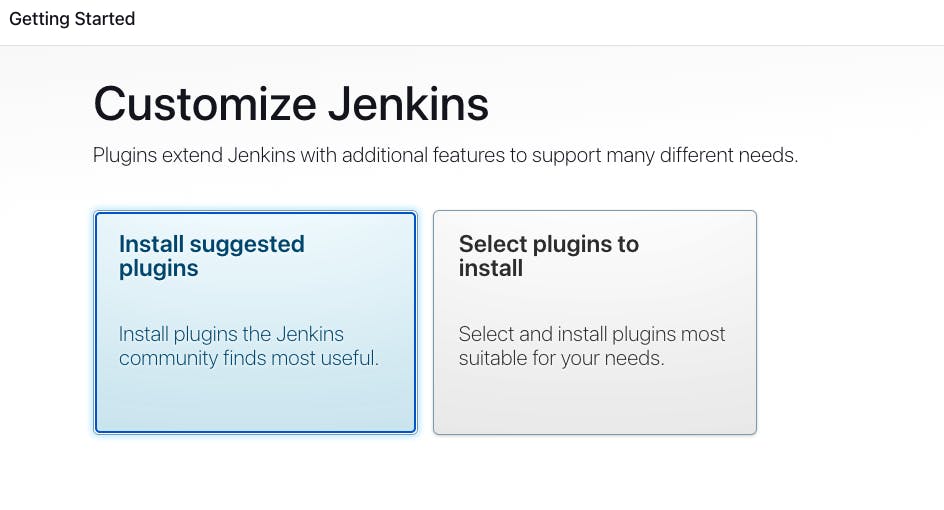
Go to Install suggested plugins.
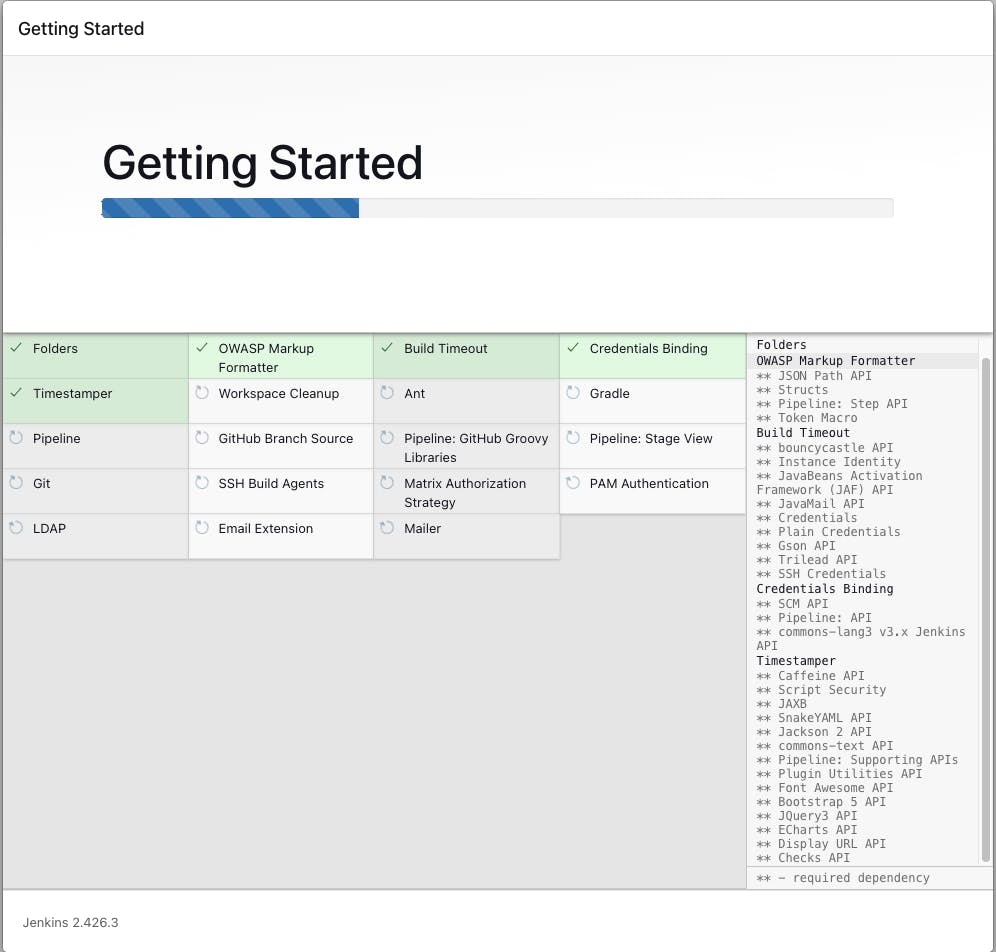
wait for the plugins to be installed.
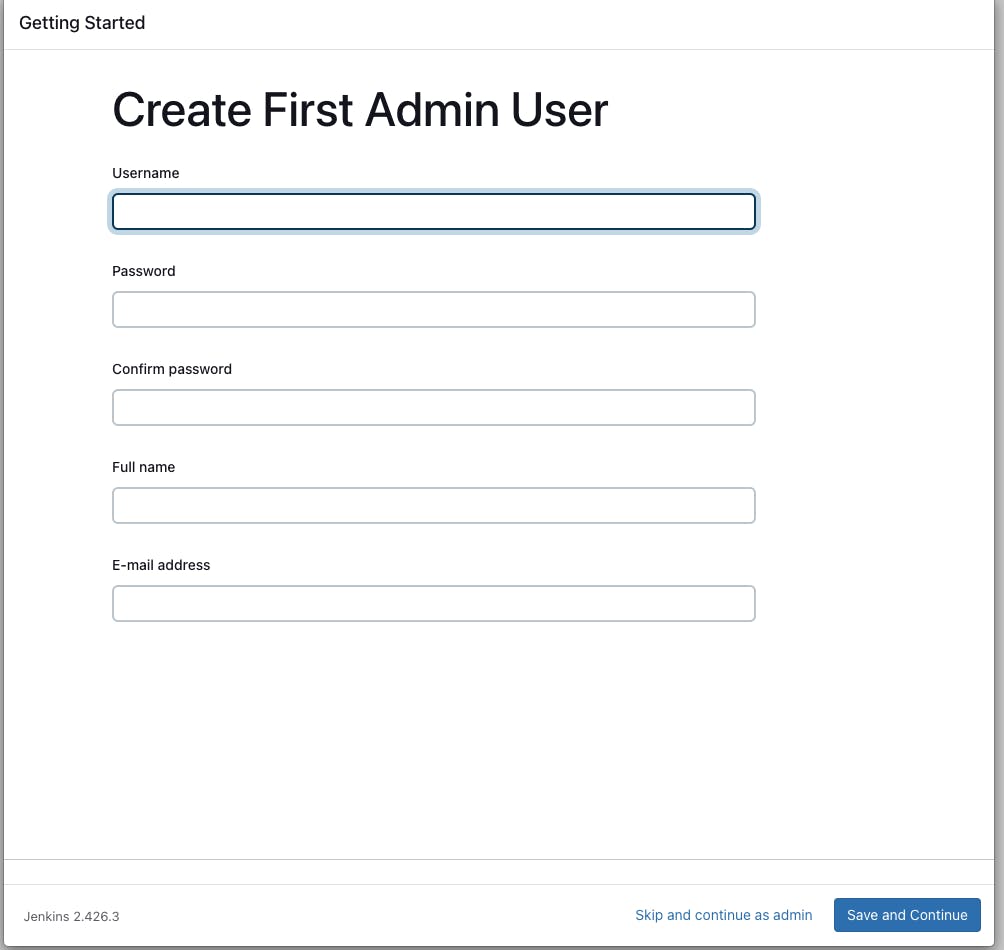
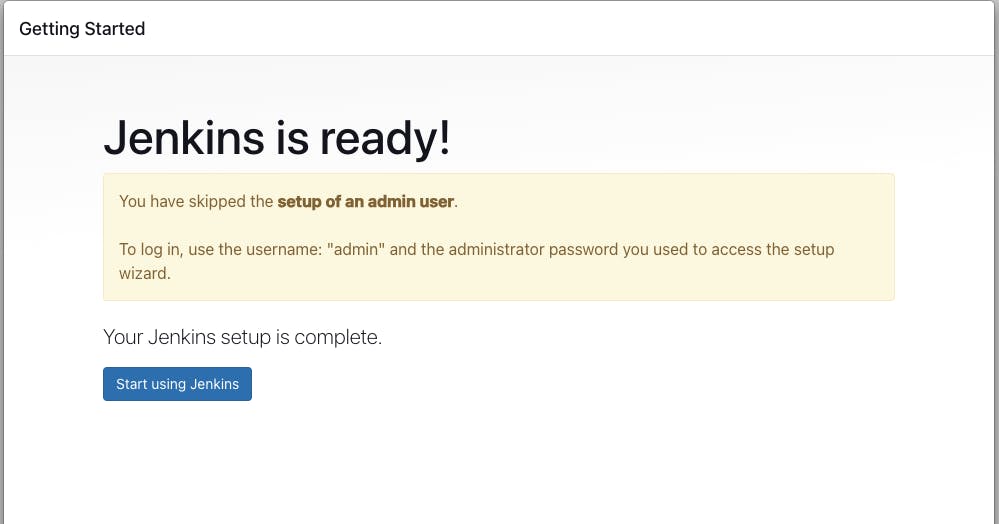
Go to skip and continue as admin.
Go to save and finish.
Go to Start using Jenkins.
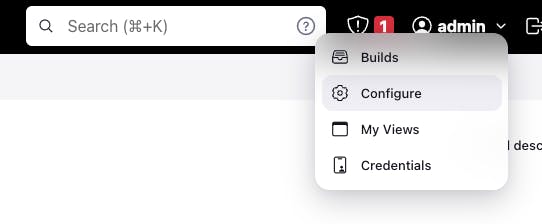
To change the password:
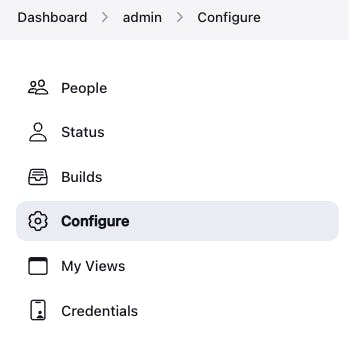
Go to the "admin" -> Configure
Go to configure -> password -> clear the old password -> enter your password

- Go to the "User Defined Time Zone"

Click on "Apply" and "Save"
then after saving, the Jenkins user will automatically log out from the Jenkins server, then you have to log in again with your username as admin and the password that you have changed.
username - admin
password - admin123
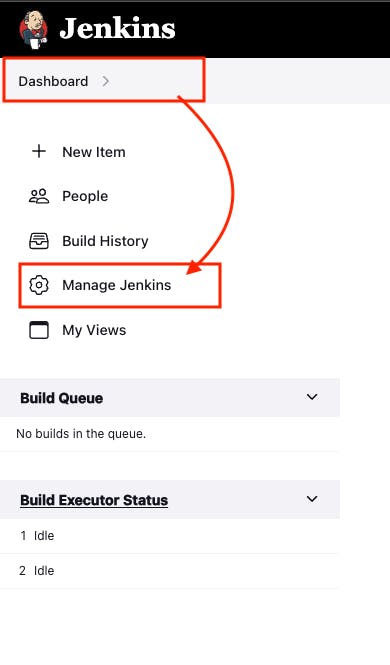
Jenkins: Install the plugins that are required to build the pipeline.
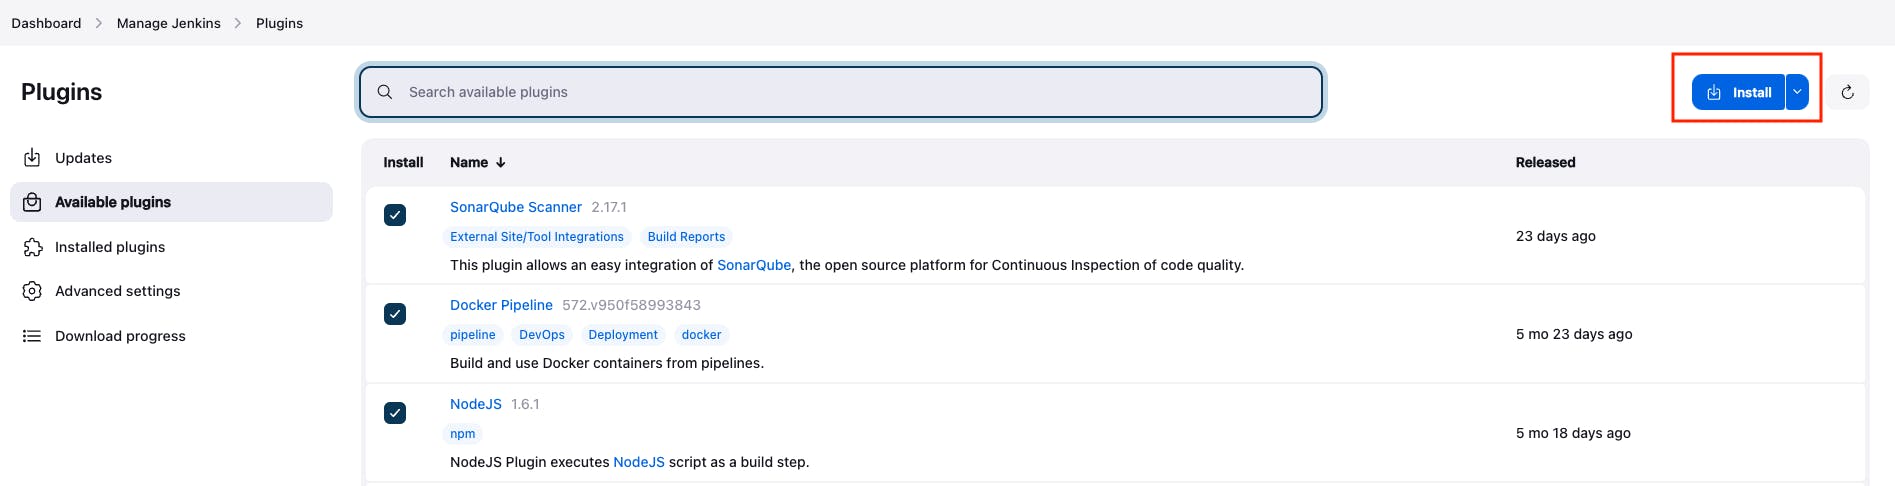
Go to Dashboard -> Manage Jenkins -> Plugins -> Available Plugins
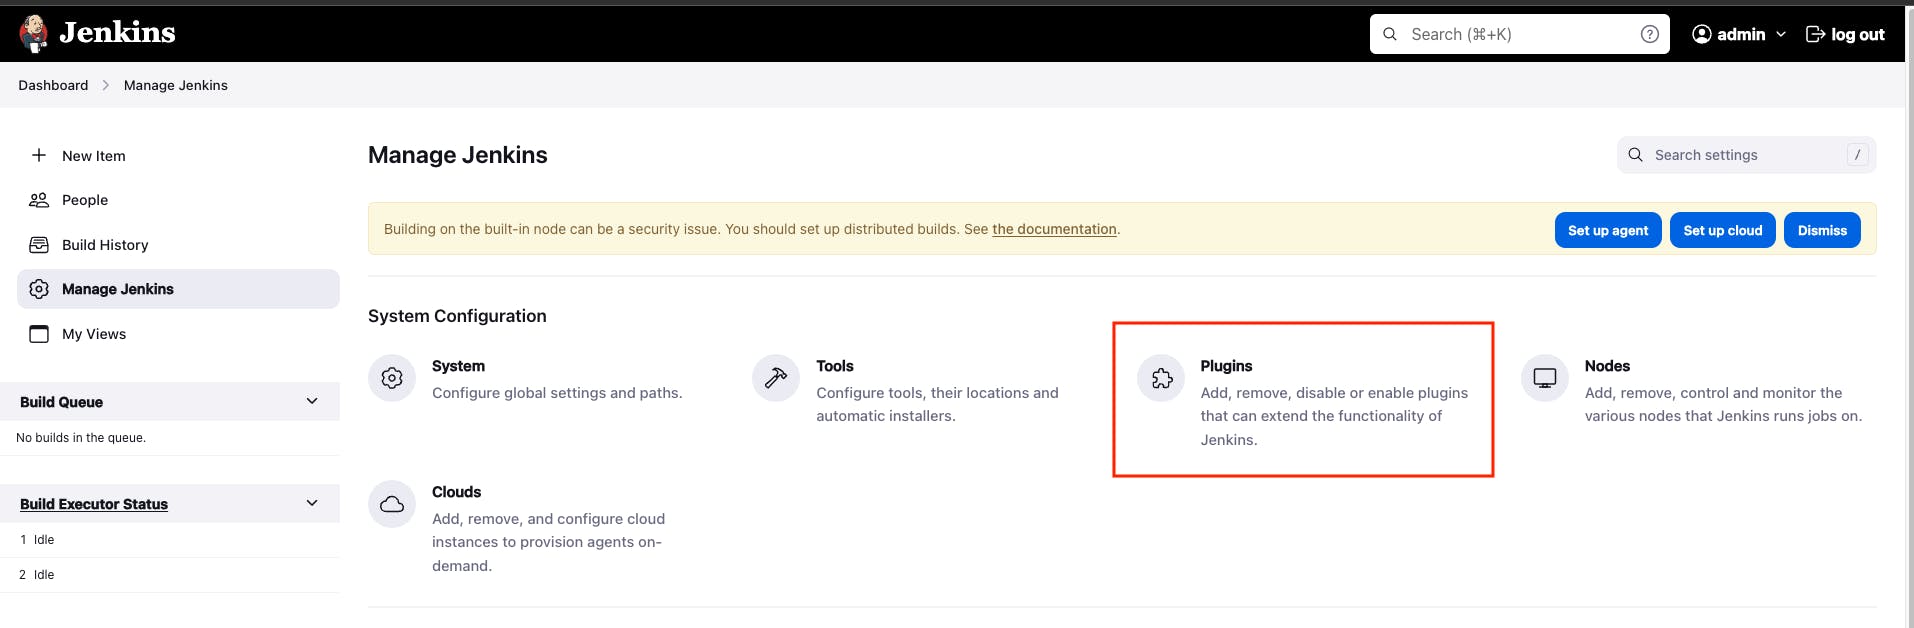
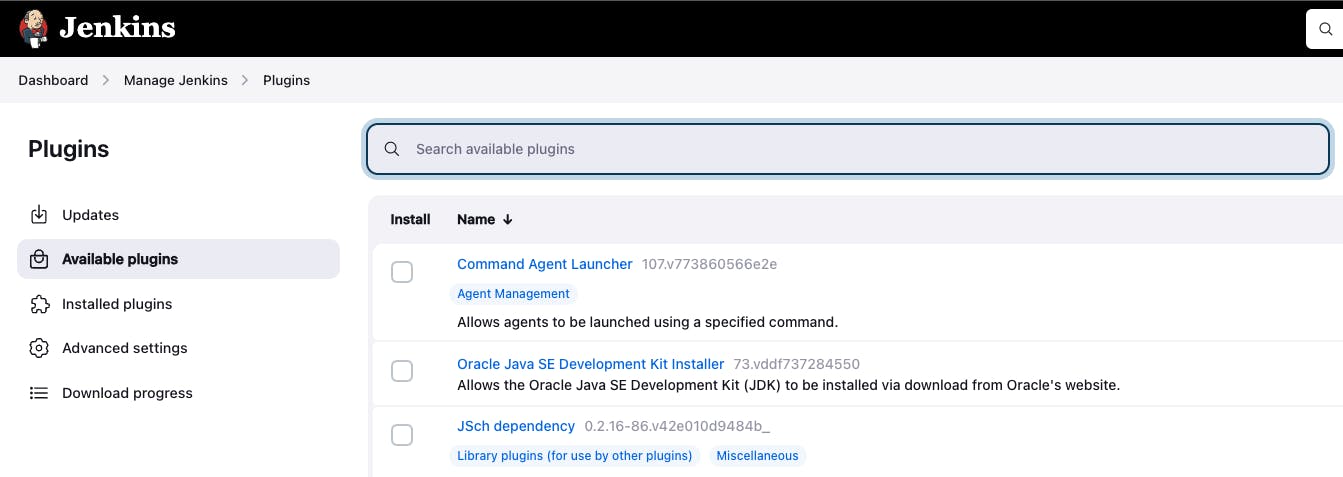
Search the Sonar scanner plugin and add it for the install
Search the docker pipeline plugin and add it for the install
Search the NodeJS plugin and add it for the install
Search the OWASP plugin and add it for the install
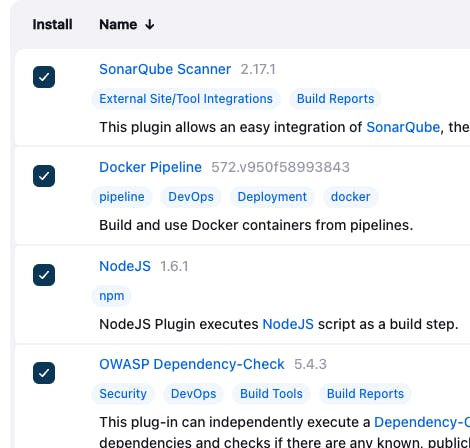
- Go to install for all the added plugins.
Step 5: Set up the SonarQube Server
Go to the URL -> public_ip_of_working_space_instance:9000
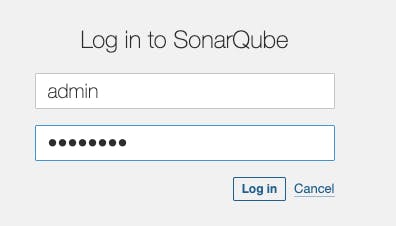
To log into the SonarQube Server the default username and password is:
Login -> admin
Password -> admin
After login, you have to change the password.
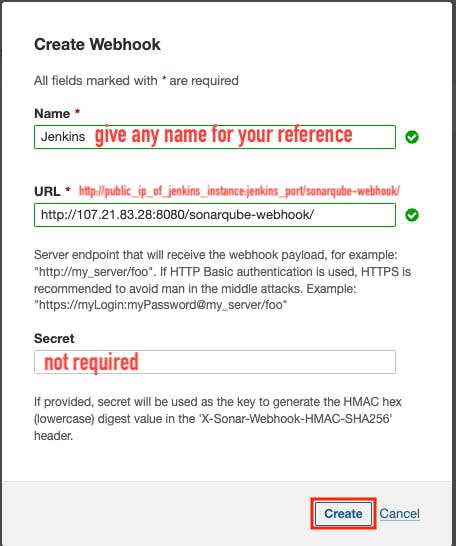
Add SonarQube Webhook for Quality Gate
Go to Administration -> Configurations -> Webhooks -> Create
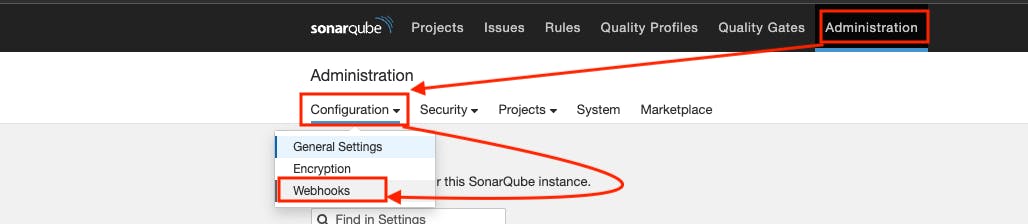

Jenkins SonarQube Webhook endpoint -> /sonarqube-webhook/

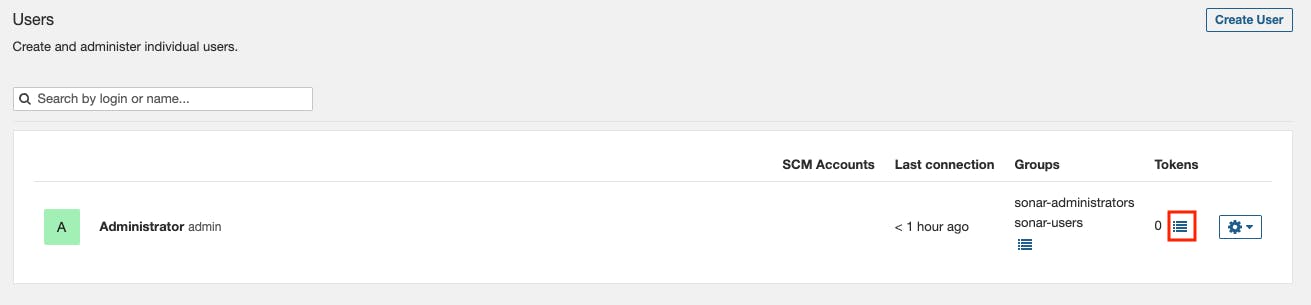
Create a SonarQube token for Sonar Scanner
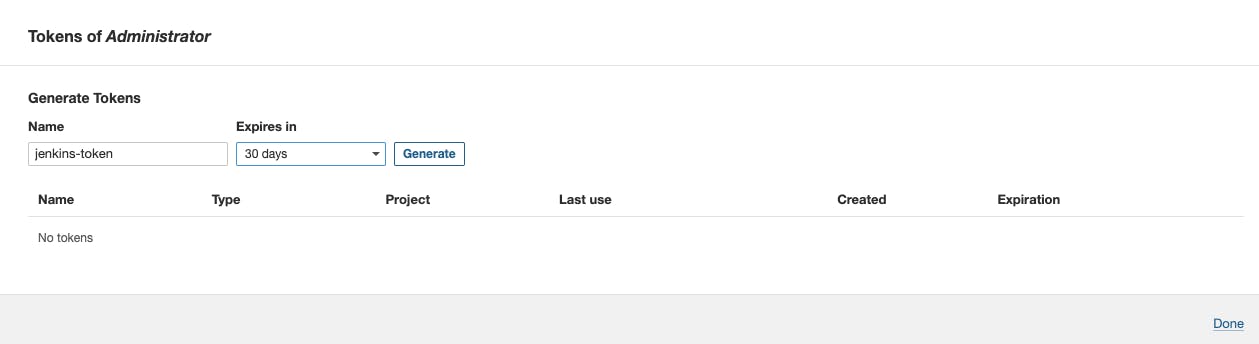
Go to Administration -> Security -> Users
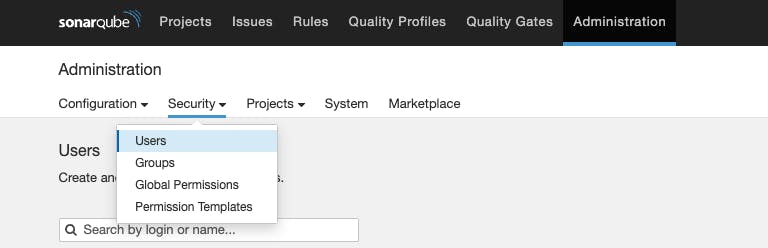
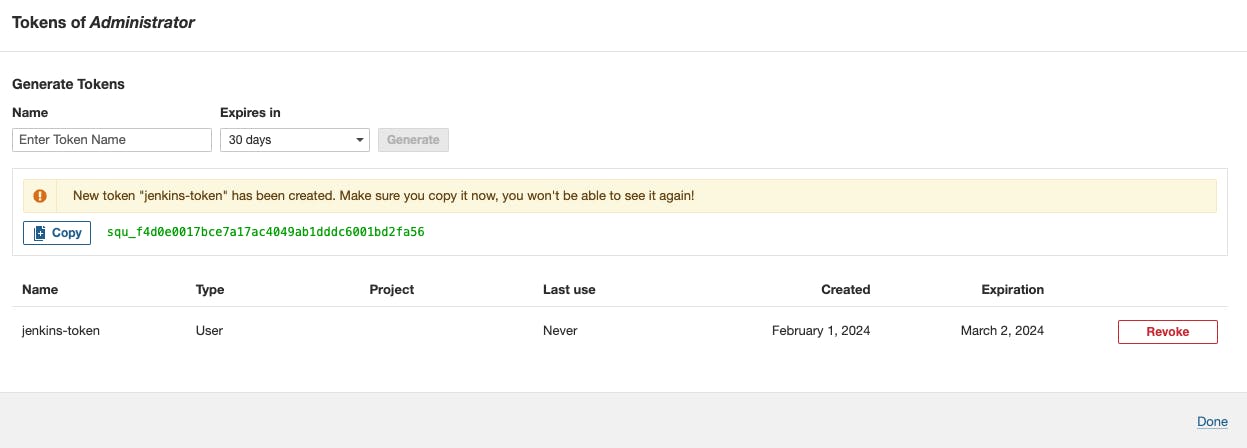
Go to tokens -> Name of the token -> generate -> copy the token
Note: If you click on done without copying the token then you won't retrieve the token back, you have to create the token again.
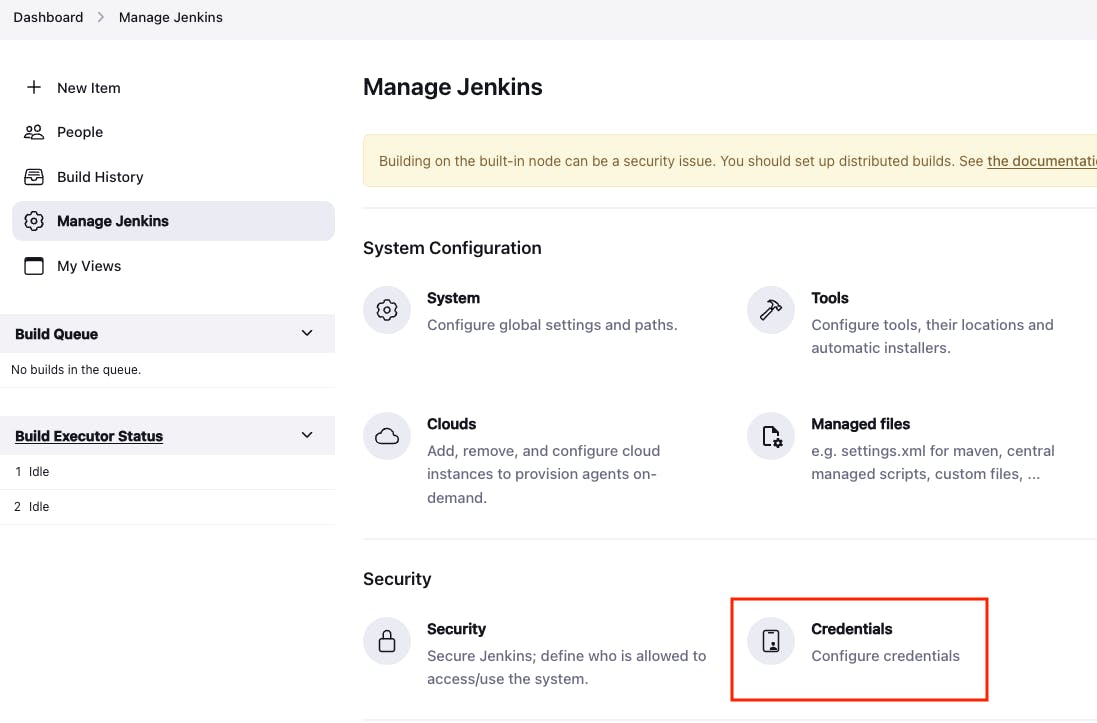
Step 6: Jenkins: Add required credentials
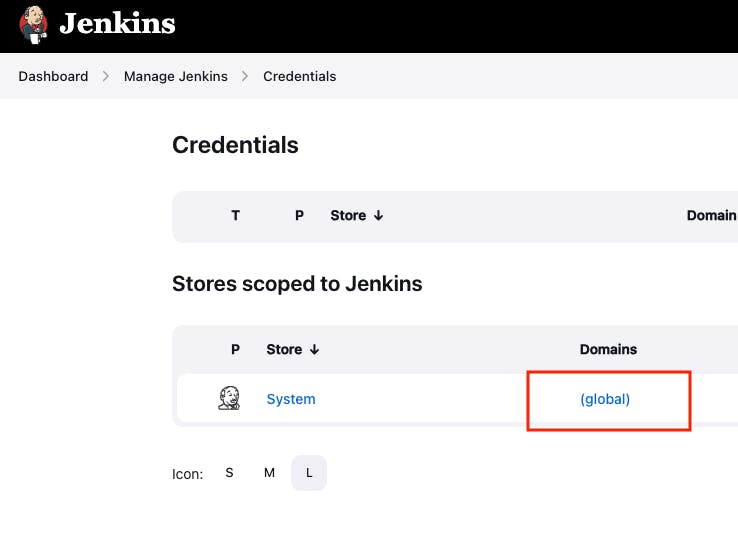
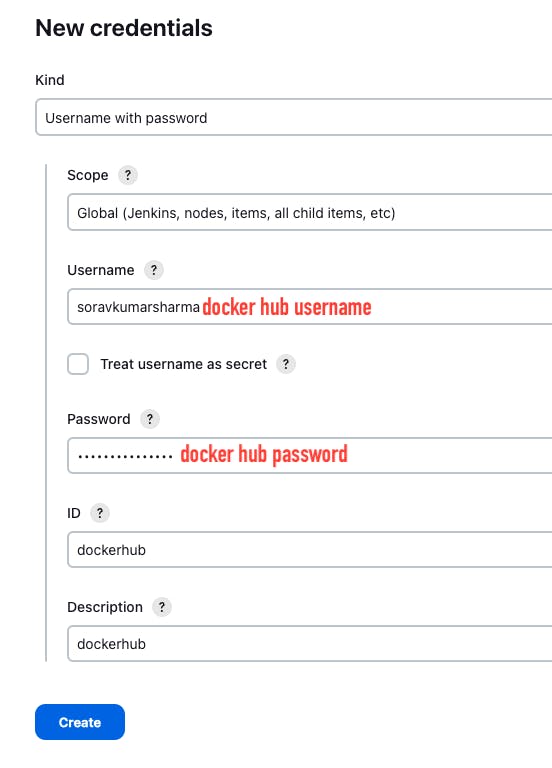
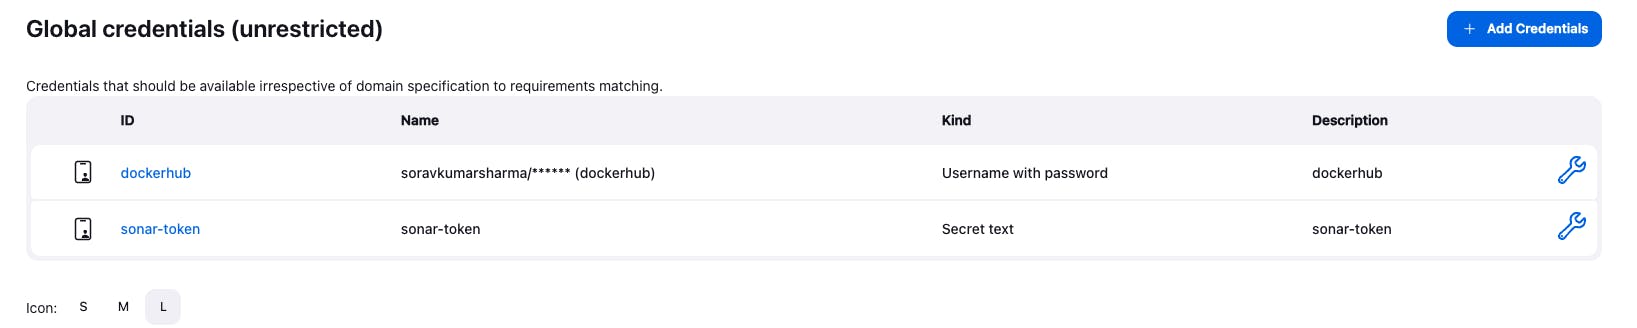
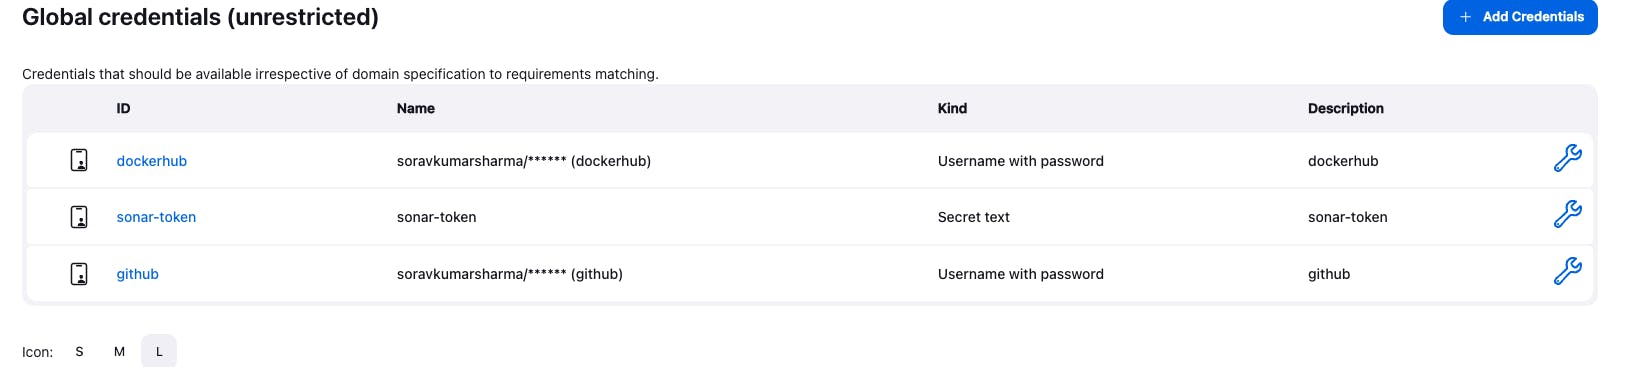
- Go to dashboard -> Manage Jenkins -> Credentials -> global -> Add Credentials

- Add Docker registry credentials, because we need to add the Docker registry credentials to push the Docker image into the Docker registry.

Go to again "Add Credentials"
Add the SonarQube token for the sonar scanner.

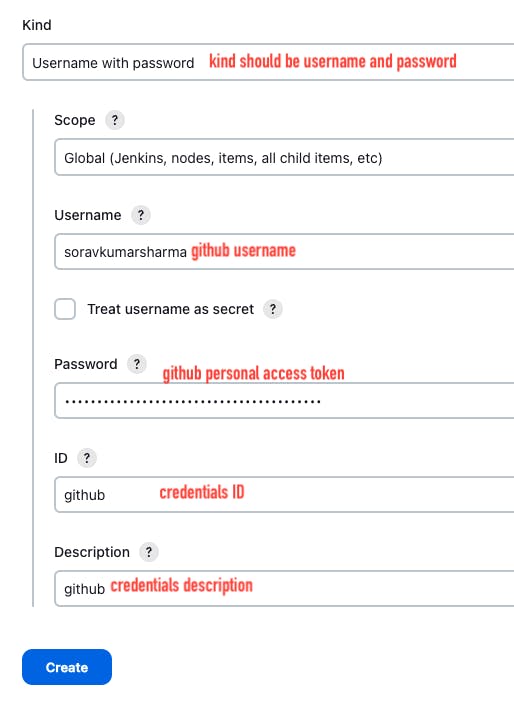
Add the GitHub credentials, to push the code into the Git repository we need to add the credentials.
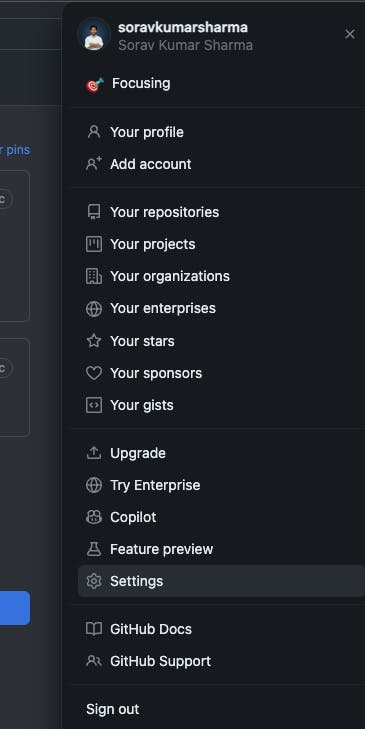
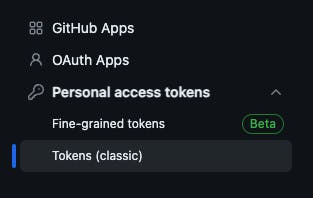
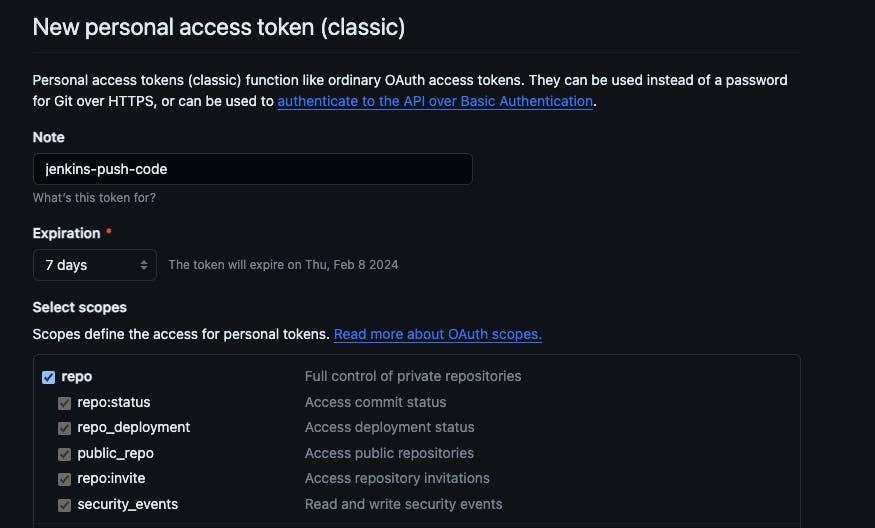
Go to "github.comyour_github_user_name" -> Go to profile -> Settings -> Developer settings -> personal access tokens -> Tokens -> Generate a new token -> generate a new token (classic)

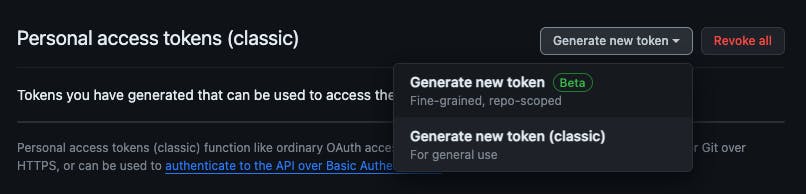
- Give a note just for your reference -> select the expiration date -> select the token scope -> repo -> generate a token -> copy the token
Go back to the Jenkins server:
Go to dashboard -> Manage Jenkins -> Credentials -> global -> Add Credentials
Step 7: Set up the tools and server for the Jenkins pipeline.
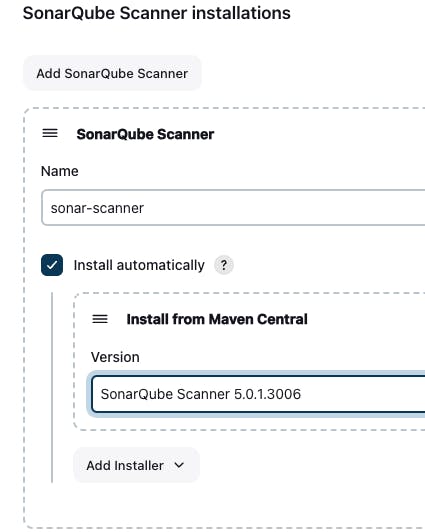
"SonarQube Scanner Installation", to install the sonar scanner tool click on the add "Sonarqube scanner installation" button, give the tool name "sonar-scanner" and select "install automatically"
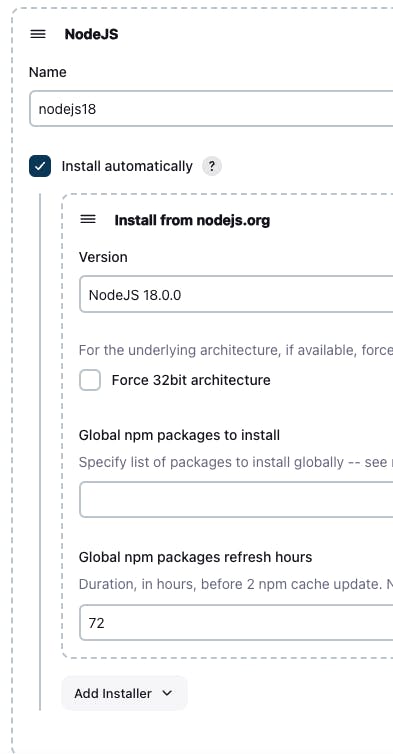
Install another tool "NodeJS", to install this tool click on the "add NodeJS" button to install the NodeJS, for our project we need NodeJs-18, The NodeJS is needed to install the modules from the package.json file
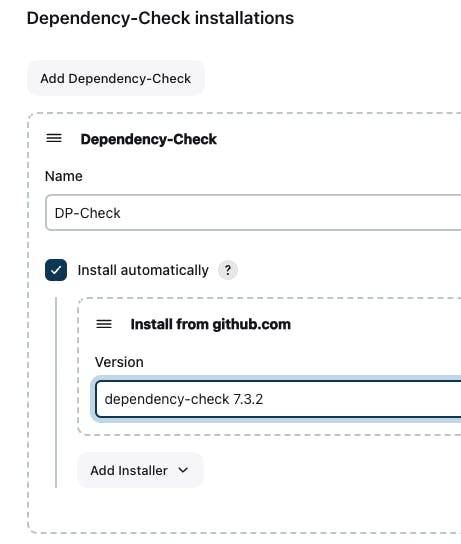
Install another tool "OWASP":
To install this tool, click on the "Add Dependency-Check" button, give the tool name "DP-Check"
select the "Install automatically" button, and then click on the button "Add Installer" and then Select the "Install from Github.com" button. to install the tool from Git Hub.
Setup the SonarQube server
Go to Jenkins Dashboard -> Go to Manage Jenkins -> Go to Systems -> Scroll the Page and in the SonarQube Server Click on the "Add SonarQube" button.
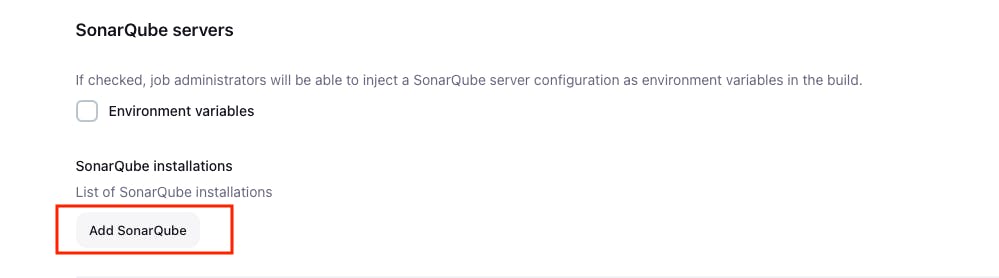
Give the name of the as "sonar-server" and paste the URL public_ip_of_working_space_instance:9000
select the token that we added before, and then click on apply and save.

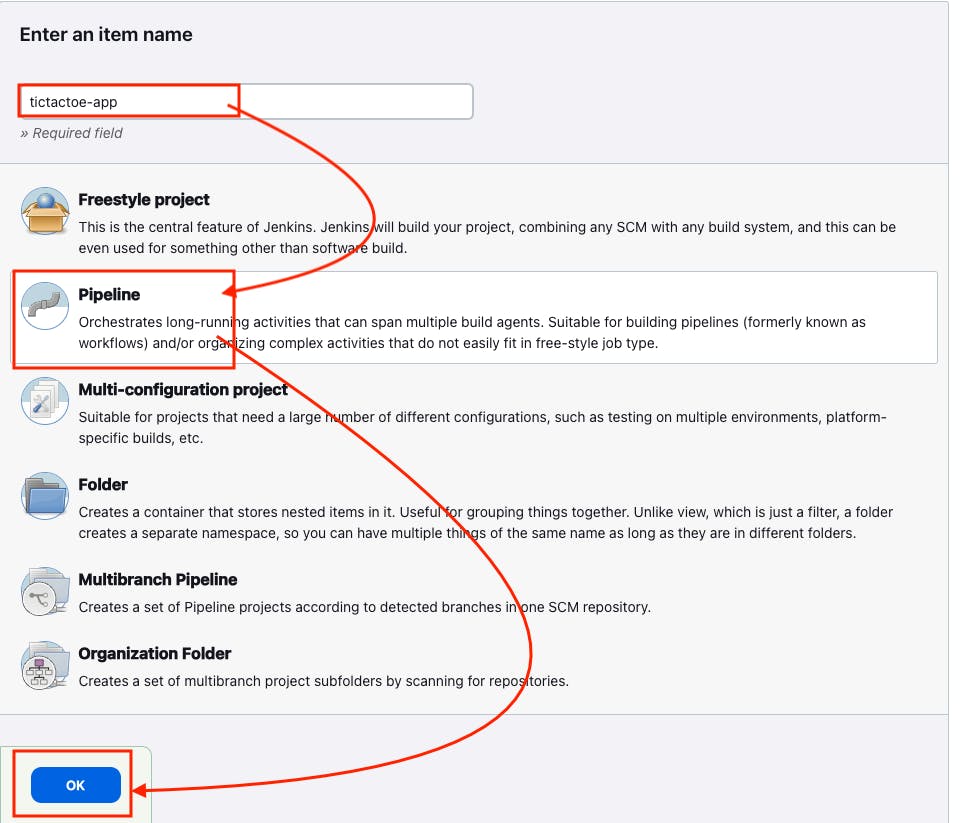
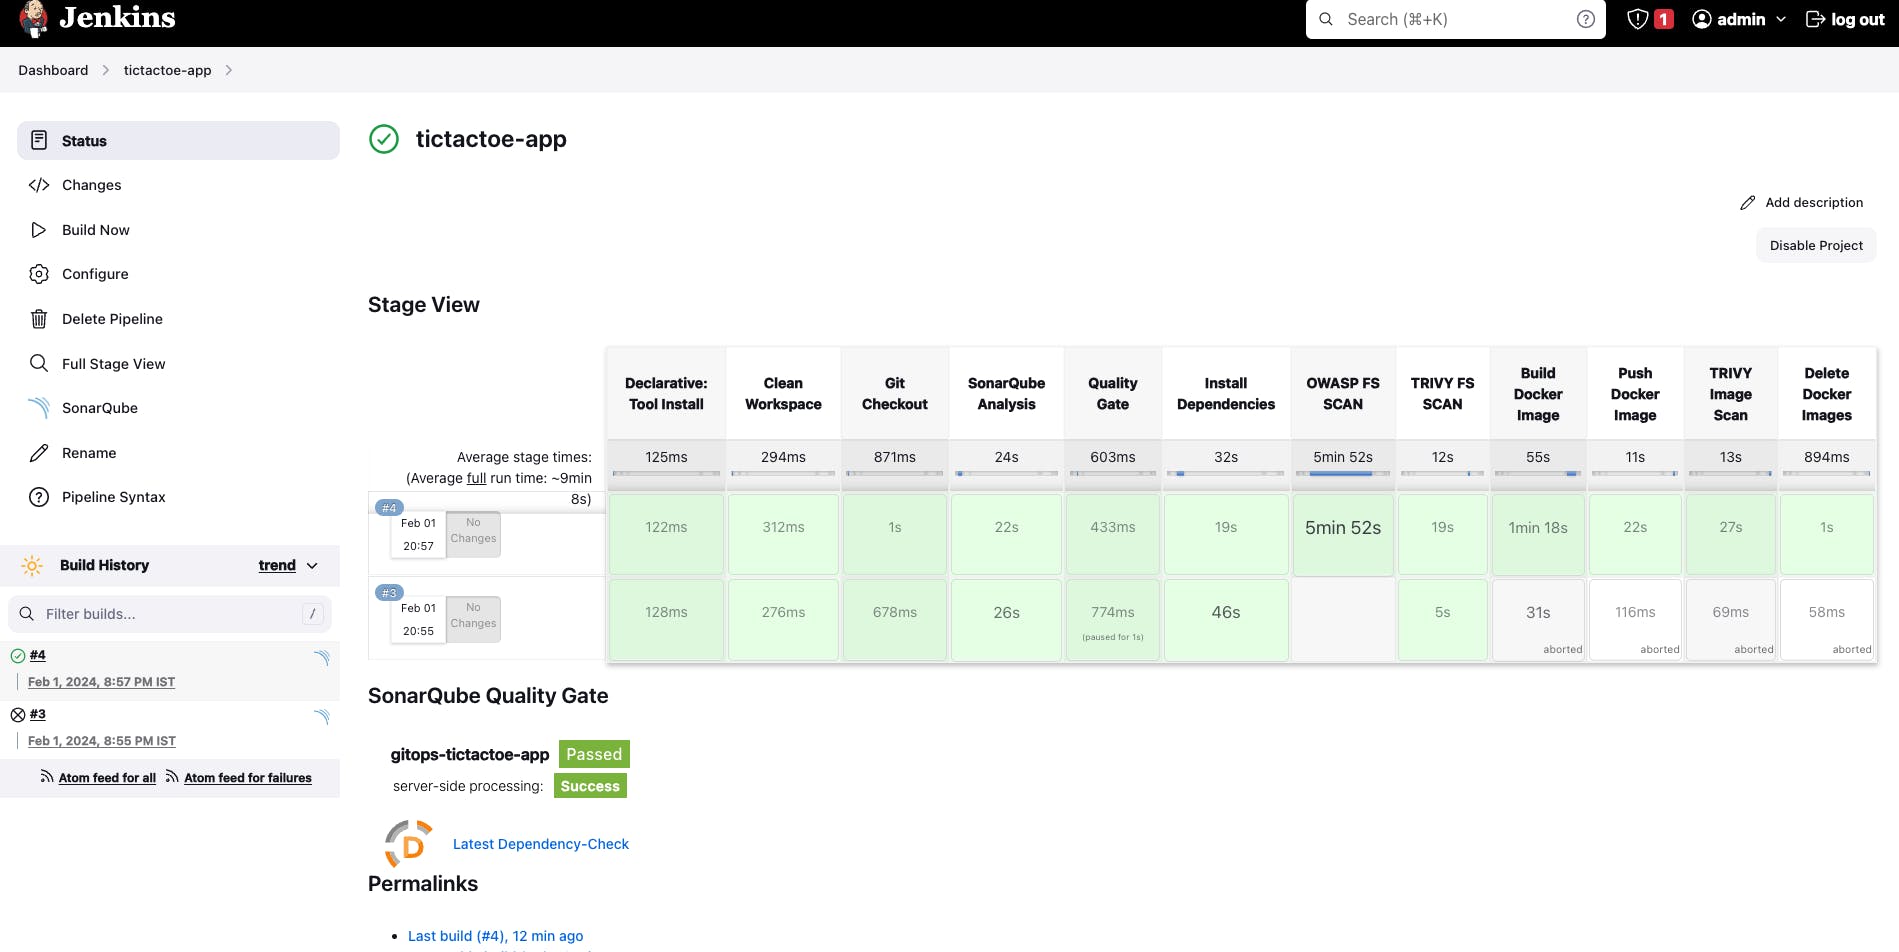
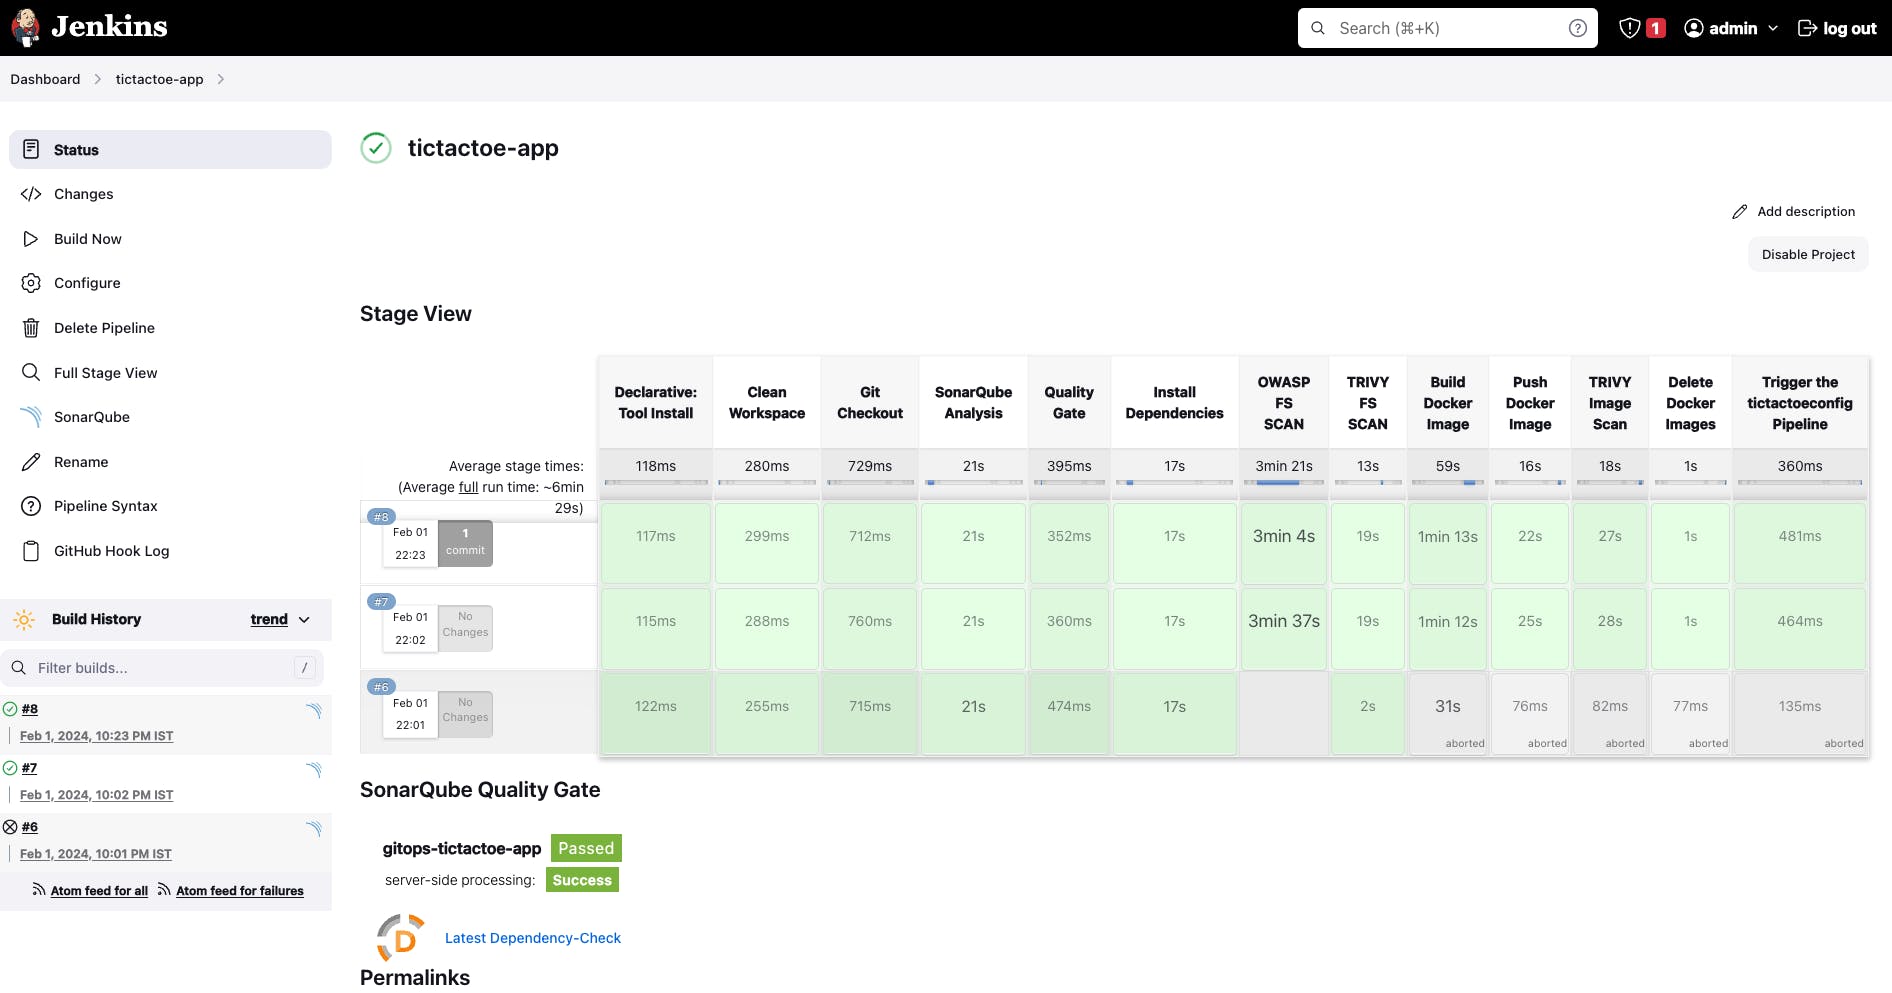
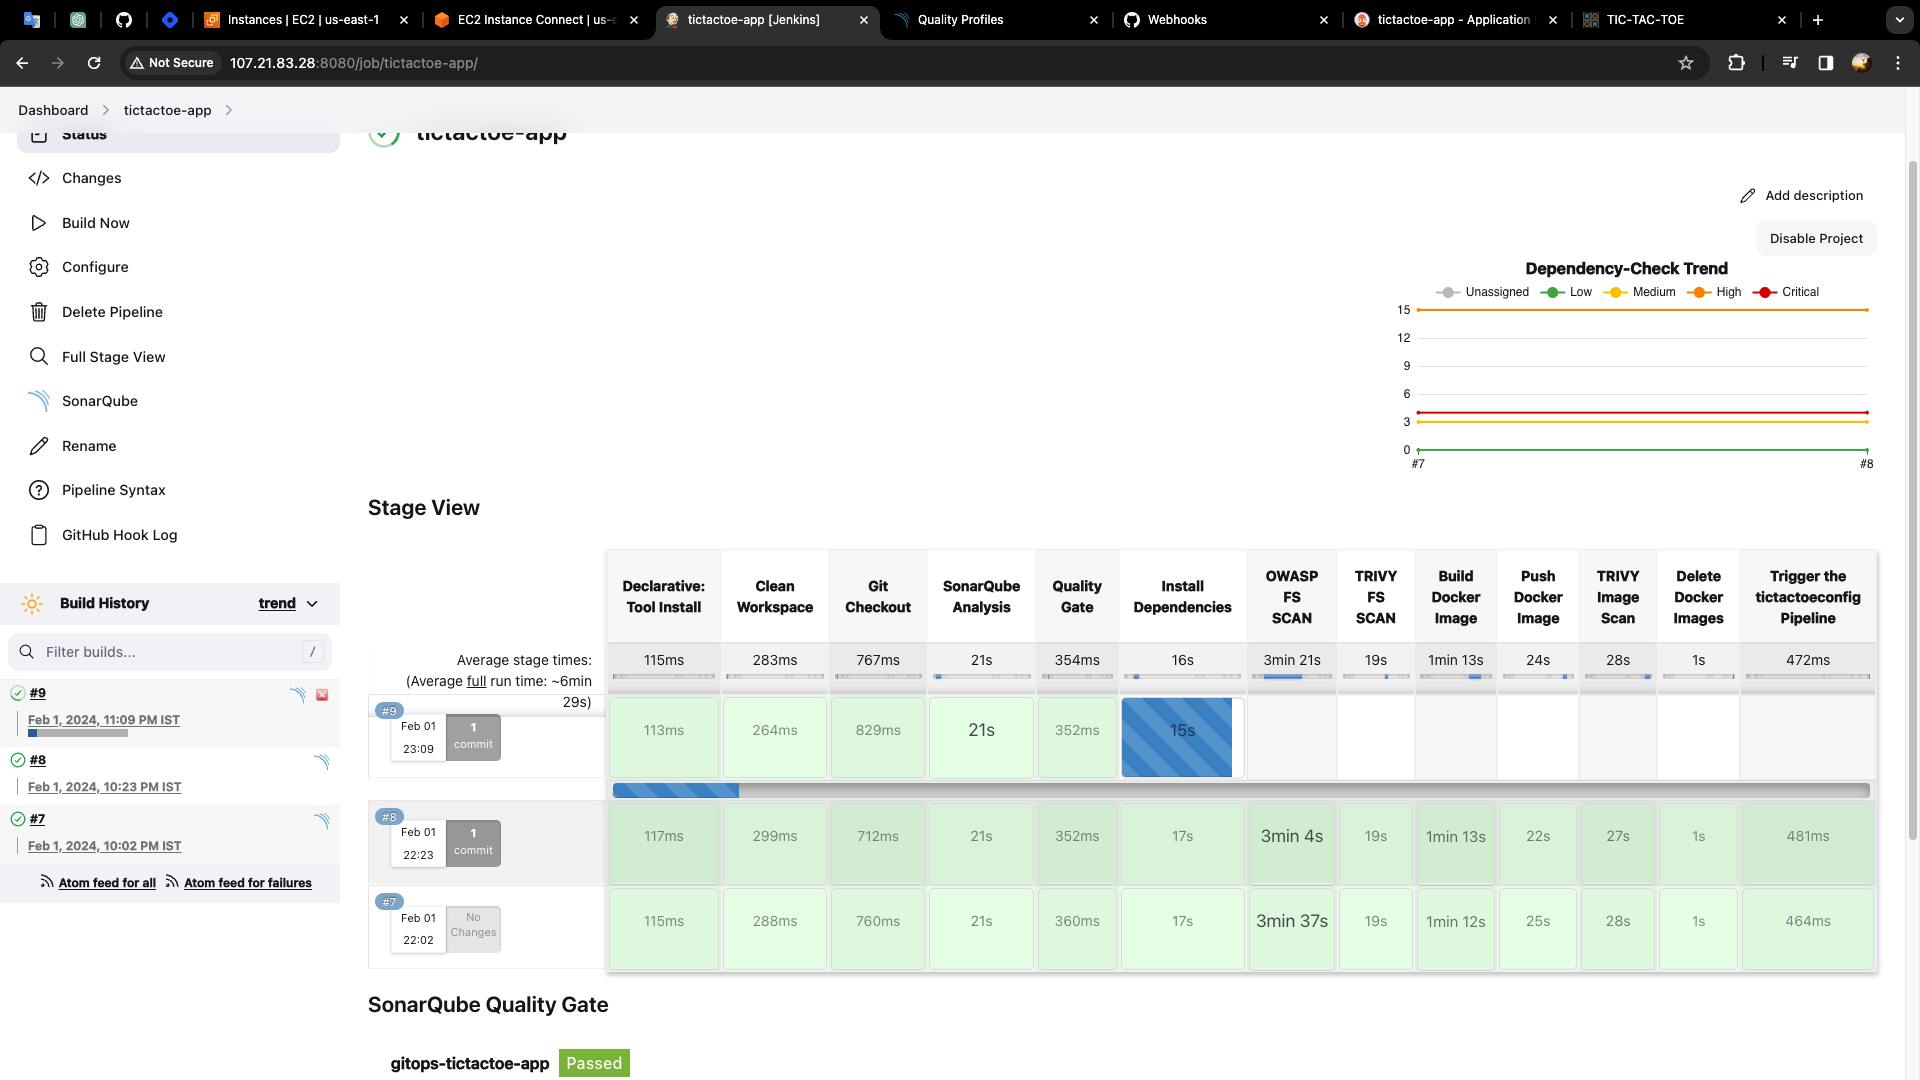
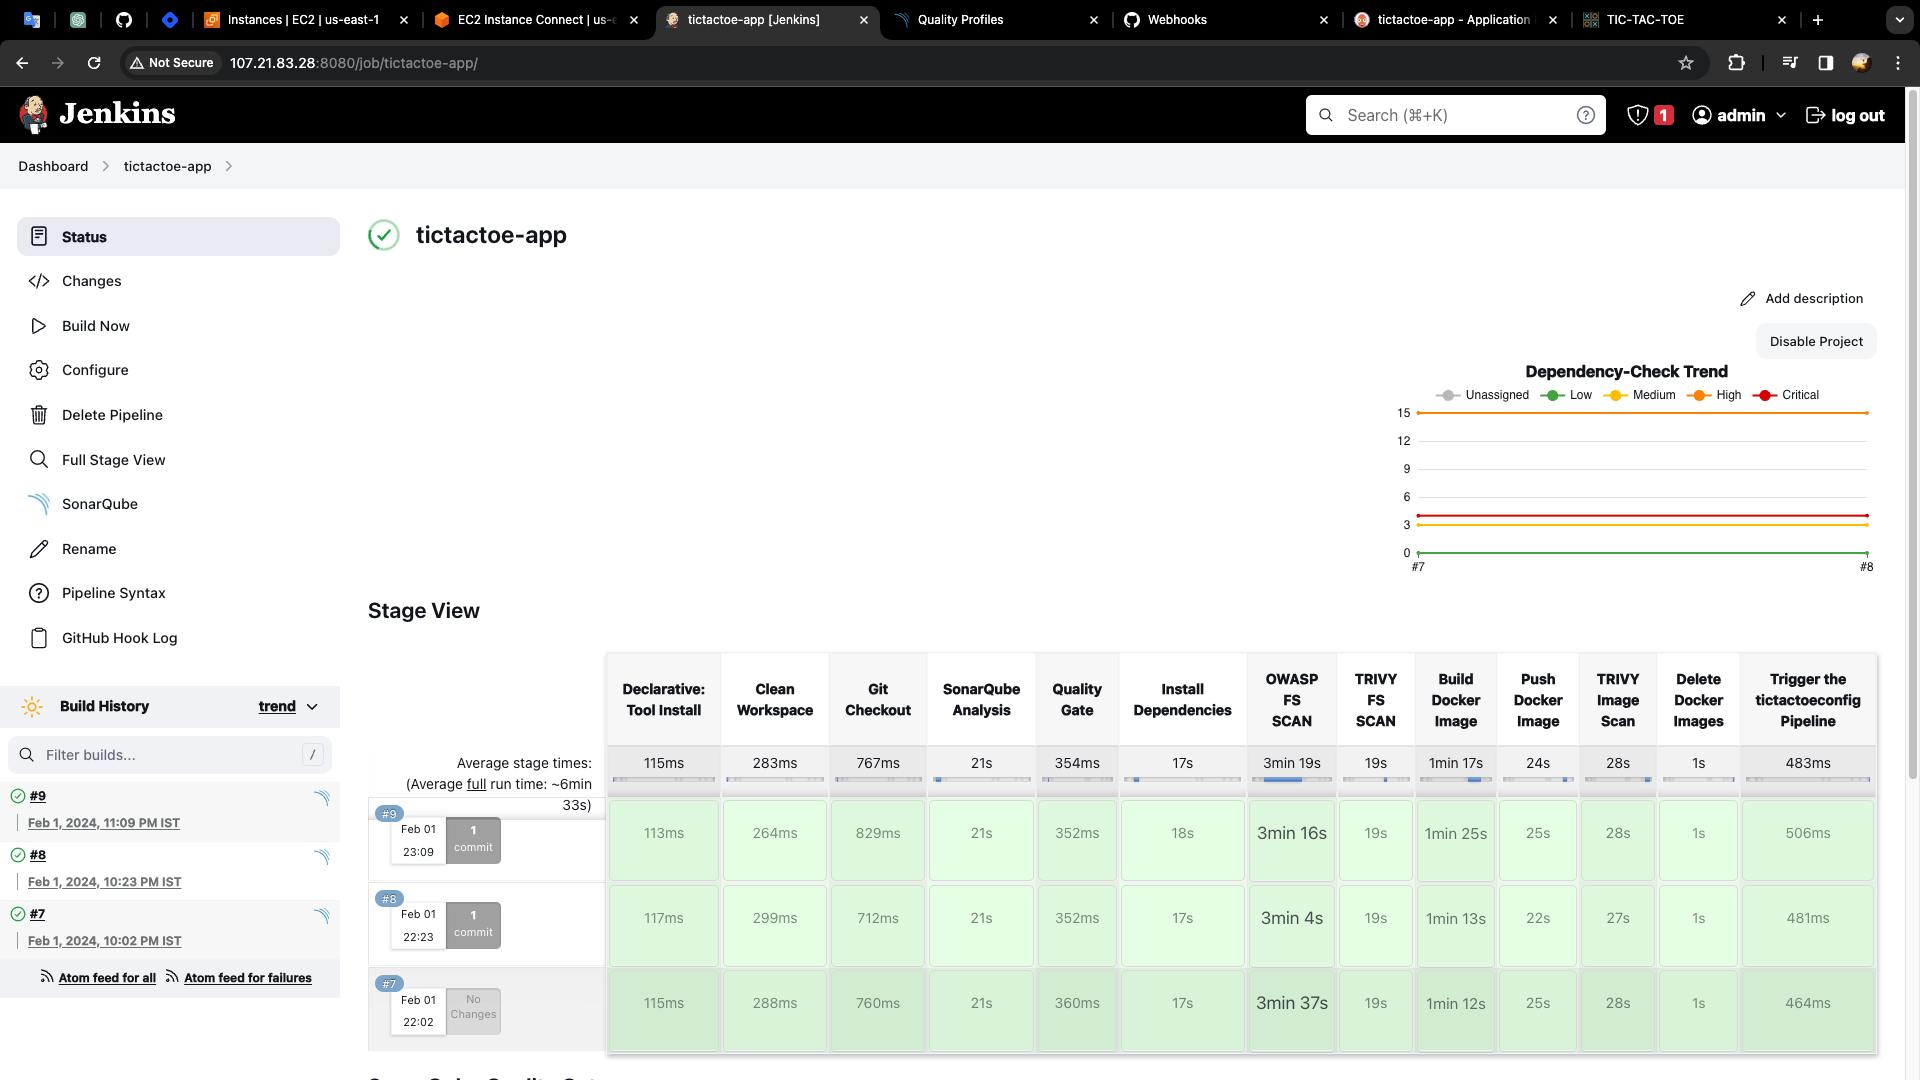
Step 8: Create the declarative pipeline for "tictactoe-app"
- Go to Jenkins dashboard -> New Item -> Give the Job name "tictactoe-app" -> Select the pipeline -> and then Click on "OK"
In this pipeline, we use tools like:
SonarQube Scanner -> to perform static code analysis.
Trivy -> to scan the file systems and docker images.
OWASP Dependency-Check -> is an open-source tool that identifies project dependencies and checks if there are any known, publicly disclosed, vulnerabilities.
NodeJS 18 -> to install the required modules or dependencies.
Docker -> to build and push the images into the docker registry.
pipeline {
agent any
options {
buildDiscarder logRotator(daysToKeepStr: '1', numToKeepStr: '2')
}
tools {
nodejs 'nodejs18'
}
environment {
SCANNER_HOME = tool 'sonar-scanner'
APP_NAME = "gitops-tictactoe-app"
DOCKERHUB_USERNAME = "soravkumarsharma"
IMAGE_TAG = "${BUILD_NUMBER}"
IMAGE_NAME = "${DOCKERHUB_USERNAME}" + "/" + "${APP_NAME}"
}
stages {
stage ('Clean Workspace') {
steps {
cleanWs()
}
}
stage ('Git Checkout') {
steps {
git branch: 'main', url: 'https://github.com/soravkumarsharma/GitOps-TicTacToe-App.git'
}
}
stage ('SonarQube Analysis') {
steps {
withSonarQubeEnv(credentialsId: 'sonar-token', installationName: 'sonar-server') {
sh ''' $SCANNER_HOME/bin/sonar-scanner -Dsonar.projectName=${APP_NAME} \
-Dsonar.projectKey=${APP_NAME} '''
}
}
}
stage('Quality Gate') {
steps {
script {
timeout(time: 1, unit: 'HOURS') {
def qg = waitForQualityGate()
if (qg.status != 'OK') {
error "Pipeline aborted due to quality gate failure: ${qg.status}"
}
}
}
}
}
stage('Install Dependencies') {
steps {
sh "npm install"
}
}
stage('OWASP FS SCAN') {
steps {
dependencyCheck additionalArguments: '--scan ./ --disableYarnAudit --disableNodeAudit', odcInstallation: 'DP-Check'
dependencyCheckPublisher pattern: '**/dependency-check-report.xml'
}
}
stage('TRIVY FS SCAN') {
steps {
sh "trivy fs . > trivyfs.txt"
}
}
stage('Build Docker Image'){
steps {
script{
docker_image = docker.build "${IMAGE_NAME}"
}
}
}
stage('Push Docker Image'){
steps {
script{
docker.withRegistry('', 'dockerhub'){
docker_image.push("${BUILD_NUMBER}")
docker_image.push('latest')
}
}
}
}
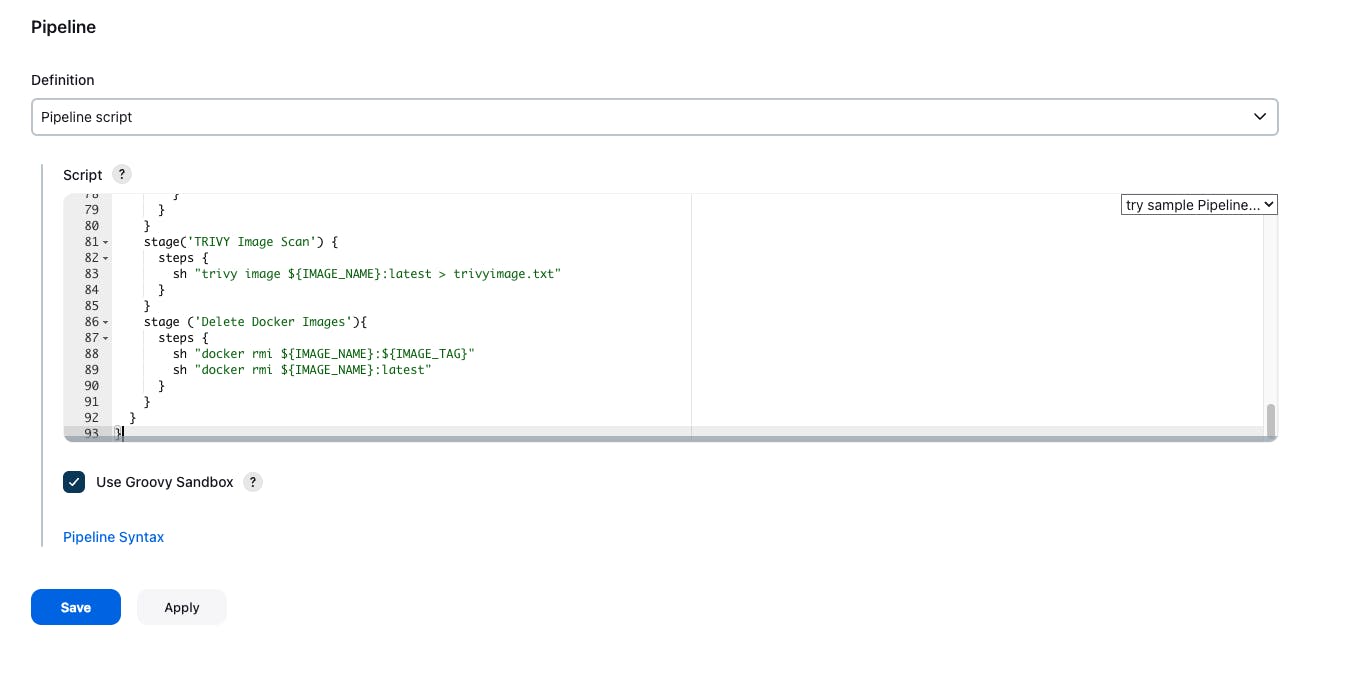
stage('TRIVY Image Scan') {
steps {
sh "trivy image ${IMAGE_NAME}:latest > trivyimage.txt"
}
}
stage ('Delete Docker Images'){
steps {
sh "docker rmi ${IMAGE_NAME}:${IMAGE_TAG}"
sh "docker rmi ${IMAGE_NAME}:latest"
}
}
}
}
- Copy the pipeline and paste the pipeline code in the pipeline block -> apply and save -> build the pipeline.
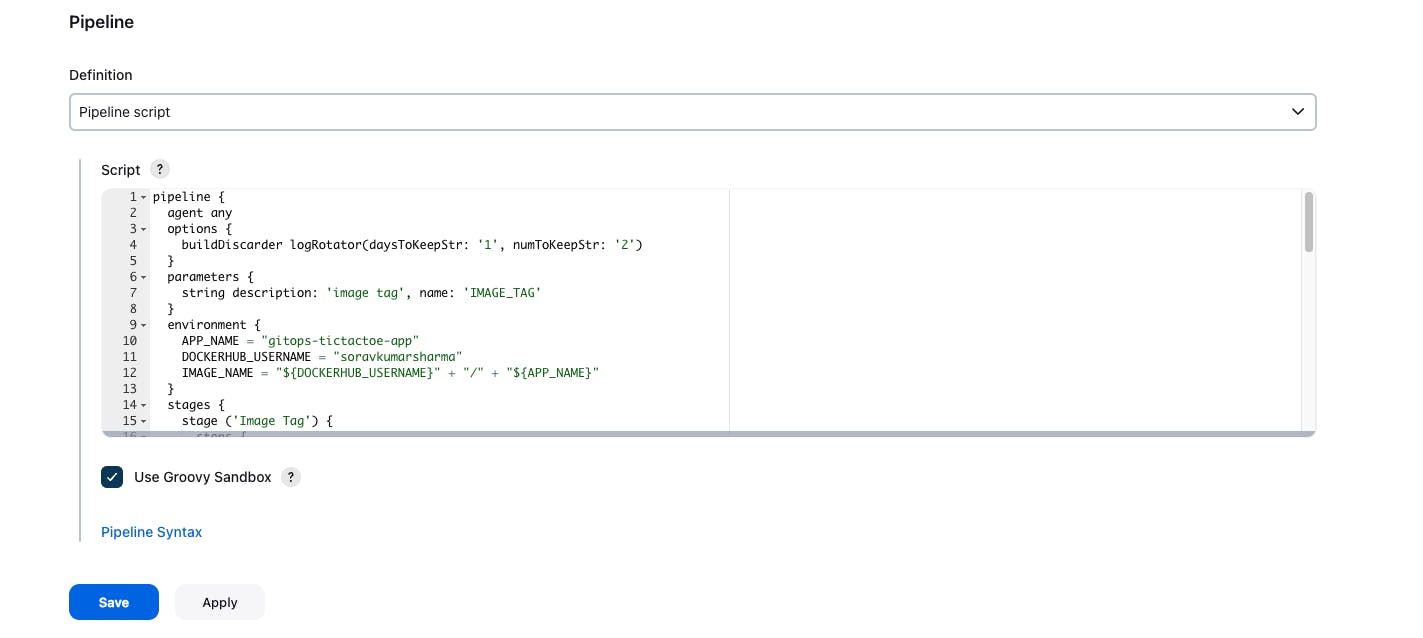
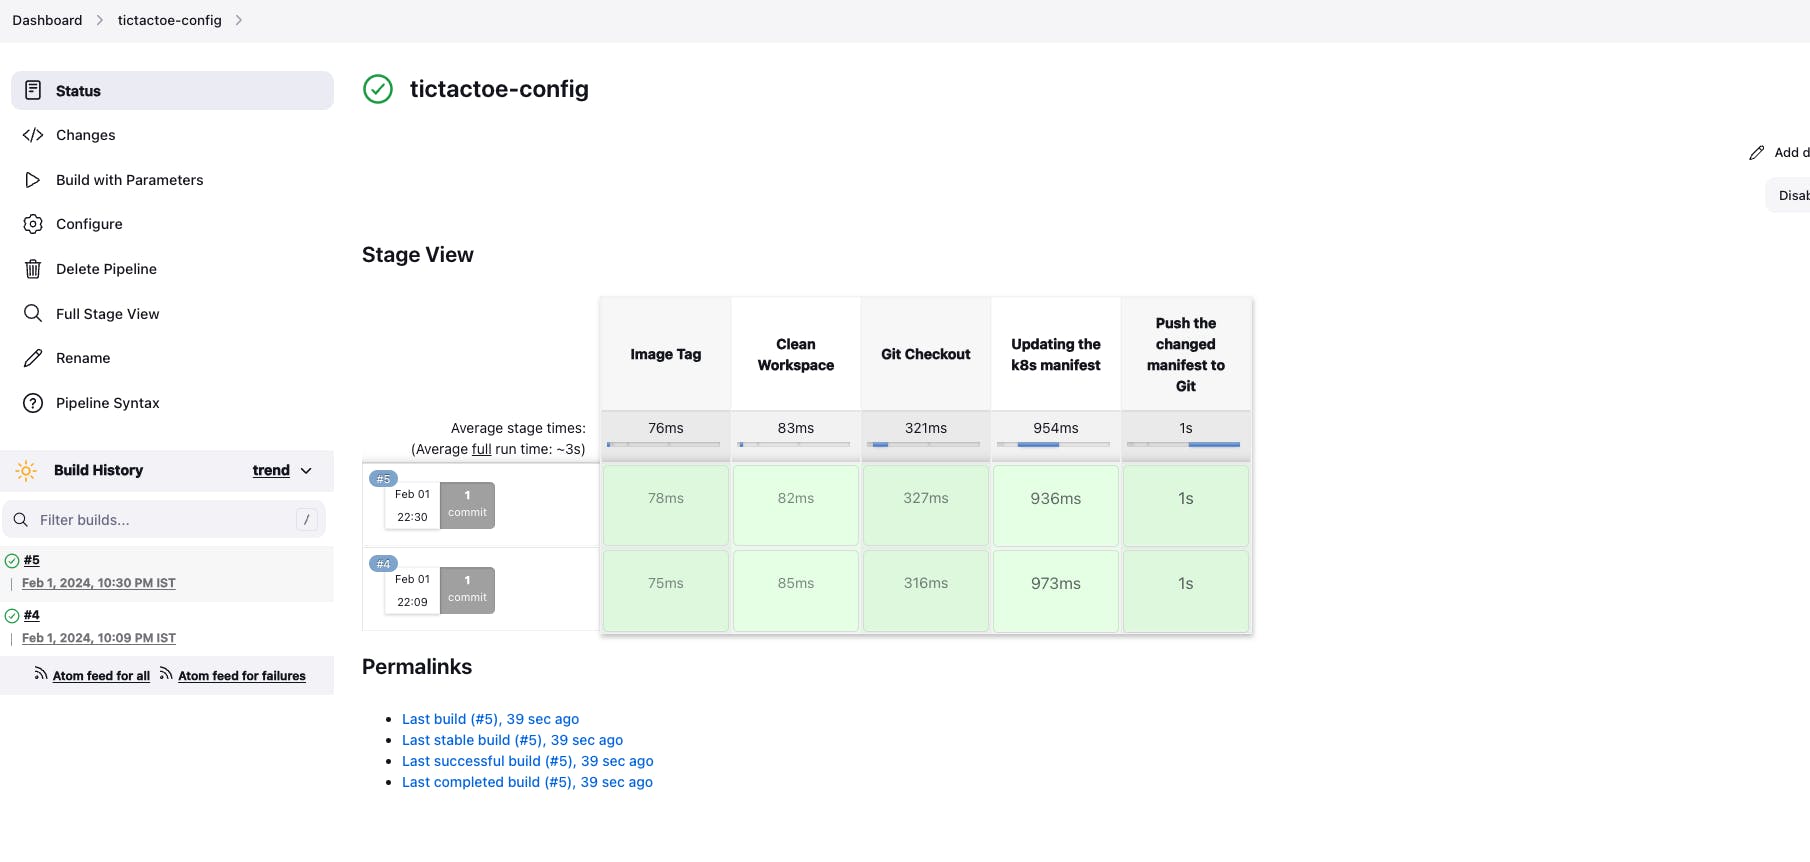
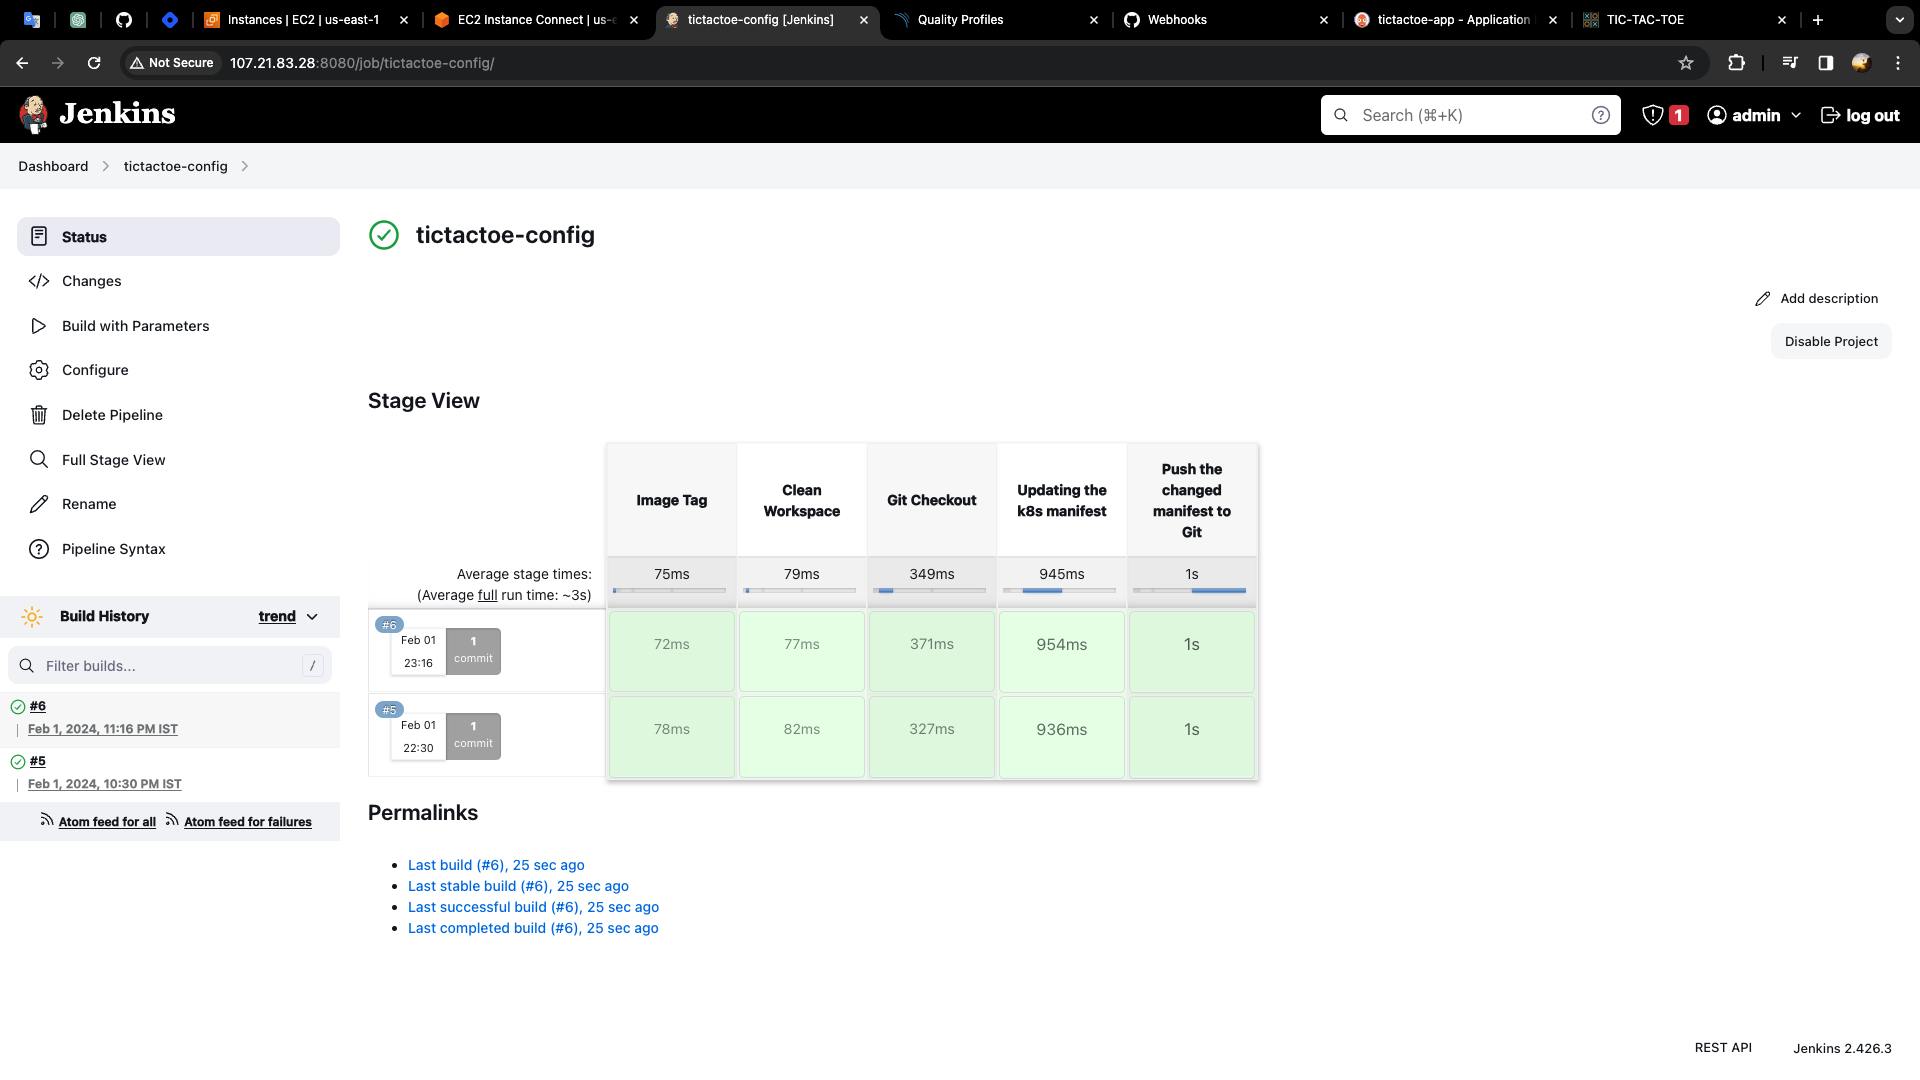
Step 9: Create the declarative pipeline for "tictactoe-config"
- Go to Jenkins dashboard -> New Item -> Give the Job name "tictactoe-config" -> Select the pipeline -> and then Click on "OK"
pipeline {
agent any
options {
buildDiscarder logRotator(daysToKeepStr: '1', numToKeepStr: '2')
}
parameters {
string description: 'image tag', name: 'IMAGE_TAG'
}
environment {
APP_NAME = "gitops-tictactoe-app"
DOCKERHUB_USERNAME = "soravkumarsharma"
IMAGE_NAME = "${DOCKERHUB_USERNAME}" + "/" + "${APP_NAME}"
}
stages {
stage ('Image Tag') {
steps {
print IMAGE_TAG
}
}
stage ('Clean Workspace') {
steps {
cleanWs()
}
}
stage ('Git Checkout') {
steps {
git branch: 'main', url: 'https://github.com/soravkumarsharma/GitOps-TicTacToe-Config.git'
}
}
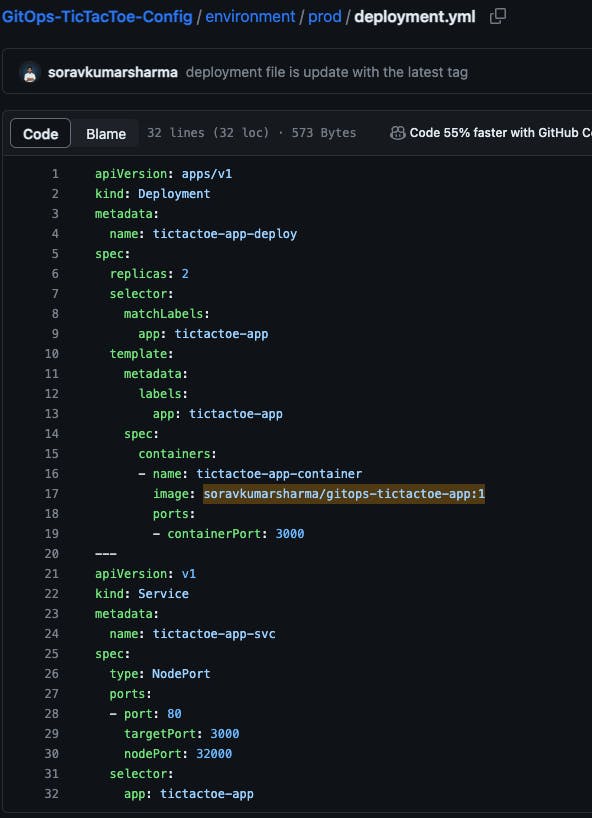
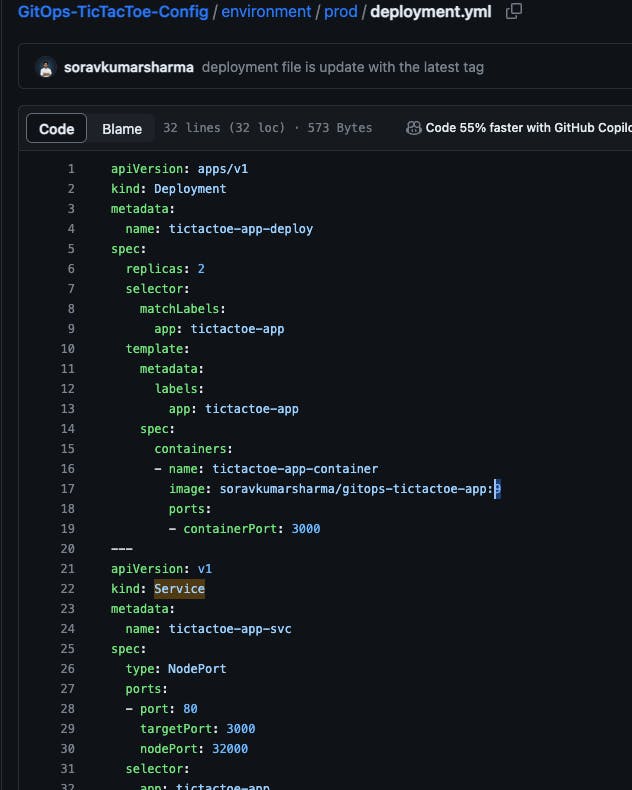
stage ('Updating the k8s manifest') {
steps {
dir('environment/prod') {
sh "cat deployment.yml"
sh 'sed -i "s/\${APP_NAME}.*/\${APP_NAME}:\${IMAGE_TAG}/g" deployment.yml'
sh "cat deployment.yml"
}
}
}
stage('Push the changed manifest to Git') {
steps {
dir('environment/prod'){
script {
sh """
git config --global user.name "Sorav Kumar Sharma"
git config --global user.email "add.your.email@gmail.com"
git add deployment.yml
git commit -m "deployment file is update with the latest tag"
"""
}
withCredentials([usernamePassword(credentialsId: 'github', passwordVariable: 'PASSWD', usernameVariable: 'USER')]) {
sh 'git push https://$USER:$PASSWD@github.com/soravkumarsharma/GitOps-TicTacToe-Config.git'
}
}
}
}
}
}
The "tictactoe-config" job is parameterized so the "build with parameters" button not be visible for now, you need to first click on the build now button then Jenkins fails the entire pipeline then only the build with parameter button will be visible.
- Save and apply -> Go to "Build now"

- Go to "Build with parameters" -> Give any image tag for testing -> Build
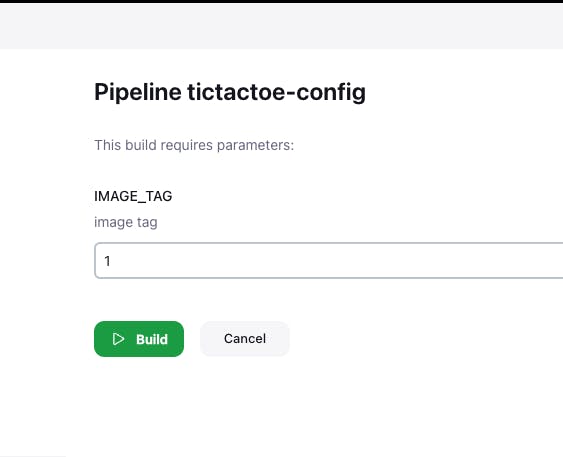
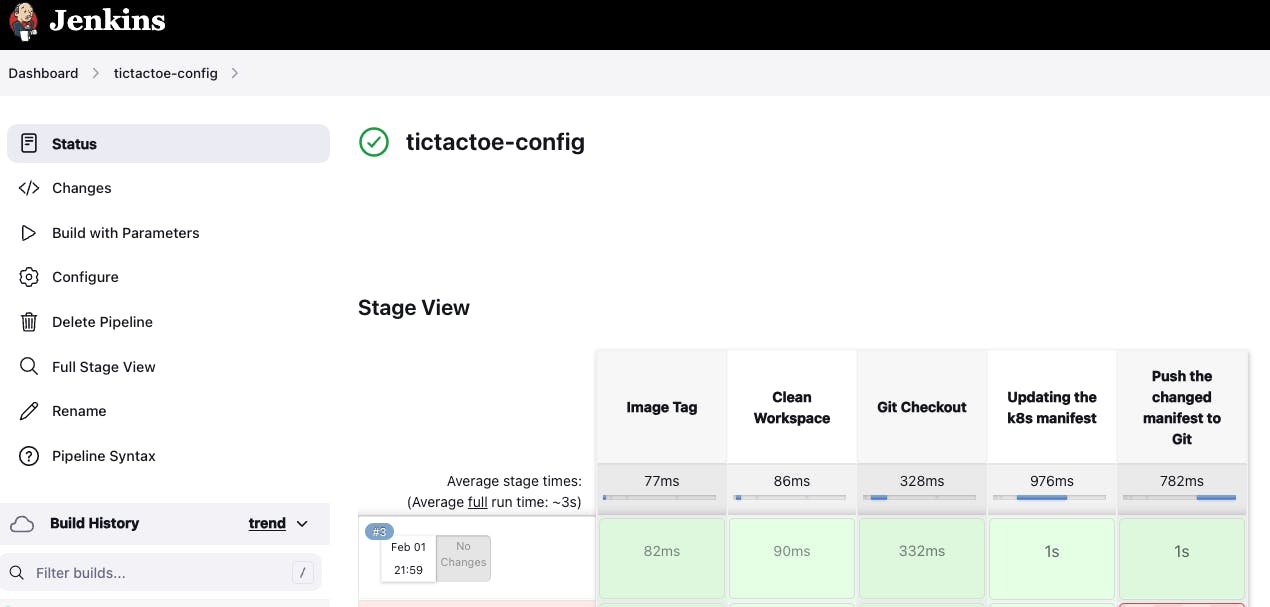
- Changes are pushed to the Git repository with the given tag.
To build the tictactoe-config job after the completion of tictactoe-app job then we need to add one more stage inside the tictactoe-app job pipeline and that stage will be responsible for triggering the tictactoe-config pipeline, once the pipeline is triggered the pipeline will automatically start for the build.
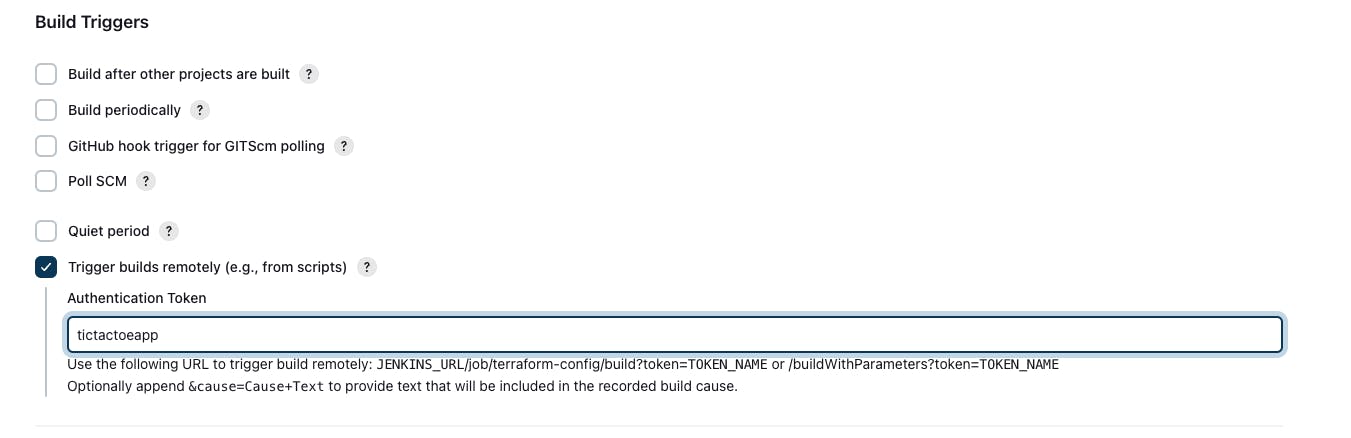
Go to the tictactoe-config job -> Go to Configure -> Build Triggers -> Enable Trigger builds remotely -> Give any token name - "tictactoeapp" -> Save and apply
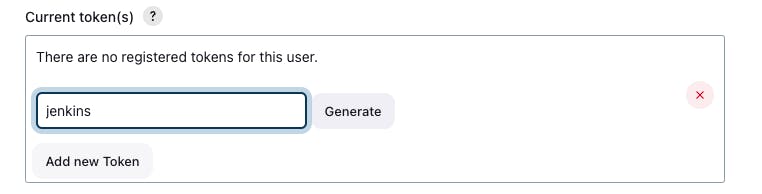
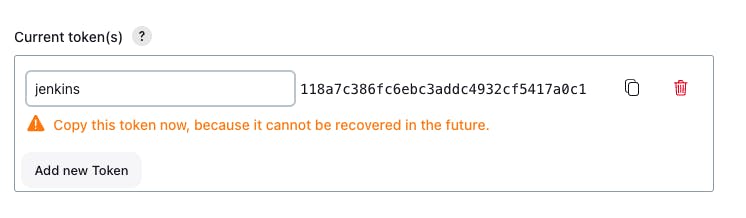
Create the JENKIN_API_TOKEN:
Go to admin -> Configure -> API TOKEN -> Add New Token

- Trigger the tictactoe-config pipeline remotely.
curl -v -k --user admin:jenkins_api_token \
-X POST \
-H 'cache-control: no-cache' \
-H 'content-type: application/x-www-form-urlencoded' \
--data "IMAGE_TAG=${IMAGE_TAG}" \
'http://public_ip_of_working_space_instace:8080/job/tictactoe-config/buildWithParameters?token=TOKEN_NAME'
    stage ('Trigger the tictactoeconfig Pipeline') {
      steps {
        sh "curl -v -k --user admin:118a7c386fc6ebc3addc4932cf5417a0c1 -X POST -H  'cache-control: no-cache' -H 'content-type: application/x-www-form-urlencoded' --data 'IMAGE_TAG=${IMAGE_TAG}' 'http://107.21.83.28:8080/job/tictactoe-config/buildWithParameters?token=tictactoeapp'"
      }
    }
Go to tictactoe-app job and replace the entire pipeline code with this one, In this pipeline, we added one more stage to build the tictactoe-config job by triggering the build remotely.
Go to tictactoe-app -> pipeline -> replace the code with a newer one -> save and apply -> build now
pipeline {
  agent any
  options {
    buildDiscarder logRotator(daysToKeepStr: '1', numToKeepStr: '2')
  }
  tools {
    nodejs 'nodejs18'
  }
  environment {
    SCANNER_HOME = tool 'sonar-scanner'
    APP_NAME = "gitops-tictactoe-app"
    DOCKERHUB_USERNAME = "soravkumarsharma"
    IMAGE_TAG = "${BUILD_NUMBER}"
    IMAGE_NAME = "${DOCKERHUB_USERNAME}" + "/" + "${APP_NAME}"
  }
  stages {
    stage ('Clean Workspace') {
      steps {
       cleanWs()
      }
    }
    stage ('Git Checkout') {
      steps {
        git branch: 'main', url: 'https://github.com/soravkumarsharma/GitOps-TicTacToe-App.git'
      }
    }
    stage ('SonarQube Analysis') {
      steps {
        withSonarQubeEnv(credentialsId: 'sonar-token', installationName: 'sonar-server') {
          sh ''' $SCANNER_HOME/bin/sonar-scanner -Dsonar.projectName=${APP_NAME} \
            -Dsonar.projectKey=${APP_NAME} '''
        }
      }
    }
    stage('Quality Gate') {
      steps {
        script {
          timeout(time: 1, unit: 'HOURS') {
            def qg = waitForQualityGate()
            if (qg.status != 'OK') {
              error "Pipeline aborted due to quality gate failure: ${qg.status}"
            }
          }
        }
      }
    }
    stage('Install Dependencies') {
      steps {
        sh "npm install"
      }
    }
    stage('OWASP FS SCAN') {
      steps {
        dependencyCheck additionalArguments: '--scan ./ --disableYarnAudit --disableNodeAudit', odcInstallation: 'DP-Check'
        dependencyCheckPublisher pattern: '**/dependency-check-report.xml'
      }
    }
    stage('TRIVY FS SCAN') {
      steps {
        sh "trivy fs . > trivyfs.txt"
      }
    }
    stage('Build Docker Image'){
      steps {
        script{
          docker_image = docker.build "${IMAGE_NAME}"
        }
      }
    }
    stage('Push Docker Image'){
      steps {
        script{
          docker.withRegistry('', 'dockerhub'){
            docker_image.push("${BUILD_NUMBER}")
            docker_image.push('latest')
          }
        }
      }
    }
    stage('TRIVY Image Scan') {
      steps {
        sh "trivy image ${IMAGE_NAME}:latest > trivyimage.txt"
      }
    }
    stage ('Delete Docker Images'){
      steps {
        sh "docker rmi ${IMAGE_NAME}:${IMAGE_TAG}"
        sh "docker rmi ${IMAGE_NAME}:latest"
      }
    }
    stage ('Trigger the tictactoeconfig Pipeline') {
      steps {
        sh "curl -v -k --user admin:118a7c386fc6ebc3addc4932cf5417a0c1 -X POST -H  'cache-control: no-cache' -H 'content-type: application/x-www-form-urlencoded' --data 'IMAGE_TAG=${IMAGE_TAG}' 'http://107.21.83.28:8080/job/tictactoe-config/buildWithParameters?token=tictactoeapp'"
      }
    }
  }
}

Add the GitHub Webhook for the tictactoe-app JOB
To trigger the tictactoe-app pipeline from the git -> If you want that if any change occurs in the git repo then the pipeline will automatically start for the build then you can add GitHub Webhook.
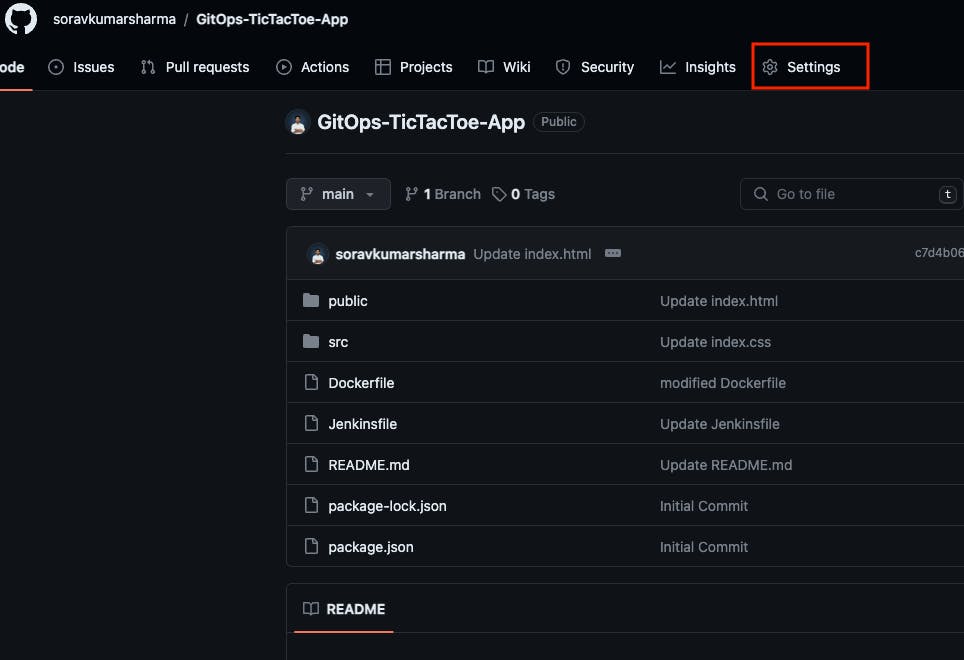
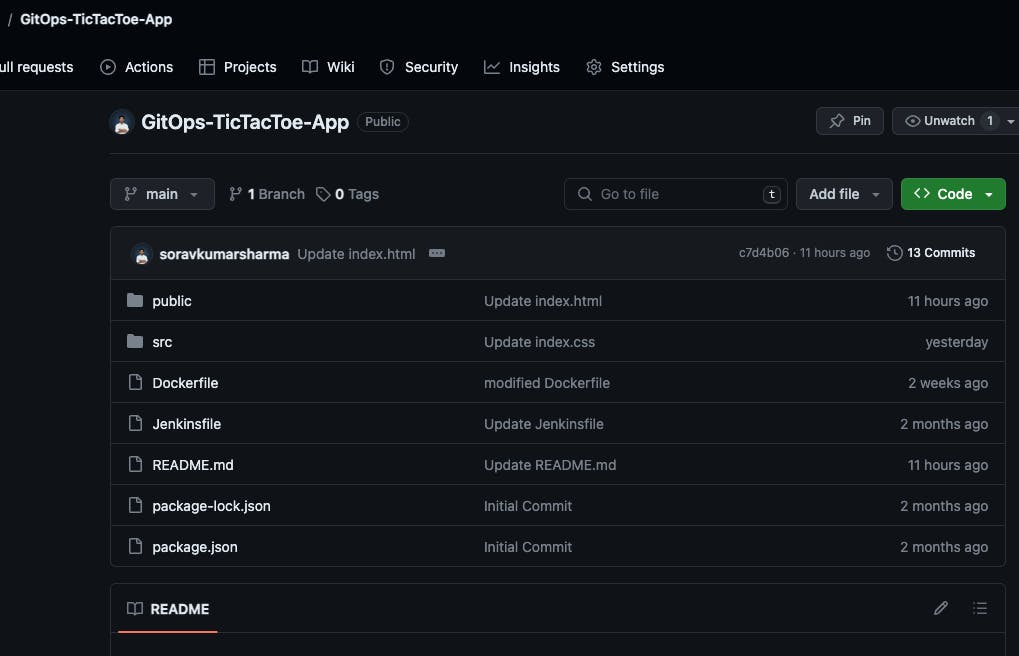
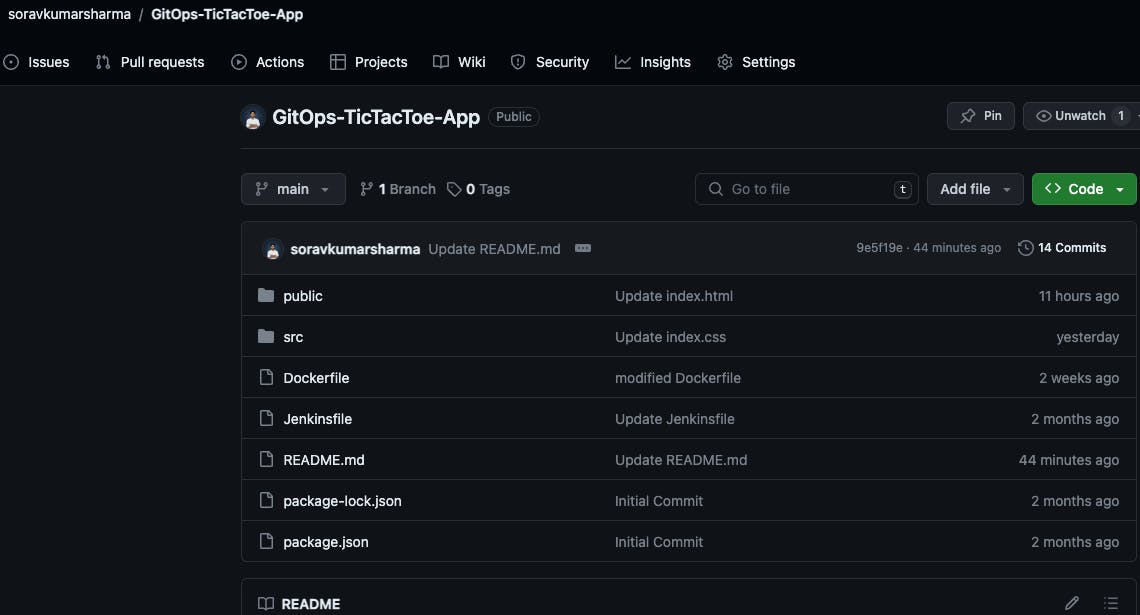
Go to the GitHub repository tic-tac-toe-app
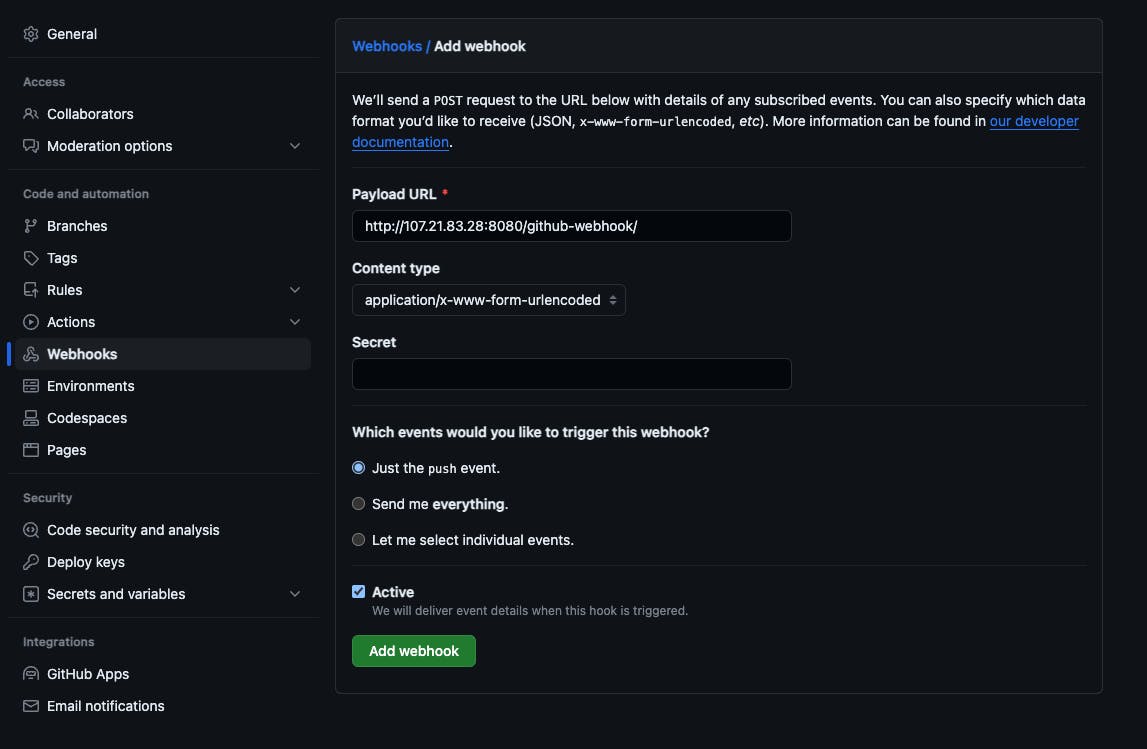
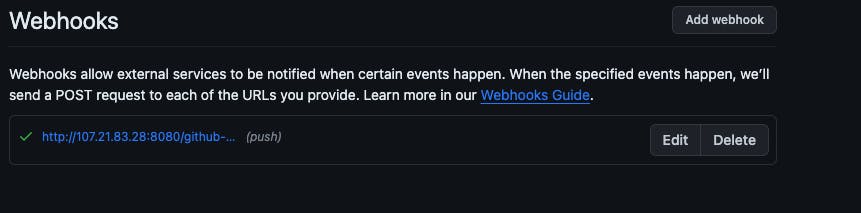
Settings -> Webhooks -> Add Webhook
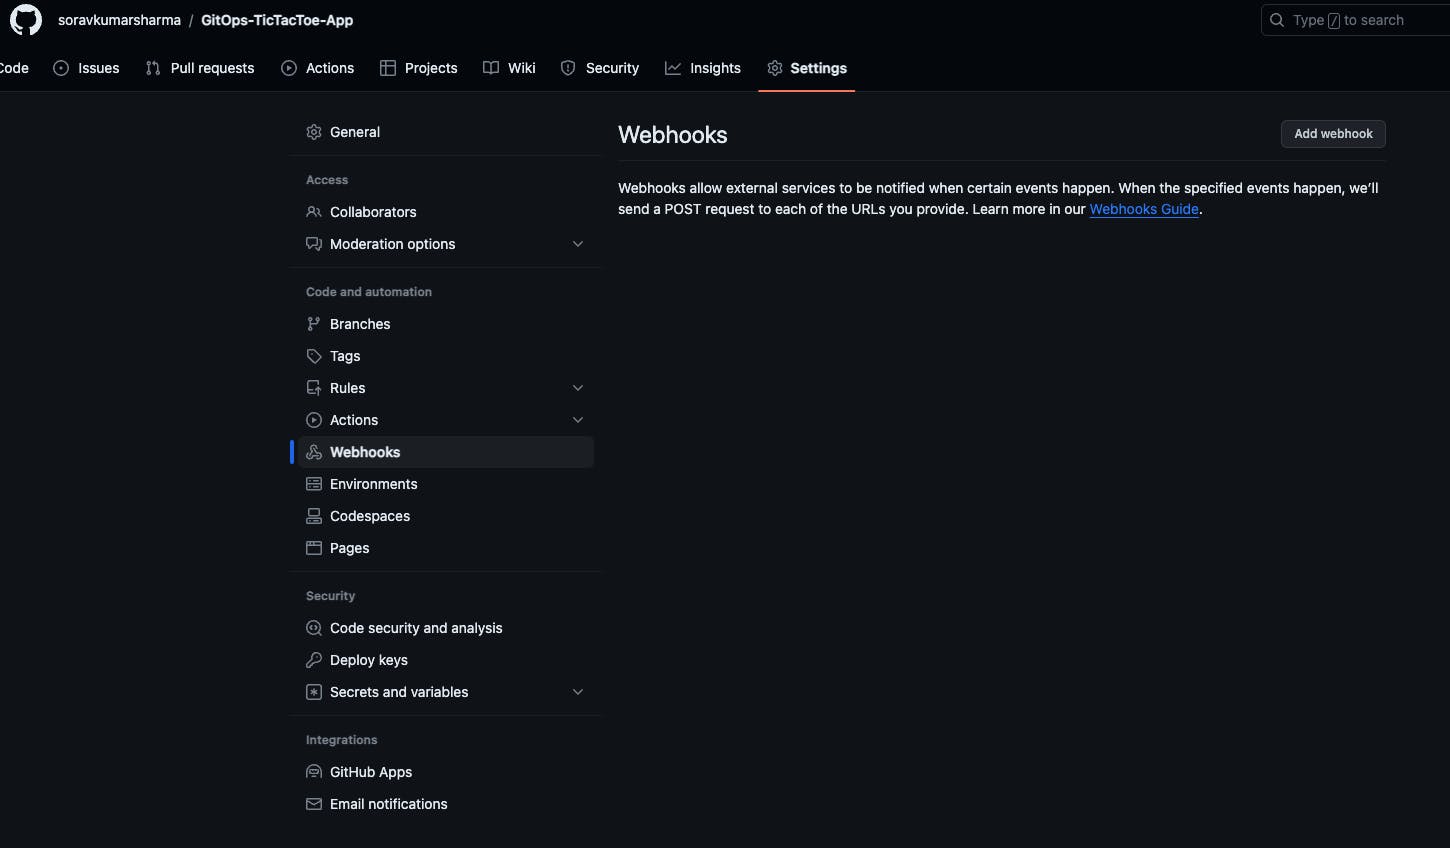
Jenkins - Github webhook endpoint: /github-webhook/
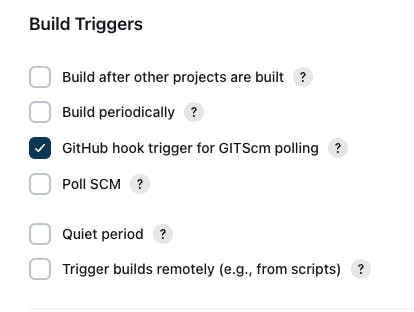
- Go to Dashboard -> tictactoe-app -> Build Triggers -> enable GitHub hook trigger for GITScm polling -> Save and apply
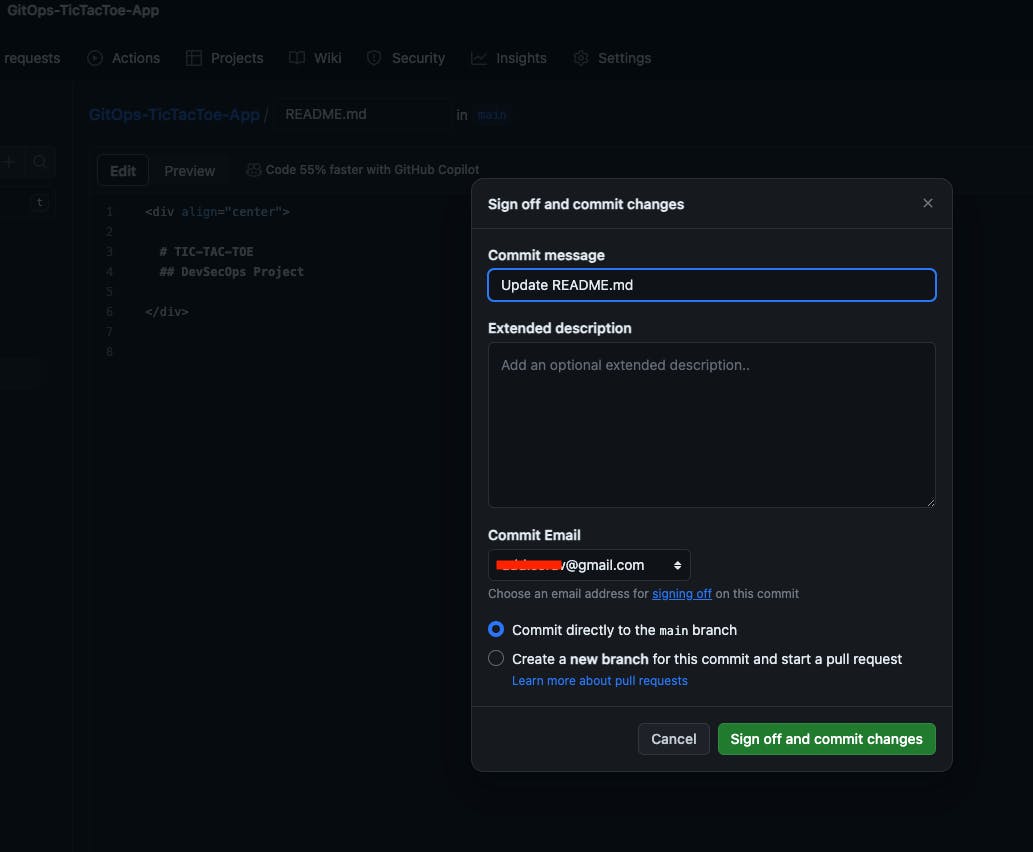
Go to Git Repo and create a commit,
- tictactoe-app job
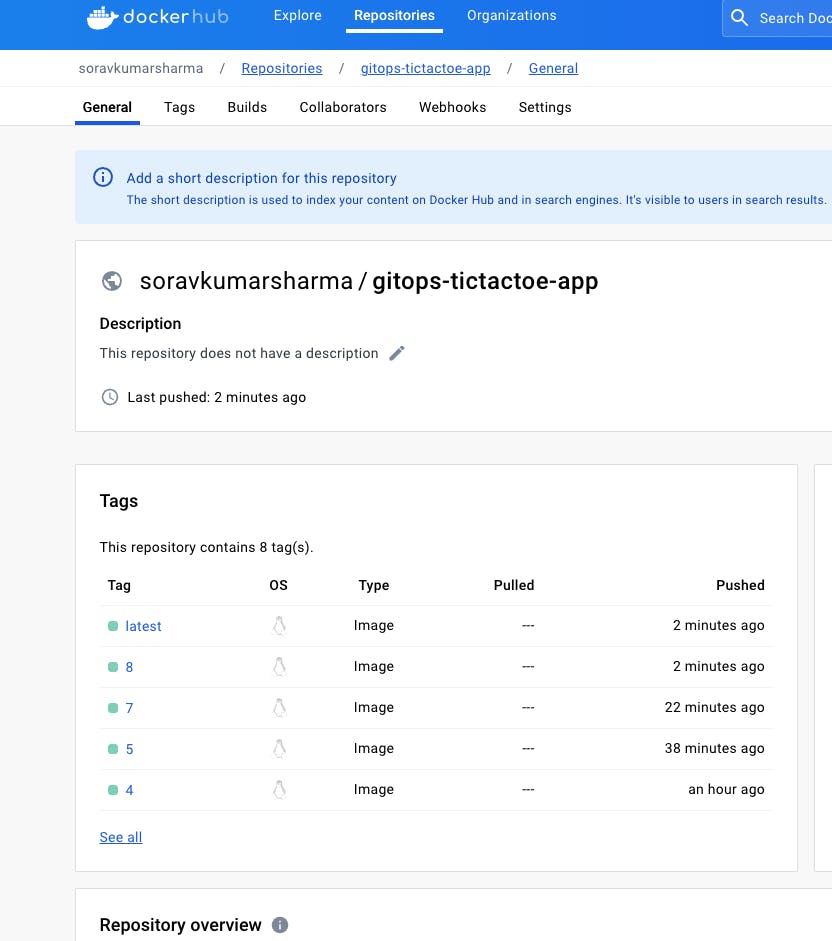
- DockerHub
- tictactoe-config
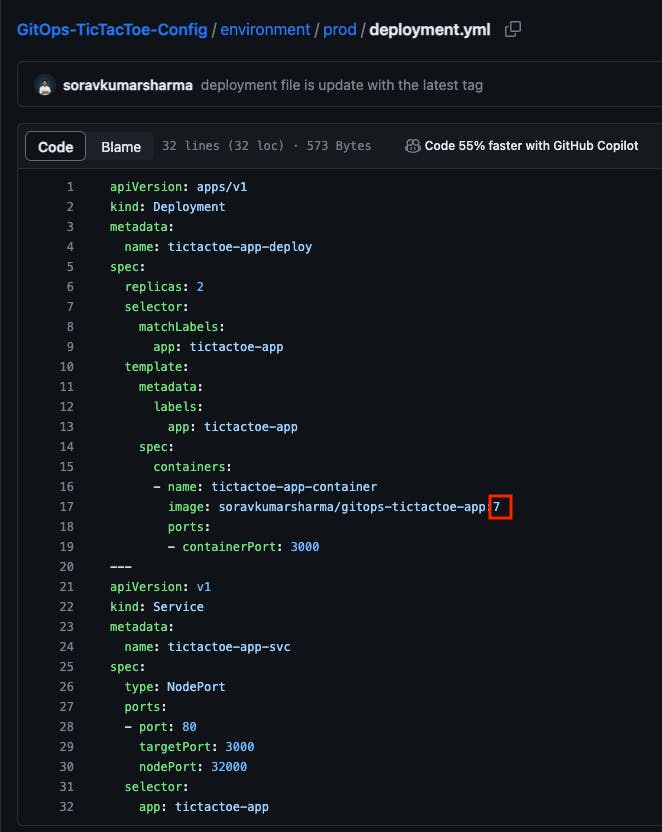
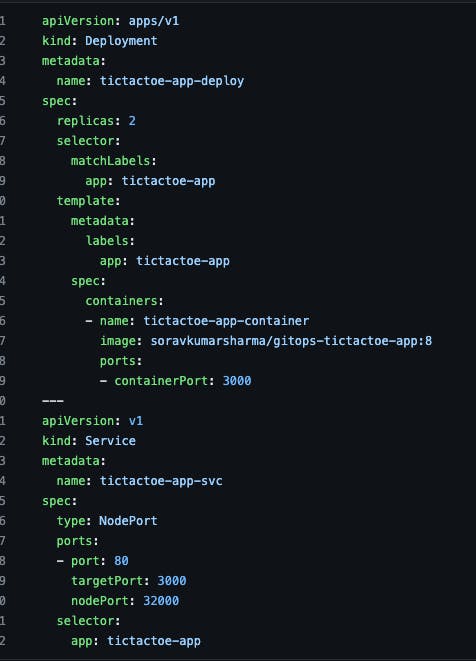
- Git Repo - deployment.yml
Provisioning a Kubernetes cluster using the Jenkins pipeline
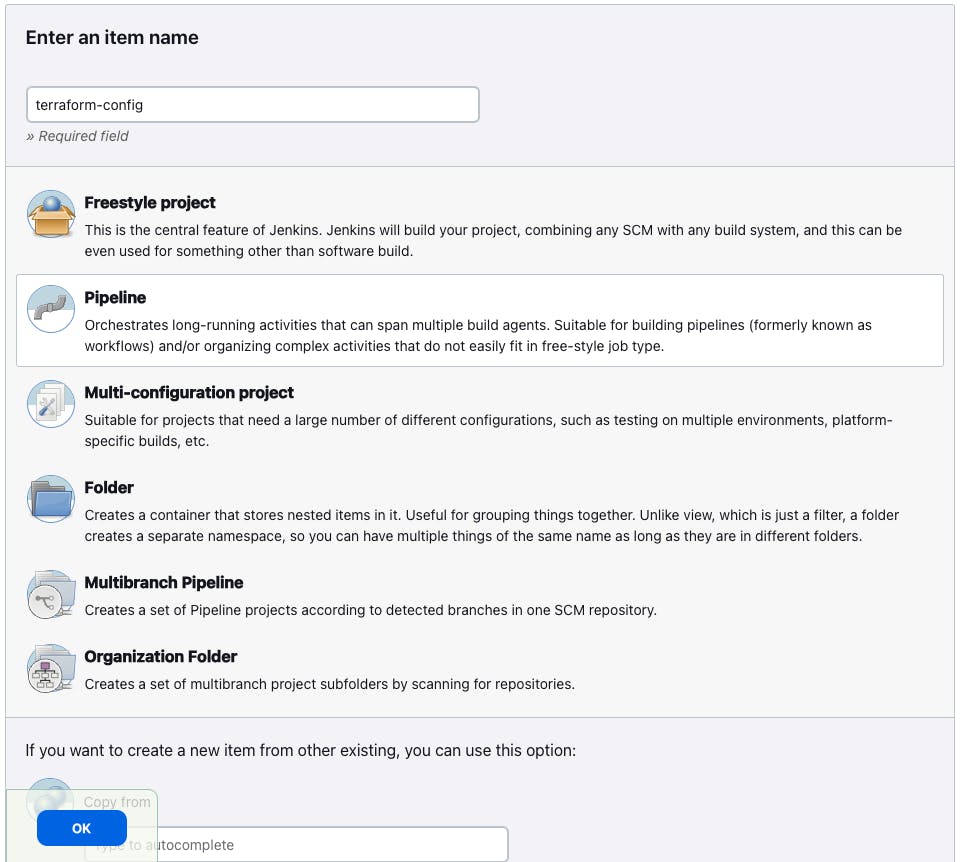
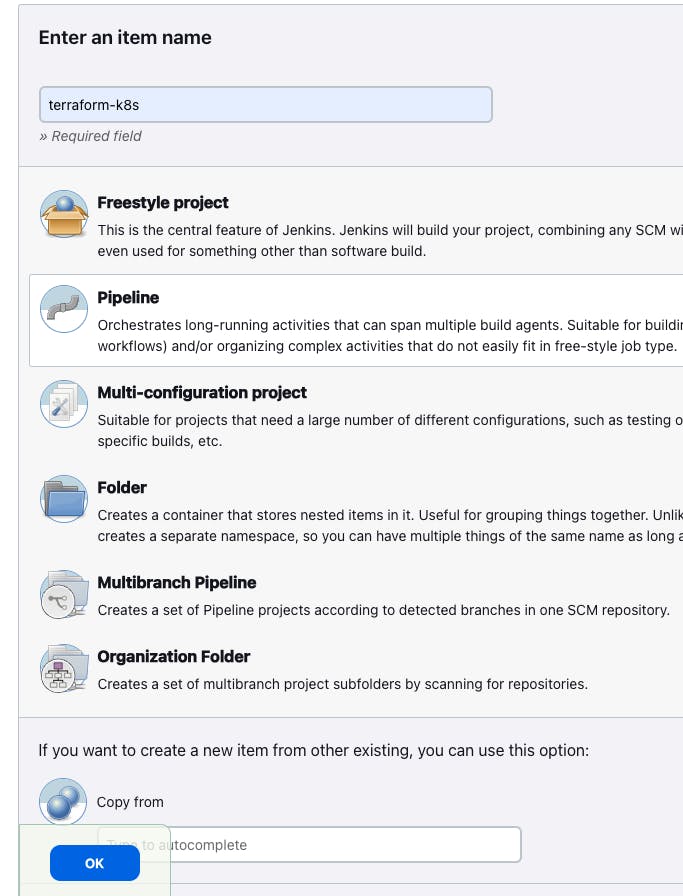
Create the new job "terraform-k8s"
Go to Jenkins dashboard -> New Item -> Give the Job name "terraform-k8s" -> Select the pipeline -> and then Click on "OK"
// Terraform Pipeline

pipeline {
  agent any
  parameters {
    choice choices: ['apply', 'destroy'], description: 'Terraform flow', name: 'WORKFLOW'
  }
  stages {
    stage ('Git Checkout') {
      steps {
        git branch: 'main', url: 'https://github.com/soravkumarsharma/GitOps-TicTacToe-Config.git'
      }
    }
    stage ('Create SSH Key and Modify the Permission') {
      steps {
        dir('k8s_cluster/ssh_key') {
          sh 'ssh-keygen -t rsa -b 2048 -f k8s  -N "" -q -y'
          sh "chmod 400 k8s"
        }
      }
    }
    stage ('Terraform Init') {
      steps {
        dir('k8s_cluster') {
          sh "terraform init"
        }
      }
    }
    stage ('Terraform apply or destroy') {
      steps {
        dir('k8s_cluster'){
          sh "terraform ${WORKFLOW} --auto-approve"
        }
      }
    }
  }
}
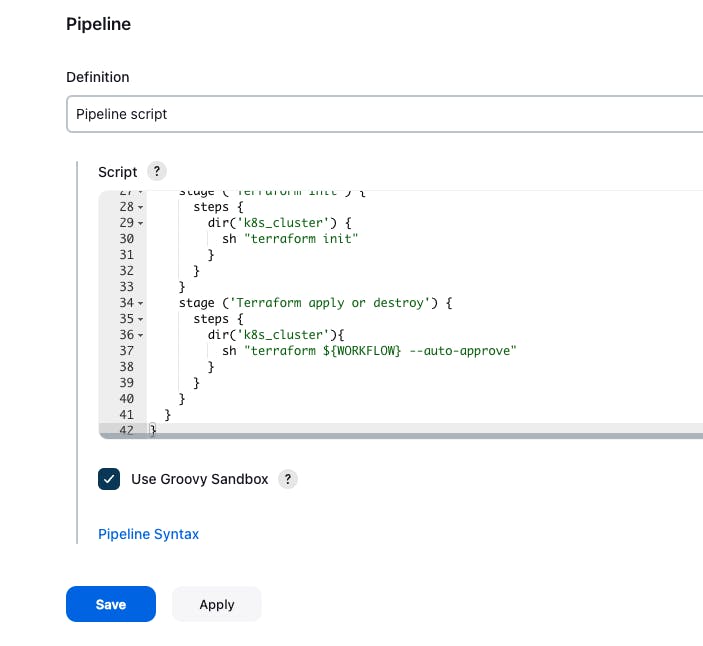
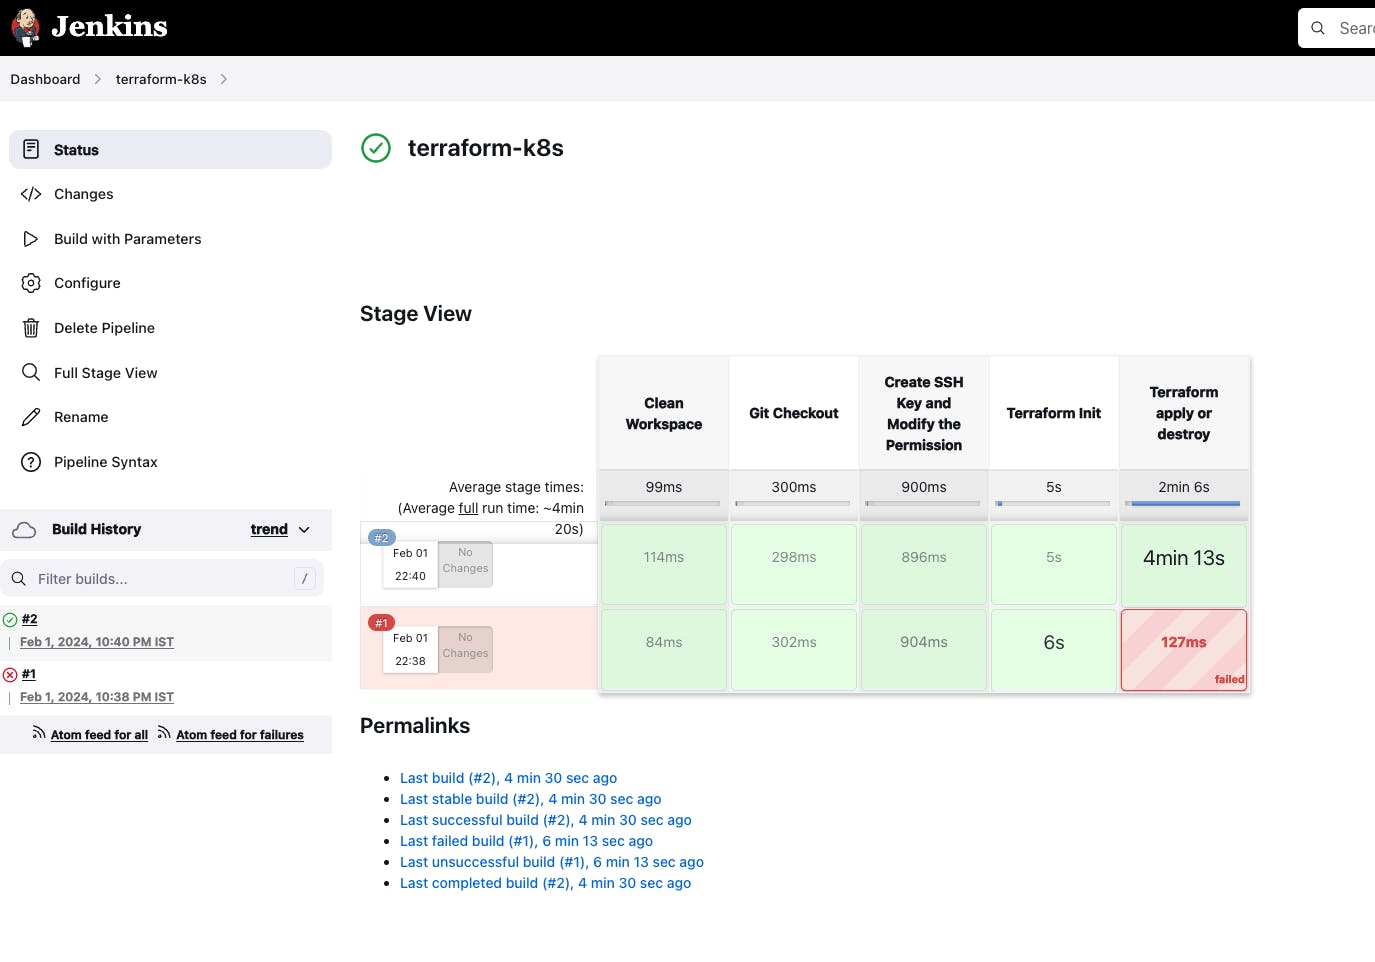
Copy the pipeline code and paste it inside the terraform-k8s job pipeline block
-> save and apply -> build now
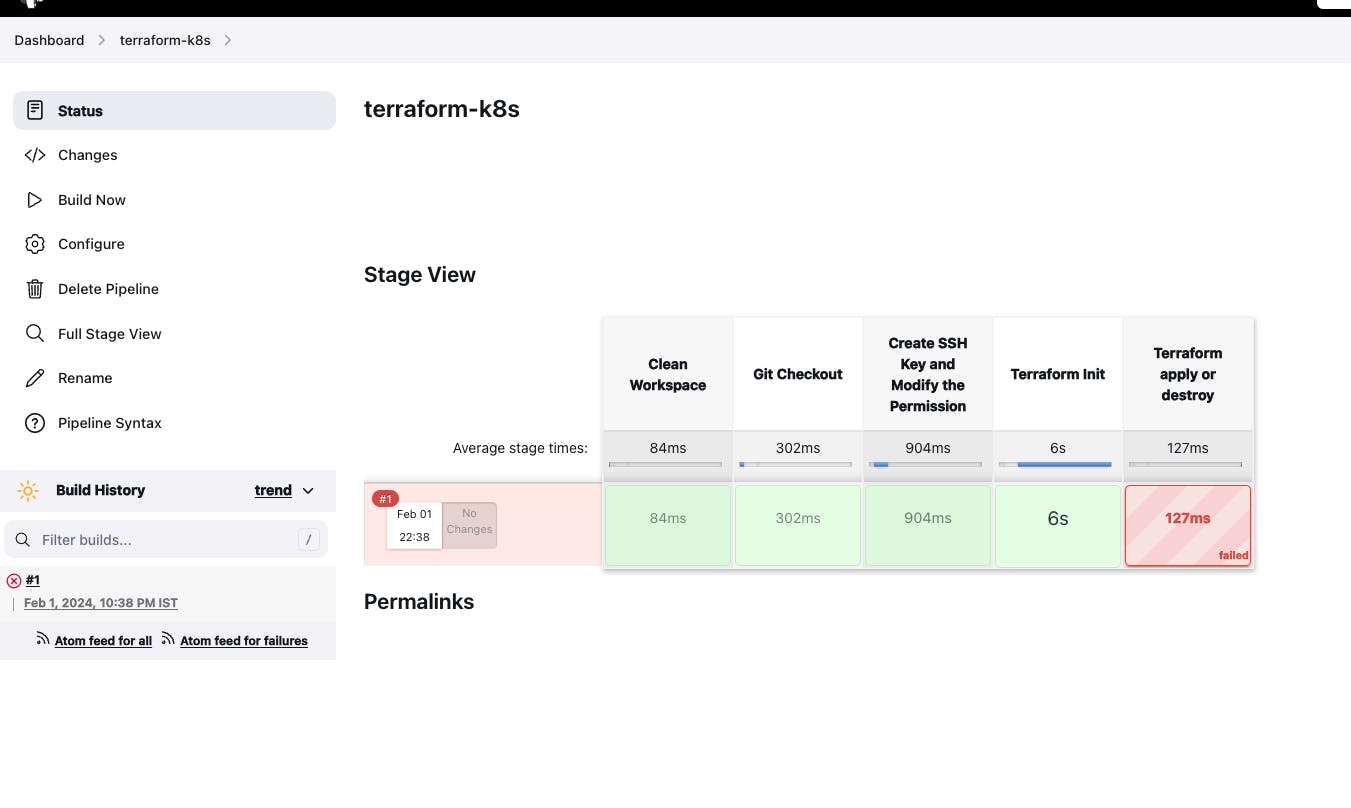
If you get an error then refresh the Jenkins page and build again "terraform-k8s" job via click on build with parameters -> apply -> build
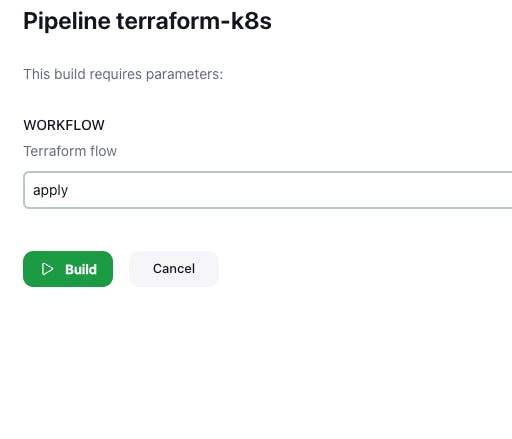
- Build with parameters
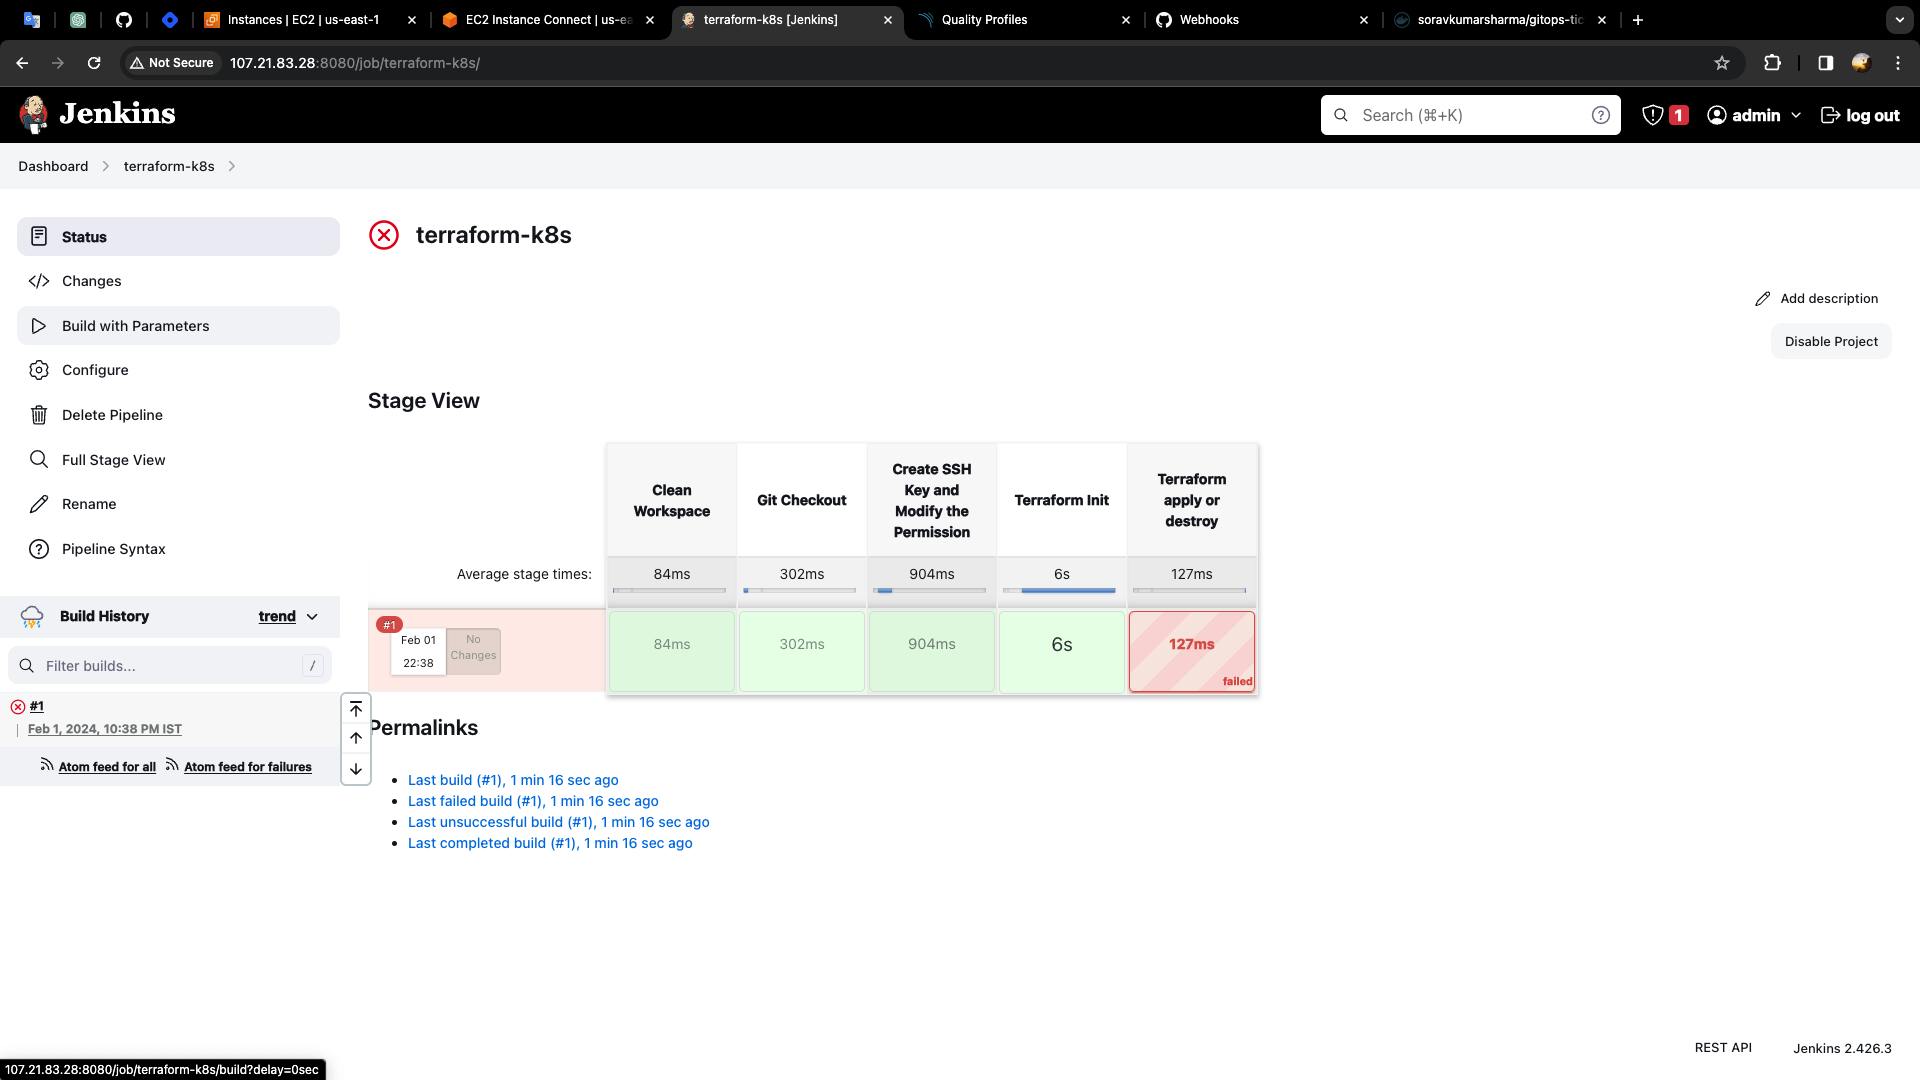
- Select the apply parameter -> build
- terraform-k8s
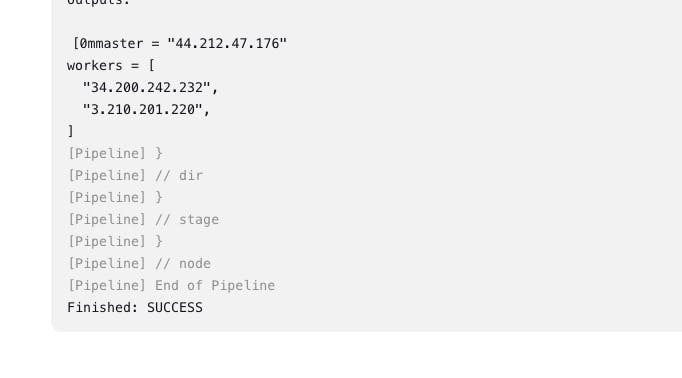
- terraform - output block
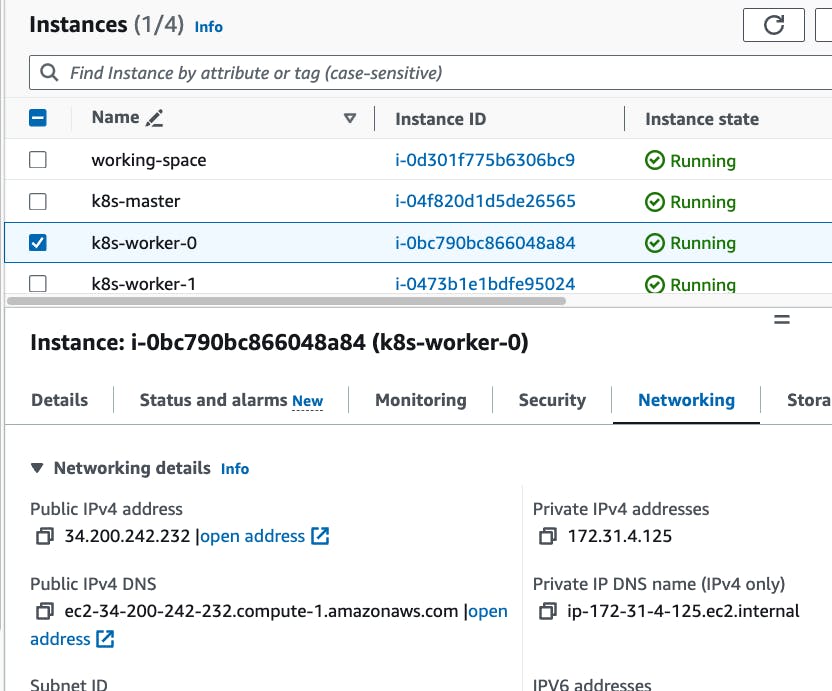
- Go to AWS EC2 Dashboard -> Go to running instances -> Select k8s-master instance -> go to connect -> select ec2 instance connect -> connect

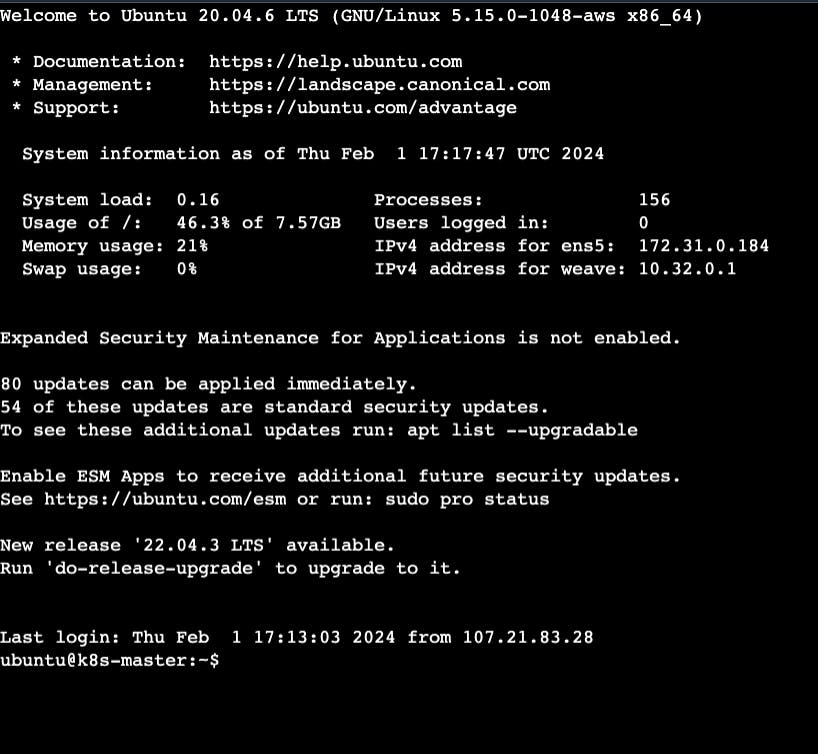
sudo su -
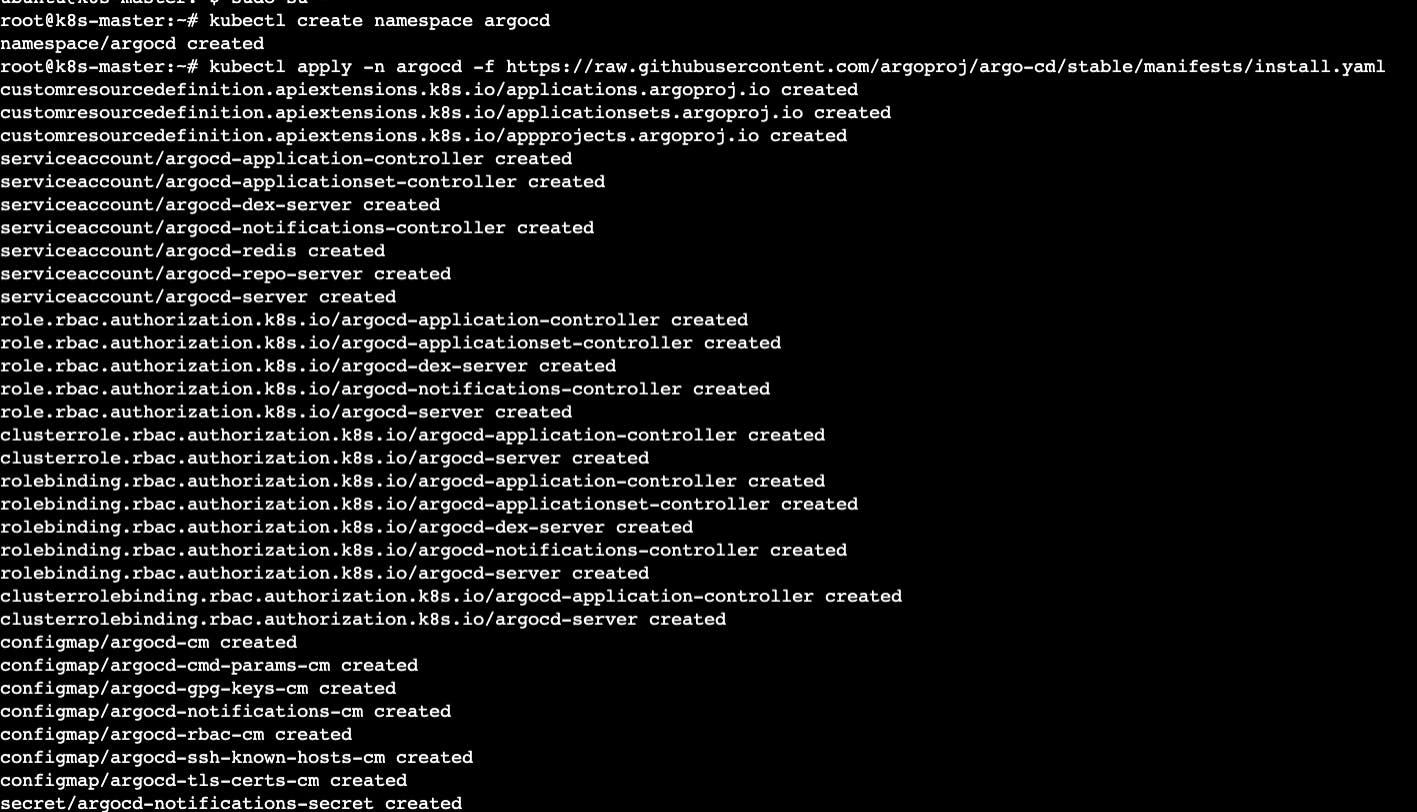
Install the ArgoCD
kubectl create namespace argocd
kubectl apply -n argocd -f https://raw.githubusercontent.com/argoproj/argo-cd/stable/manifests/install.yaml
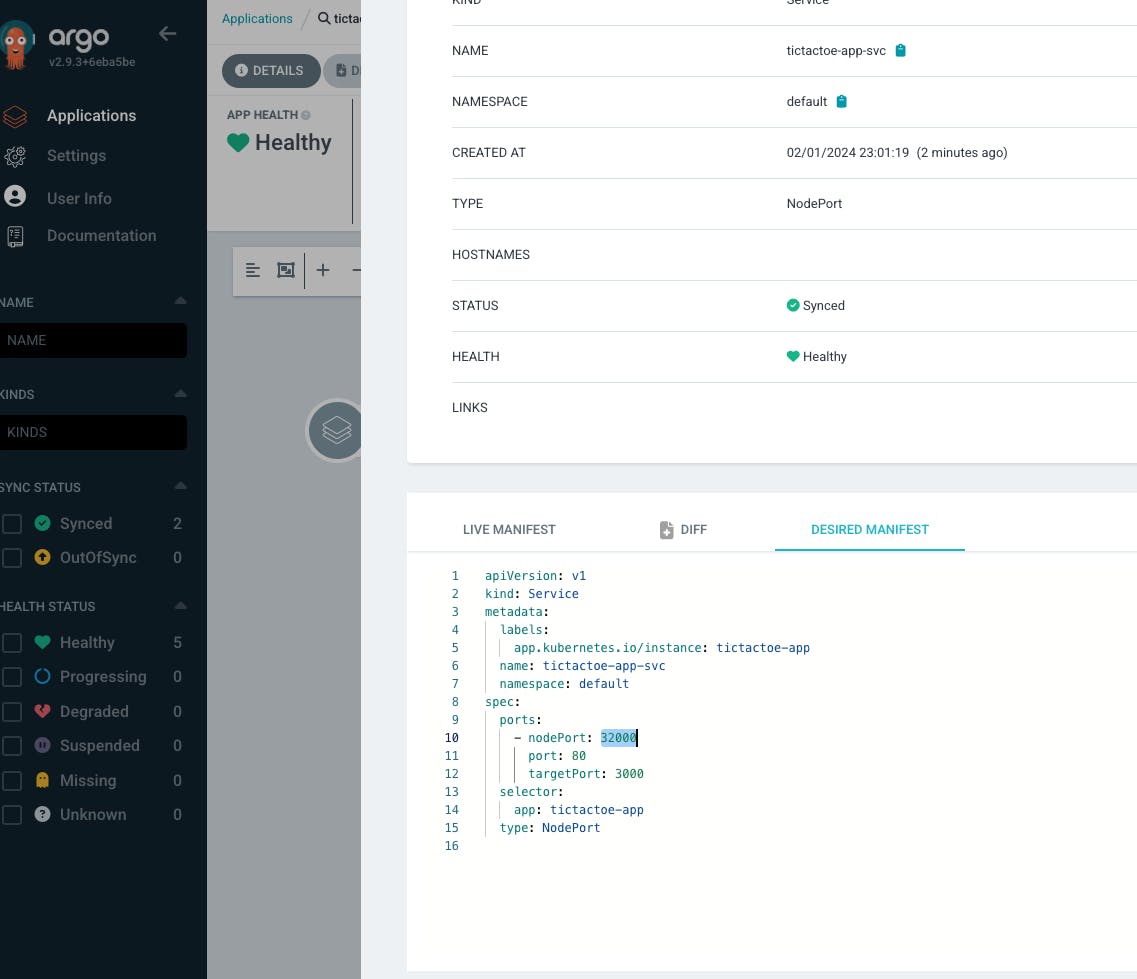
kubectl patch svc argocd-server -n argocd -p '{"spec": {"type": "NodePort"}}'
kubectl get svc/argocd-server -n argocd
kubectl -n argocd get secret argocd-initial-admin-secret -o jsonpath="{.data.password}" | base64 -d


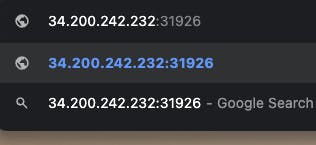
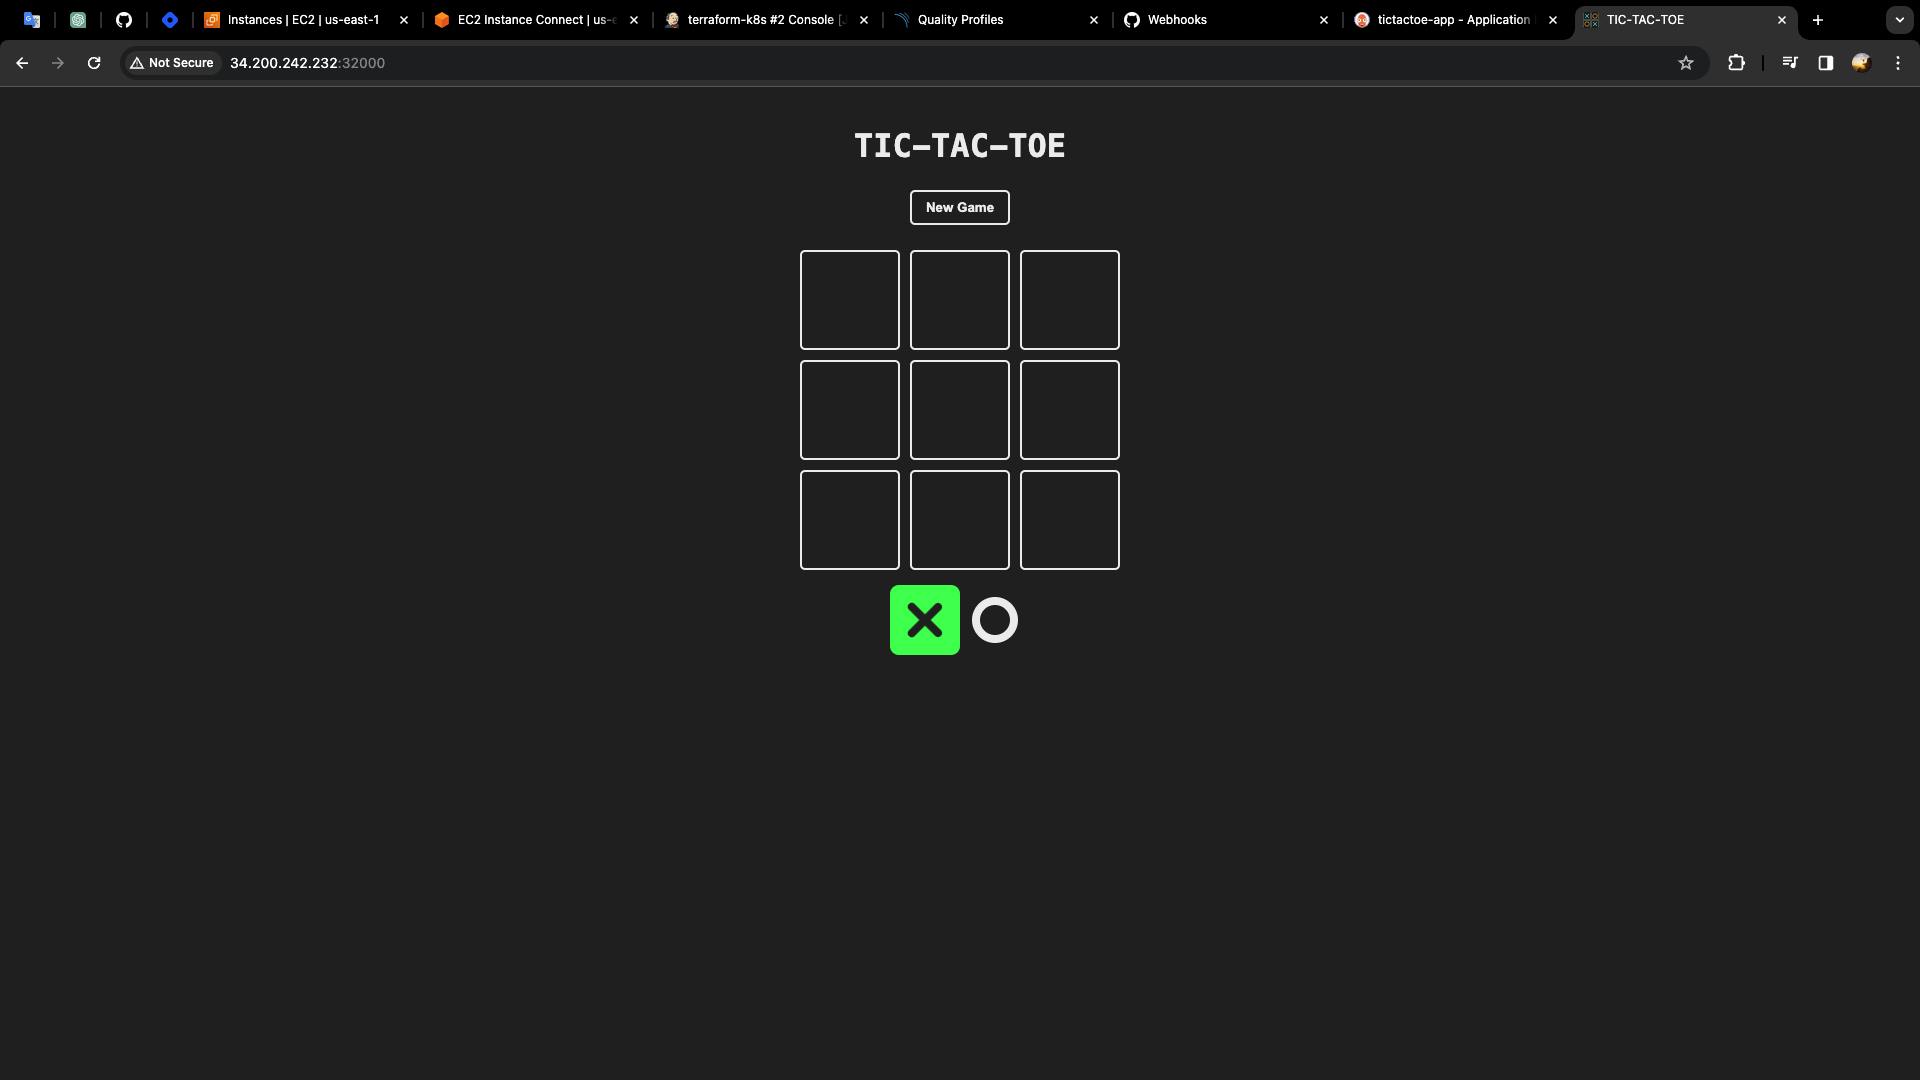
Go to AWS EC2 instances -> go to running instances -> Select any worker node and copy the public IP -> paste the IP with NodePort port -> public_ip_of_worker_instance:argo_cd_nodepo..
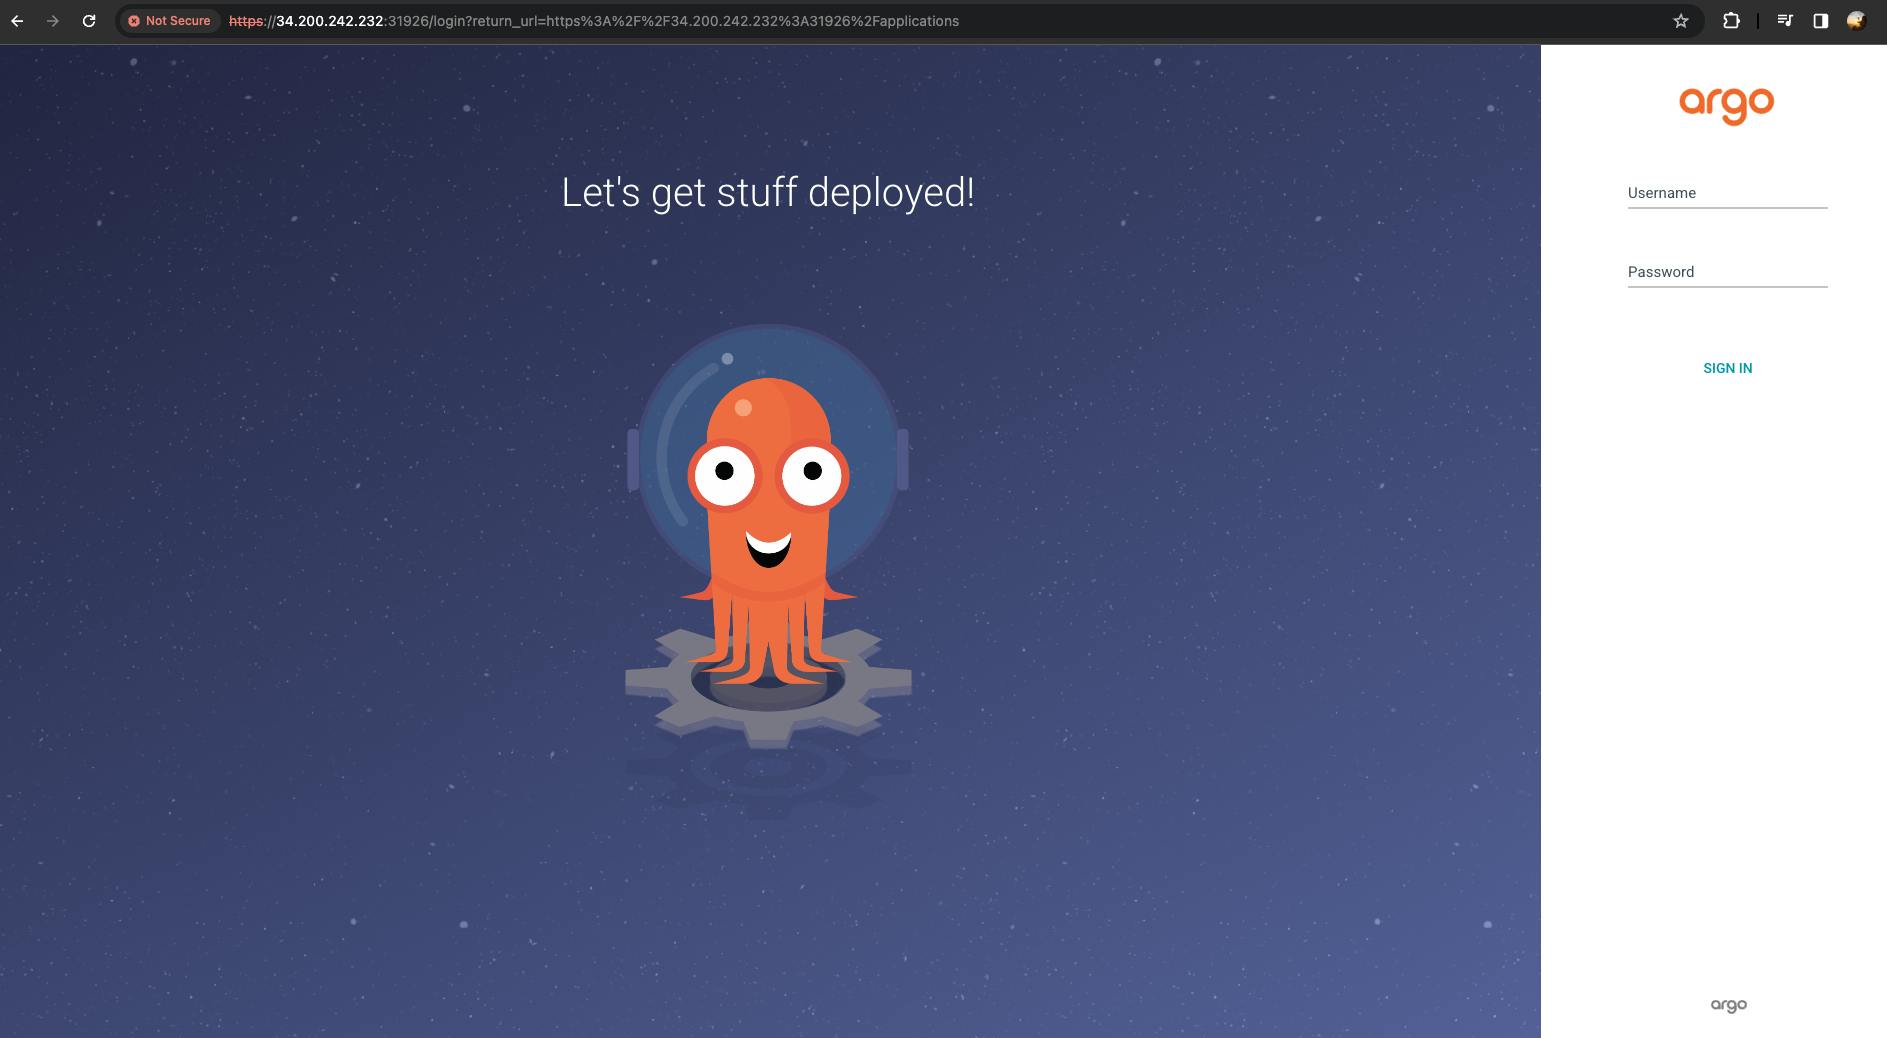
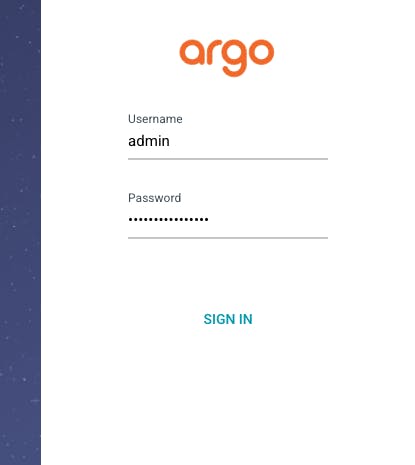
username -> admin
password -> To get the password run the following command.
kubectl -n argocd get secret argocd-initial-admin-secret -o jsonpath="{.data.password}" | base64 -d

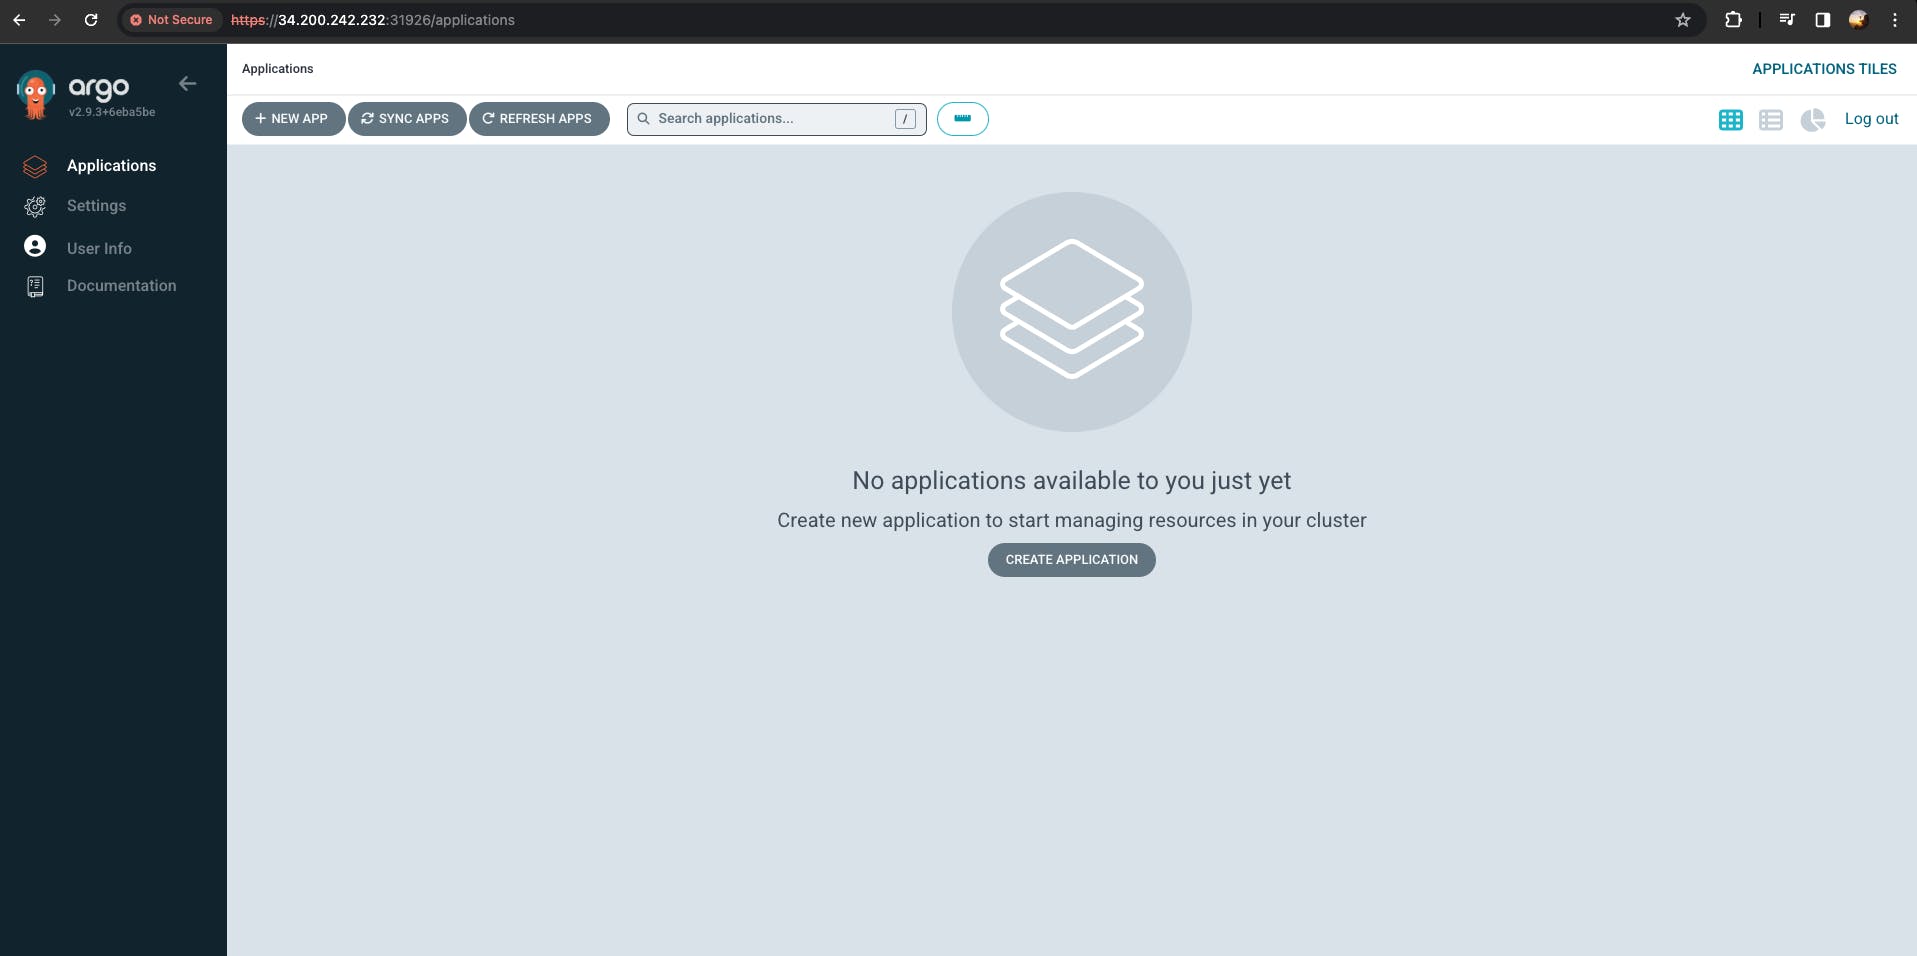
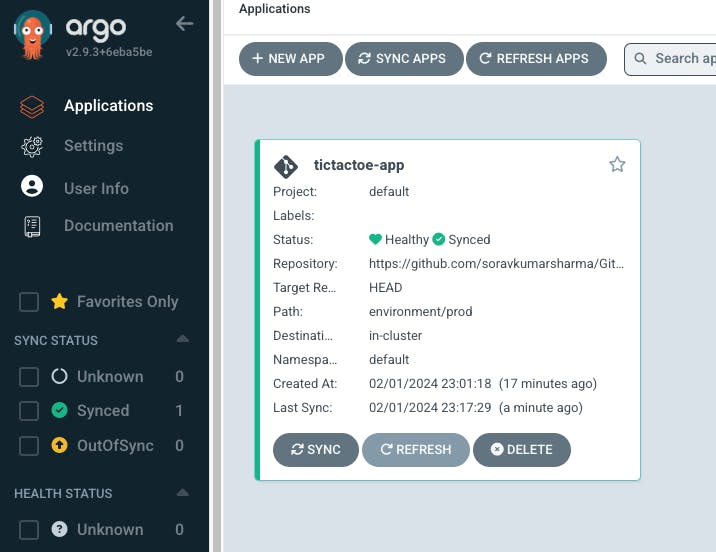
Before creating the application first we need to connect the repo inside the ArgoCD.
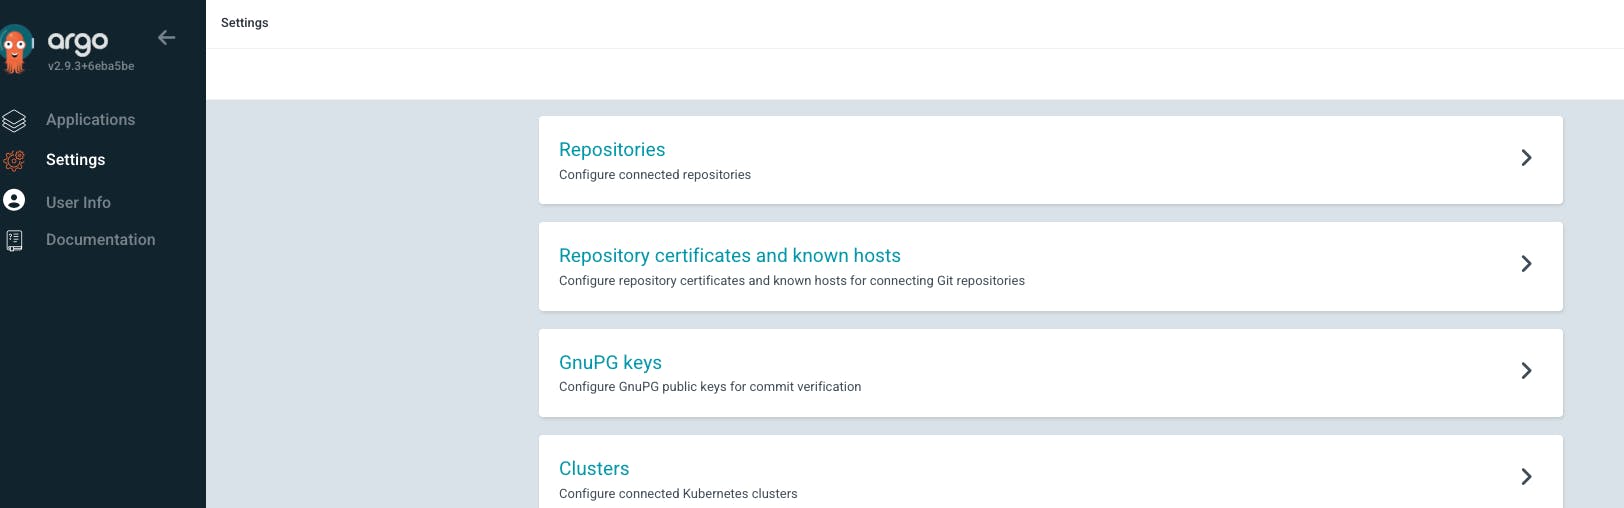
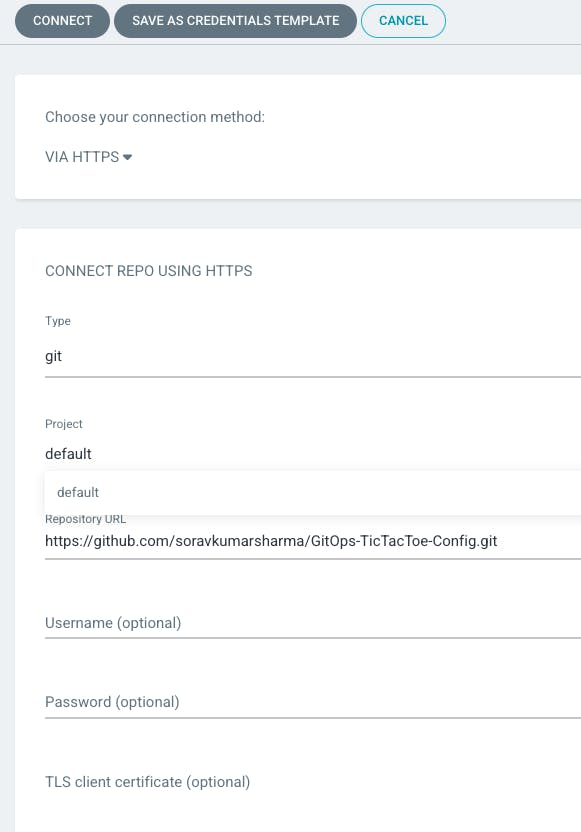
Go to settings -> Go to Repositories -> Connect Repo


Go to Application -> Go to a new app
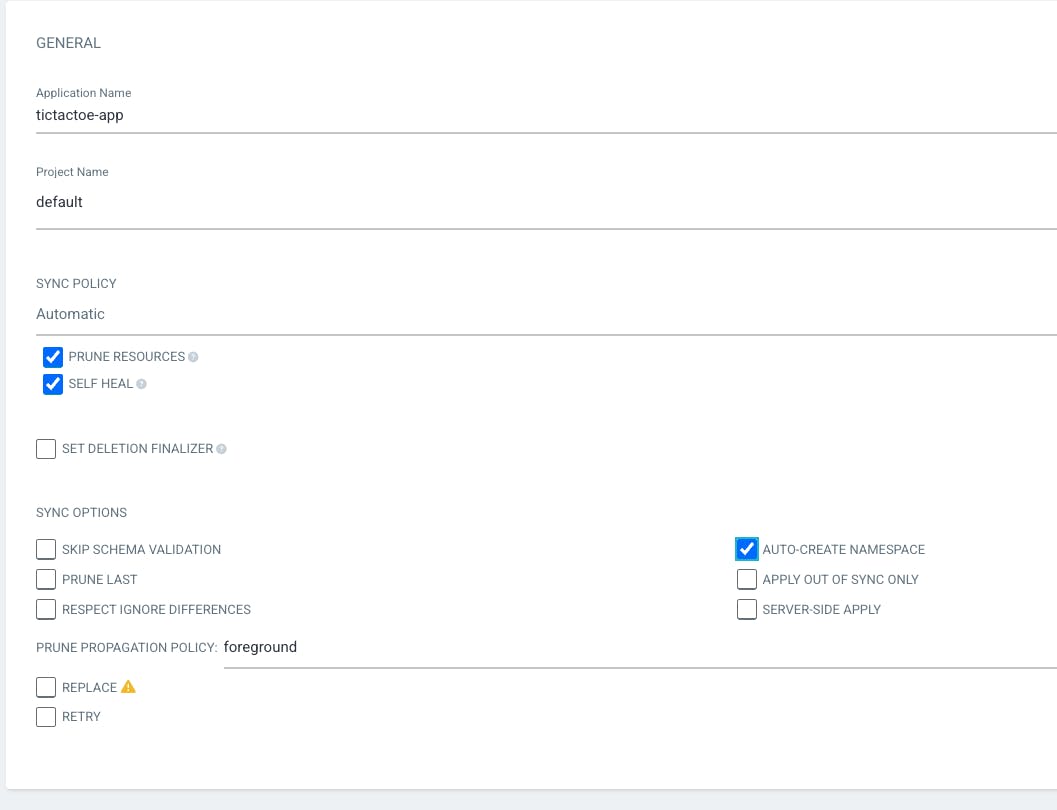
Application Name "tictactoe-app" -> Project name - "default" -> SYNC POLICY "Automatic" -> enable Prune resources, self heal, auto-create namespace
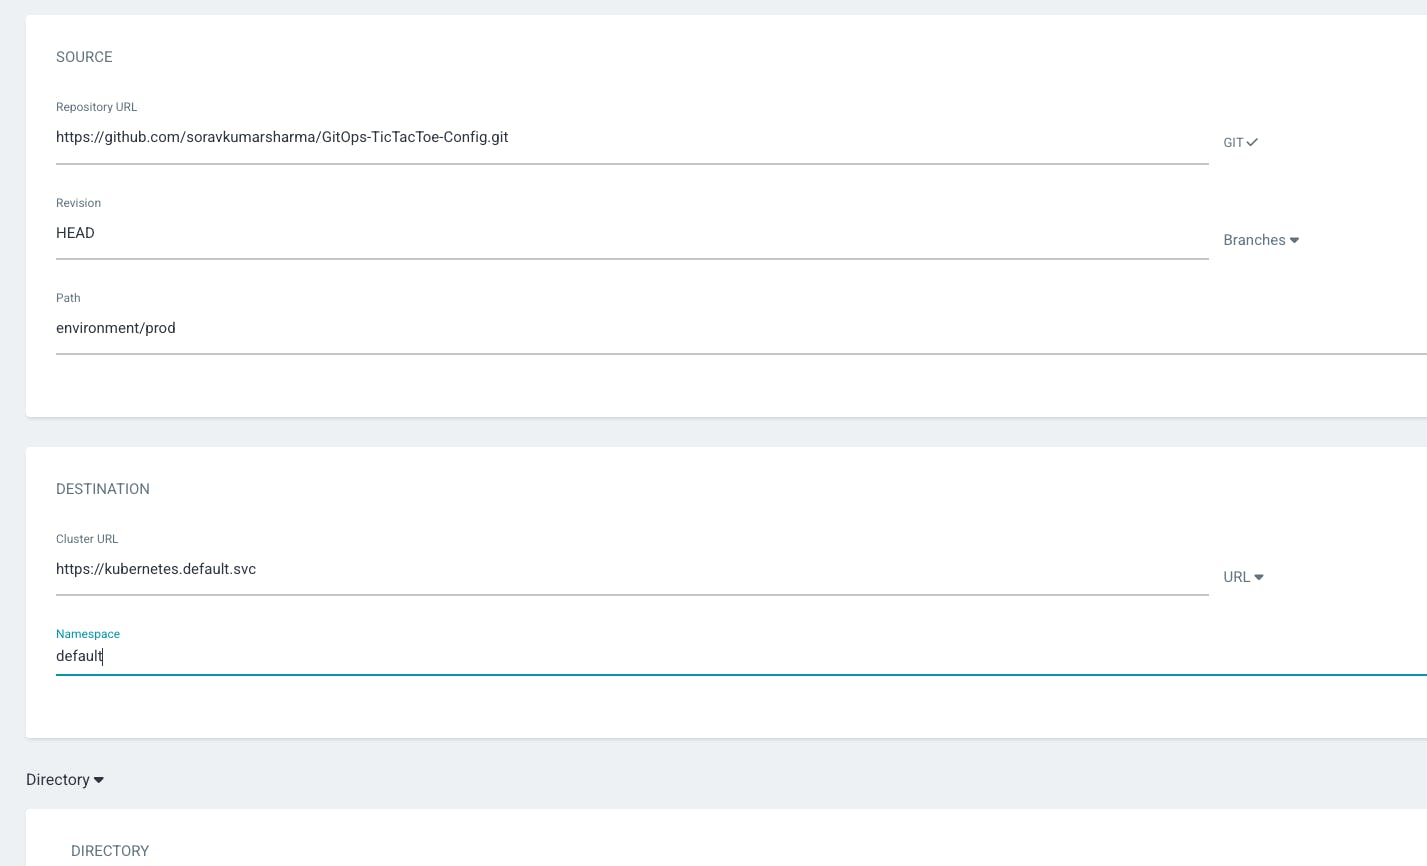
- then we need to configure the source and destination for tictactoe-app. the source is the Git repository and the destination is the Kubernetes cluster.
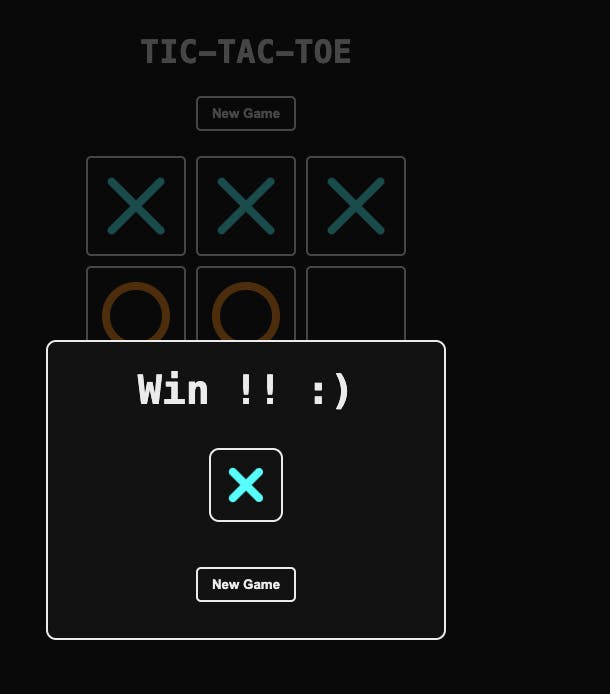
- Let's test the entire automation from the Git repository to the production Kubernetes cluster, for this I'm going to remove the hyphen from the title.
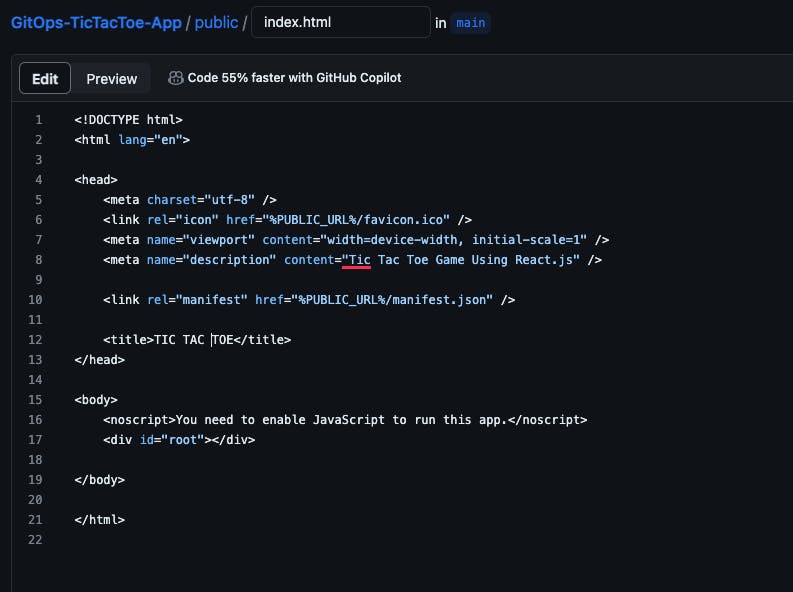
Go to the Git Repository -> Public folder -> index.html
- Edit the index.html file

- Remove the hyphen from the title and create a commit.
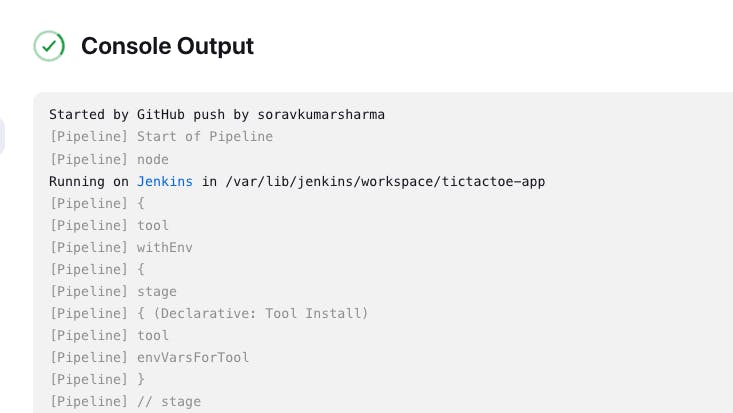
- Go to the Jenkins Server -> go to the tictactoe-app
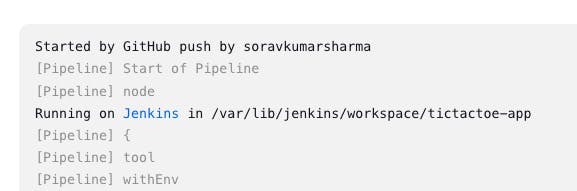
- The pipeline is triggered by git.
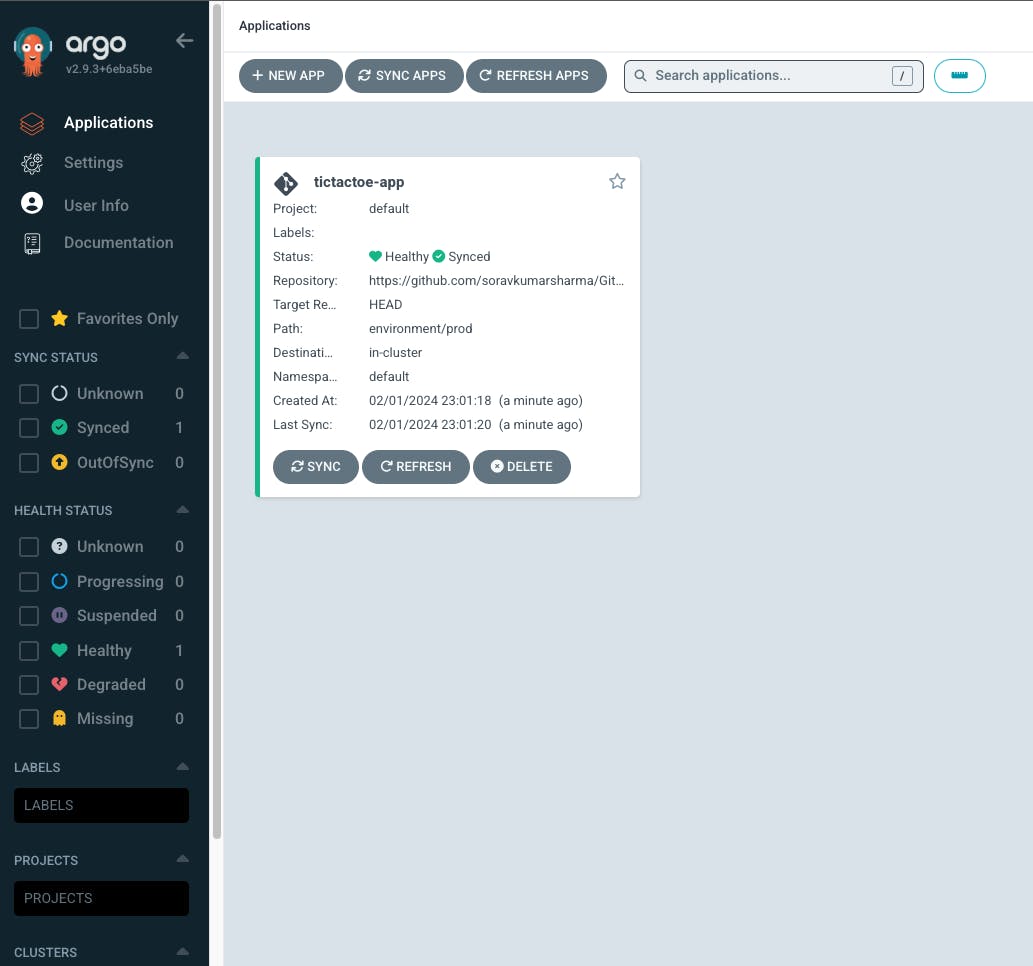
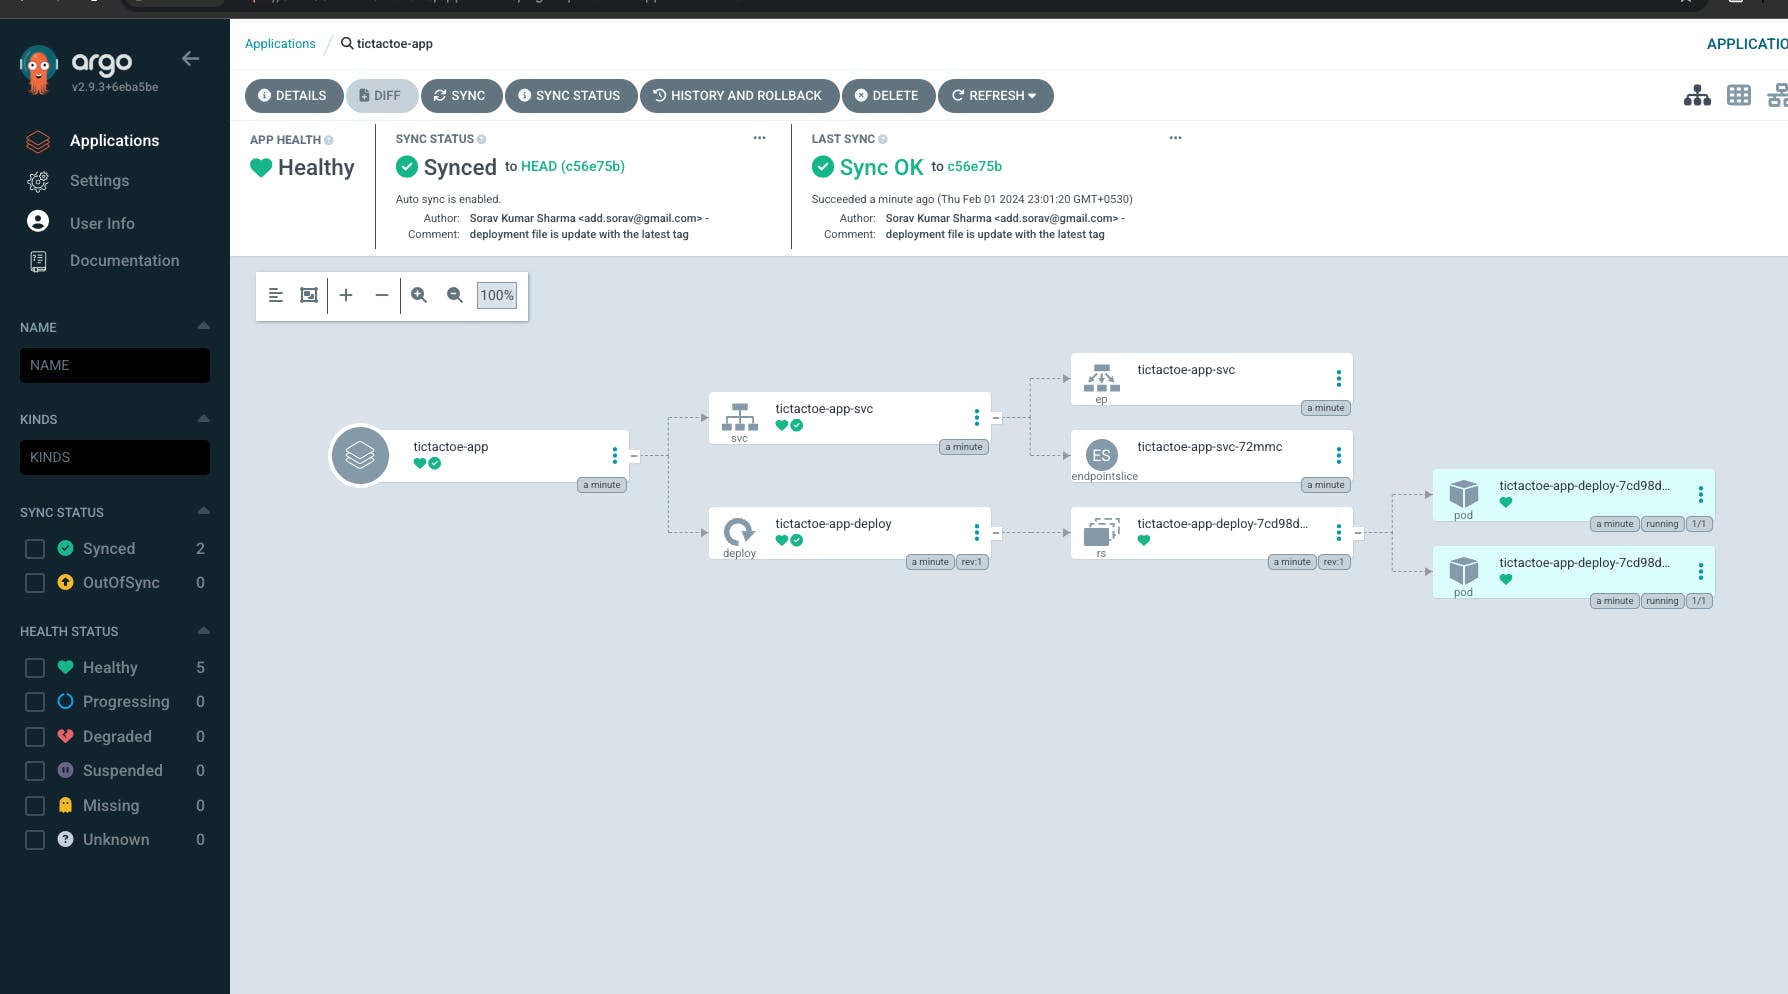
Go to the ArgoCD UI -> Refresh
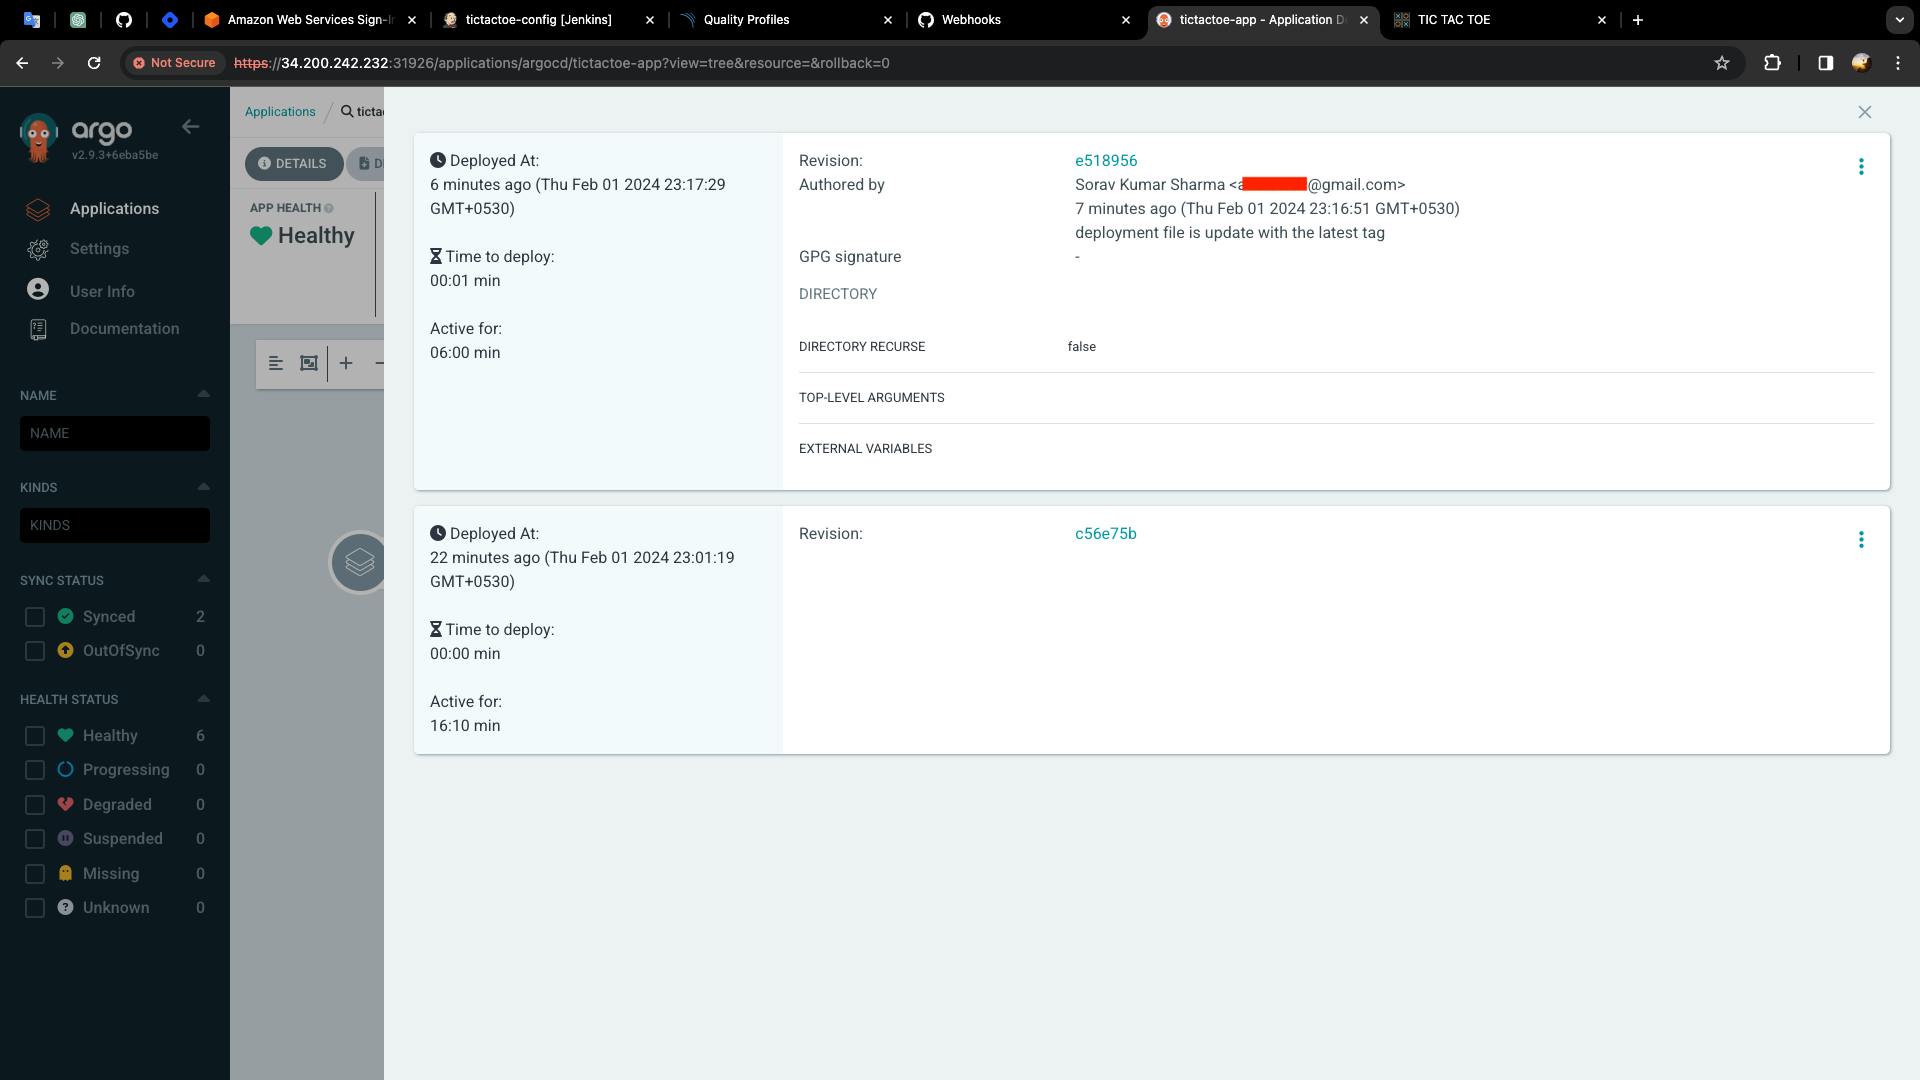

Destroy the Kubernetes cluster:
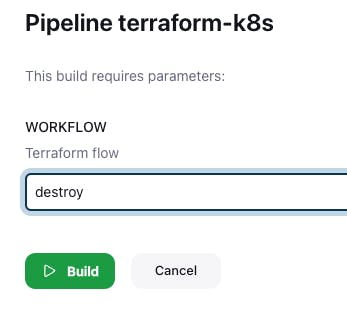
- Go to Jenkins Server -> Go to Dashboard -> Go to "terraform-k8s" job -> Go to Build with parameters -> destroy -> build

Complete Pipeline Code for tictactoe-config
pipeline {
  agent any
  options {
    buildDiscarder logRotator(daysToKeepStr: '1', numToKeepStr: '2')
  }
  parameters {
    string description: 'image tag', name: 'IMAGE_TAG'
  }
  environment {
    APP_NAME = "gitops-tictactoe-app"
    DOCKERHUB_USERNAME = "soravkumarsharma"
    IMAGE_NAME = "${DOCKERHUB_USERNAME}" + "/" + "${APP_NAME}"
  }
  stages {
    stage ('Image Tag') {
      steps {
        print IMAGE_TAG
      }
    }
    stage ('Clean Workspace') {
      steps {
       cleanWs()
      }
    }
    stage ('Git Checkout') {
      steps {
        git branch: 'main', url: 'https://github.com/soravkumarsharma/GitOps-TicTacToe-Config.git'
      }
    }
    stage ('Updating the k8s manifest') {
      steps {
        dir('environment/prod') {
          sh "cat deployment.yml"
          sh 'sed -i "s/\${APP_NAME}.*/\${APP_NAME}:\${IMAGE_TAG}/g" deployment.yml'
          sh "cat deployment.yml"
        }
      }
    }
    stage('Push the changed manifest to Git') {
      steps {
        dir('environment/prod'){
          script {
            sh """
              git config --global user.name "Sorav Kumar Sharma"
              git config --global user.email "add.your.email@gmail.com"
              git add deployment.yml
              git commit -m "deployment file is update with the latest tag"
            """
          }
          withCredentials([usernamePassword(credentialsId: 'github', passwordVariable: 'PASSWD', usernameVariable: 'USER')]) {
            sh 'git push https://$USER:$PASSWD@github.com/soravkumarsharma/GitOps-TicTacToe-Config.git'
          }
        }
      }
    }
  }
}
Complete pipeline code for tictactoe-app
pipeline {
  agent any
  options {
    buildDiscarder logRotator(daysToKeepStr: '1', numToKeepStr: '2')
  }
  tools {
    nodejs 'nodejs18'
  }
  environment {
    SCANNER_HOME = tool 'sonar-scanner'
    APP_NAME = "gitops-tictactoe-app"
    DOCKERHUB_USERNAME = "soravkumarsharma"
    IMAGE_TAG = "${BUILD_NUMBER}"
    IMAGE_NAME = "${DOCKERHUB_USERNAME}" + "/" + "${APP_NAME}"
  }
  stage ('Git Checkout') {
    steps {
      git branch: 'main', url: 'https://github.com/soravkumarsharma/GitOps-TicTacToe-App.git'
    }
  }
  stage ('SonarQube Analysis') {
    steps {
      withSonarQubeEnv(credentialsId: 'sonar-token', installationName: 'sonar-server') {
        sh ''' $SCANNER_HOME/bin/sonar-scanner -Dsonar.projectName=${APP_NAME} \
          -Dsonar.projectKey=${APP_NAME} '''
      }
    }
  }
  stage('Quality Gate') {
    steps {
      script {
        timeout(time: 1, unit: 'HOURS') {
          def qg = waitForQualityGate()
          if (qg.status != 'OK') {
             error "Pipeline aborted due to quality gate failure: ${qg.status}"
           }
         }
      }
    }
  }
  stage('Install Dependencies') {
    steps {
      sh "npm install"
     }
  }
  stage('OWASP FS SCAN') {
    when { expression { false } }
    steps {
      dependencyCheck additionalArguments: '--scan ./ --disableYarnAudit --disableNodeAudit', odcInstallation: 'DP-Check'
      dependencyCheckPublisher pattern: '**/dependency-check-report.xml'
    }
  }
  stage('TRIVY FS SCAN') {
    steps {
      sh "trivy fs . > trivyfs.txt"
    }
  }
  stage('Build Docker Image'){
    steps {
      script{
        docker_image = docker.build "${IMAGE_NAME}"
      }
    }
  }
  stage('Push Docker Image'){
    steps {
      script{
        docker.withRegistry('', 'dockerhub'){
          docker_image.push("${BUILD_NUMBER}")
          docker_image.push('latest')
        }
      }
    }
  }
  stage('TRIVY Image Scan') {
    steps {
      sh "trivy image ${IMAGE_NAME}:latest > trivyimage.txt"
    }
  }
  stage ('Delete Docker Images'){
    steps {
      sh "docker rmi ${IMAGE_NAME}:${IMAGE_TAG}"
      sh "docker rmi ${IMAGE_NAME}:latest"
    }
  }
  stage ('Trigger the tictactoeconfig Pipeline') {
    steps {
      sh "curl -v -k --user admin:118a7c386fc6ebc3addc4932cf5417a0c1 -X POST -H  'cache-control: no-cache' -H 'content-type: application/x-www-form-urlencoded' --data 'IMAGE_TAG=${IMAGE_TAG}' 'http://107.21.83.28:8080/job/tictactoe-config/buildWithParameters?token=tictactoeapp'"
    }
  }
}
Complete pipeline for terraform-k8s
// Terraform Pipeline

pipeline {
  agent any
  parameters {
    choice choices: ['apply', 'destroy'], description: 'Terraform flow', name: 'WORKFLOW'
  }
  stages {
    stage ('Git Checkout') {
      steps {
        git branch: 'main', url: 'https://github.com/soravkumarsharma/GitOps-TicTacToe-Config.git'
      }
    }
    stage ('Create SSH Key and Modify the Permission') {
      steps {
        dir('k8s_cluster/ssh_key') {
          sh 'ssh-keygen -t rsa -b 2048 -f k8s  -N "" -q -y'
          sh "chmod 400 k8s"
        }
      }
    }
    stage ('Terraform Init') {
      steps {
        dir('k8s_cluster') {
          sh "terraform init"
        }
      }
    }
    stage ('Terraform apply or destroy') {
      steps {
        dir('k8s_cluster'){
          sh "terraform ${WORKFLOW} --auto-approve"
        }
      }
    }
  }
}
"Thank you for joining me on this exploration of deploying 'tic-tac-toe' with GitOps on Kubernetes. Your interest and engagement make this journey all the more rewarding. Until next time, happy learning!"